Branded
-
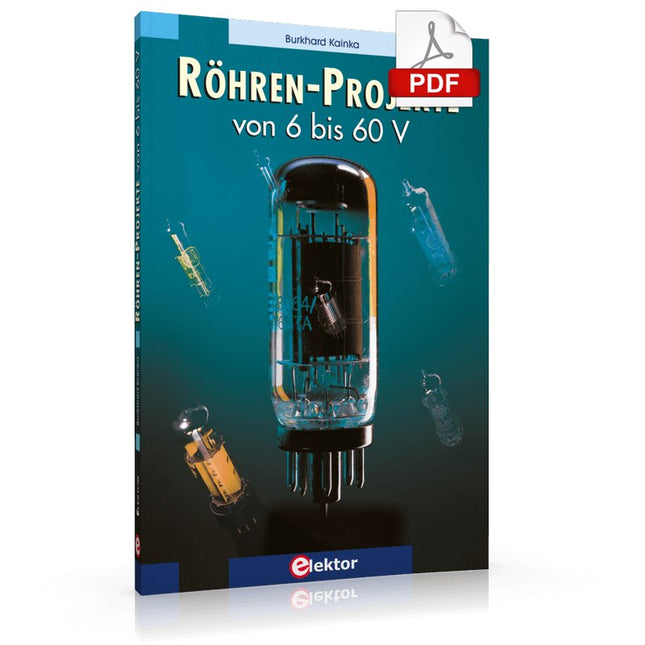
Elektor Digital Röhren-Projekte von 6 bis 60 V (E-book)
Röhren sind wieder „in". High-Tech-Audiogeräte wie MP3-Player, CD-Player oder der digitale Rundfunk kommen erst richtig zur Geltung, wenn ein Röhrenverstärker den perfekten Sound veredelt. Am Ausgang der PC-Soundkarte kann statt IC-bestückter Aktivboxen auch ein selbst gebautes Röhrengerät arbeiten. Der Einbau eigener Röhrenschaltungen in den PC selbst bringt den individuellen Geschmack erst richtig zur Geltung. Wenn statt einer LED das geheimnisvolle Glühen einer Röhrenkathode die Betriebsbereitschaft signalisiert, dann hebt sich das Gerät deutlich aus der Masse ab. In der Regel arbeiten Röhren mit hohen Spannungen, was nicht ganz ungefährlich ist. Eine Röhre, die ursprünglich für eine Anodenspannung von 250 Volt entwickelt wurde, kann durchaus aber auch bei 12 Volt arbeiten. So gilt für dieses Buch prinzipiell: Röhrenschaltungen funktionieren auch mit ungefährlichen Spannungen. Dieses Buch richtet sich an Leser, die technischen Abenteuern gegenüber aufgeschlossen sind. Teilweise handelt es sich um eine Reise zurück in die Geschichte der Röhrentechnik. Mehr als 50 Jahre alte Konzepte werden in einem neuen Gewand wieder entdeckt. Teilweise aber werden alte Röhren völlig neuartig eingesetzt. High-Tech und Tradition treffen hier aufeinander.
€ 29,80
Mitglieder: € 26,82
-
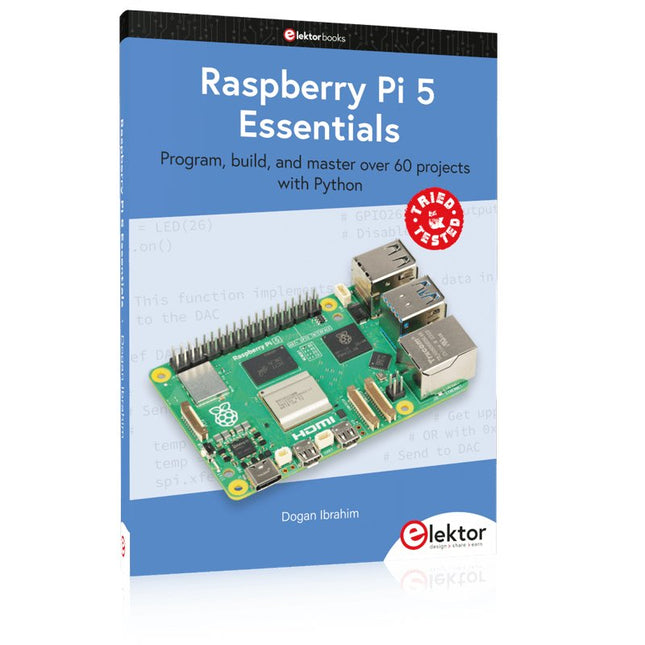
Elektor Publishing Raspberry Pi 5 Essentials
Program, build, and master over 60 projects with Python The Raspberry Pi 5 is the latest single-board computer from the Raspberry Pi Foundation. It can be used in many applications, such as in audio and video media centers, as a desktop computer, in industrial controllers, robotics, and in many domestic and commercial applications. In addition to the well-established features found in other Raspberry Pi computers, the Raspberry Pi 5 offers Wi-Fi and Bluetooth (classic and BLE), which makes it a perfect match for IoT as well as in remote and Internet-based control and monitoring applications. It is now possible to develop many real-time projects such as audio digital signal processing, real-time digital filtering, real-time digital control and monitoring, and many other real-time operations using this tiny powerhouse. The book starts with an introduction to the Raspberry Pi 5 computer and covers the important topics of accessing the computer locally and remotely. Use of the console language commands as well as accessing and using the desktop GUI are described with working examples. The remaining parts of the book cover many Raspberry Pi 5-based hardware projects using components and devices such as LEDs and buzzers LCDs Ultrasonic sensors Temperature and atmospheric pressure sensors The Sense HAT Camera modules Example projects are given using Wi-Fi and Bluetooth modules to send and receive data from smartphones and PCs, and sending real-time temperature and atmospheric pressure data to the cloud. All projects given in the book have been fully tested for correct operation. Only basic programming and electronics experience are required to follow the projects. Brief descriptions, block diagrams, detailed circuit diagrams, and full Python program listings are given for all projects described.
€ 39,95
Mitglieder: € 35,96
-
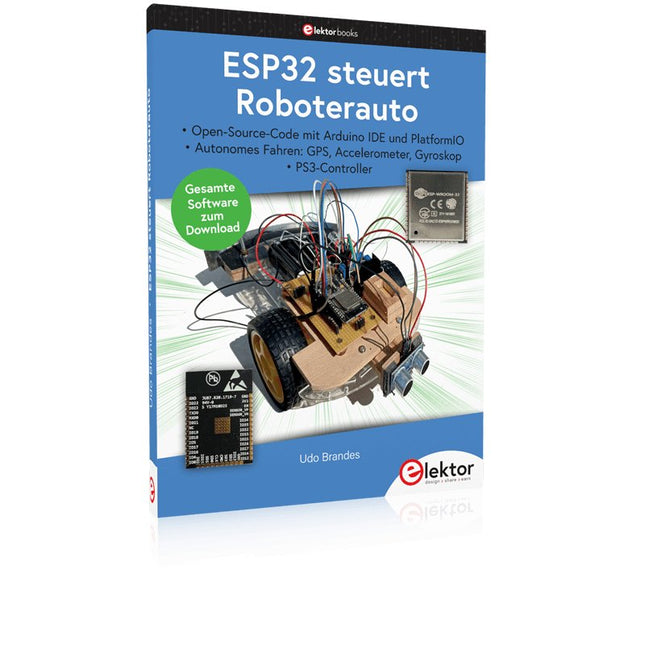
Elektor Publishing ESP32 steuert Roboterauto
Open-Source-Code mit Arduino IDE und PlatformIO Autonomes Fahren: GPS, Accelerometer, Gyroskop PS3-Controller Mikrocontroller wie der Arduino und Einplatinenrechner wie der Raspberry Pi haben sich zu beliebten Komponenten entwickelt. Dritter im Bunde ist der ESP32 der Firma Espressif. Mikrocontroller dieser Baureihe zeichnen sich durch eine Vielzahl implementierter Funktionen aus, die bei einem Arduino konventioneller Prägung mit einem Atmel-AVR-Mikrocontroller erst mit weiterer Hardware möglich sind. Prominentes Beispiel sind hier die WiFi- und Bluetooth-Funktionalitäten. Gegenüber einem Raspberry Pi zeichnen sie sich durch einen deutlich geringeren Preis aus. Allgemeine Informationen für die Realisierung eines Roboterauto-Projekts mit dem ESP32 sind leicht zu finden. Dabei handelt es sich aber oft nur um Ausführungen zu einem Teilaspekt, ohne inhaltliche oder funktionale Abstimmung. So ist nicht nur die Beschaffung der benötigten Informationen mühselig und zeitaufwändig, sie kann auch außerordentlich fehlerträchtig sein. Ansatzpunkt dieses Buches ist, diese Lücke zu schließen. Es geht auf verschiedene Möglichkeiten eines Chassis ein, vermittelt nötige Kenntnisse und führt schrittweise von einer einfachen Motorsteuerung zu einem komplexen sensor- und sprachgesteuerten Roboterauto. Hacks rund um GPS und eine PlayStation 3 runden die Sache ab. Inhalt Bei der Reihenfolge der Kapitel wurde versucht – beginnend bei der Darstellung von grundlegenden Informationen – über die Lösung einfacher Aufgaben zu etwas anspruchsvolleren Techniken zu führen. Der Mikrocontroller ESP32 Die Software erstellen Die Stromversorgung Rund um die Hardware Das Chassis Der Gleichstrommotor Kabellose Steuerung über WiFi Mit Sensoren Hindernisse erkennen Eine eigene Roboterauto-App Servo und Lichtsensor GPS Accelerometer / Gyroskop PS3-Controller Roboterauto-App Hinweis zur Software Die Dateien haben das Suffix (.cpp). Grund ist die Entwicklung mit PlatformIO. Mit Copy & Paste sollten sie auch in der Arduino-IDE verwendet werden können.
€ 39,80
Bestpreis
-

Elektor Digital RISC-V Assembly Language Programming using ESP32-C3 and QEMU (E-book)
With the availability of free and open source C/C++ compilers today, you might wonder why someone would be interested in assembler language. What is so compelling about the RISC-V Instruction Set Architecture (ISA)? How does RISC-V differ from existing architectures? And most importantly, how do we gain experience with the RISC-V without a major investment? Is there affordable hardware available? The availability of the Espressif ESP32-C3 chip provides a way to get hands-on experience with RISC-V. The open sourced QEMU emulator adds a 64-bit experience in RISC-V under Linux. These are just two ways for the student and enthusiast alike to explore RISC-V in this book. The projects in this book are boiled down to the barest essentials to keep the assembly language concepts clear and simple. In this manner you will have “aha!” moments rather than puzzling about something difficult. The focus in this book is about learning how to write RISC-V assembly language code without getting bogged down. As you work your way through this tutorial, you’ll build up small demonstration programs to be run and tested. Often the result is some simple printed messages to prove a concept. Once you’ve mastered these basic concepts, you will be well equipped to apply assembly language in larger projects.
€ 34,95
Mitglieder: € 31,46
-

Elektor Digital Mastering Surface Mount Technology (E-book)
Mastering Surface Mount Technology takes you on a crash course in techniques, tips and know-how to successfully introduce surface mount technology in your workflow. Even if you are on a budget you too can jumpstart your designs with advanced fine pitch parts. Besides explaining methodology and equipment, attention is given to SMT parts technologies and soldering methods. In a step by step way, several projects introduce you to handling surface mount parts and the required skills to successfully build SMT assemblies. Many practical tips and tricks are disclosed that bring surface mount technology into everyone's reach without breaking the bank.
€ 34,95
Mitglieder: € 31,46
-
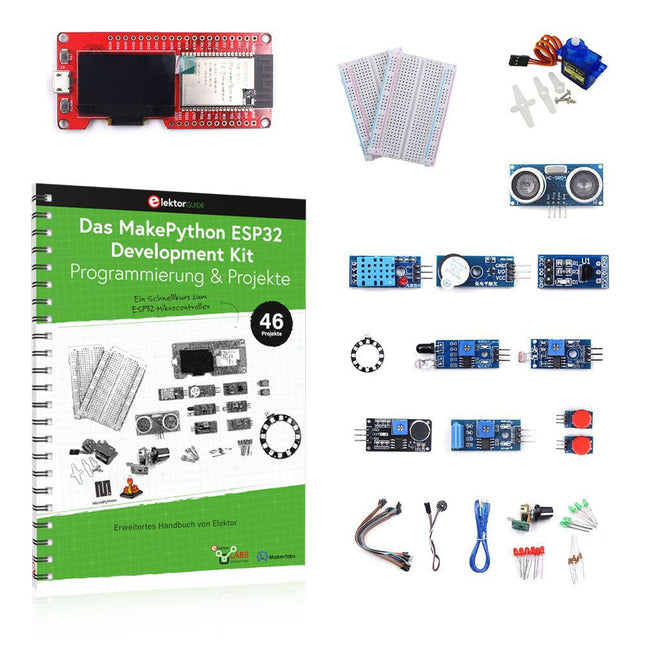
Elektor Bundles MakePython ESP32 Development Kit (DE)
Lernen Sie, wie Sie den ESP32-Mikrocontroller und die MicroPython-Programmierung in Ihren zukünftigen Projekten einsetzen können! Das Projektbuch – geschrieben von Dogan Ibrahim – enthält viele Software- und Hardware-basierte Projekte, die speziell für das MakePython ESP32 Development Kit entwickelt wurden. Das Kit wird mit verschiedenen LEDs, Sensoren und Aktoren geliefert. Ziel des Kits ist es, grundlegende Kenntnisse für die Erstellung von IoT-Projekten zu erwerben. Die in diesem Buch vorgestellten Projekte sind umfassend getestet und funktionsfähig und verwenden alle mitgelieferten Komponenten. Für jedes Projekt gibt es im Buch ein Blockdiagramm, einen Schaltplan, ein vollständiges Programmlisting und eine komplette Programmbeschreibung. Lieferumfang des Kits 1x MakePython ESP32-Entwicklungsboard mit LCD 1x Ultraschall-Entfernungsmodul 1x Temperatur- und Feuchtigkeitssensor 1x Buzzer-Modul 1x DS18B20-Modul 1x Infrarotmodul 1x Potentiometer 1x WS2812-Modul 1x Schallsensor 1x Vibrationssensor 1x Lichtempfindliches Widerstandsmodul 1x Pulssensor 1x Servomotor 1x USB-Kabel 2x Taste 2x Steckplatine 45x Schaltdraht 10x Widerstand 330R 10x LED (Rot) 10x LED (Grün) 1x Projektbuch (Deutsch, 213 Seiten) 46 Projekte im Buch LED-Projekte Blinkende LED Blinkendes SOS Blinkende LED – mit einem Timer Abwechselnd blinkende LEDs Tastersteuerung Ändern der LED-Blinkrate durch Taster-Interrupts Laufschrift-LEDs Binär zählende LEDs Weihnachtsbeleuchtung (zufällig blinkende 8 LEDs) Elektronischer Würfel Glücklicher Tag der Woche Pulsweitenmodulation (PWM) Projekte Erzeugt eine 1000-Hz-PWM-Wellenform mit 50% Tastverhältnis Steuerung der LED-Helligkeit Messung der Frequenz und des Tastverhältnisses einer PWM-Wellenform Melodie-Macher Einfache elektronische Orgel Steuerung eines Servomotors Servomotor DS18B20 Thermometer Analog-Digital-Wandler (ADC) Projekte Spannungsmesser Aufzeichnung der analogen Eingangsspannung ESP32 interner Temperatursensor Ohmmeter Lichtempfindliches Widerstandsmodul Digital-Analog-Wandler (DAC) Projekte Erzeugung von Festspannungen Erzeugen eines Sägezahnsignals Erzeugen eines Dreieckssignals Arbiträre periodische Wellenform Generierung eines Sinussignals Erzeugung eines genauen Sinussignals mit Hilfe von Timer-Interrupts Verwendung des OLED-Displays Sekundenzähler Ereigniszähler DS18B20 OLED-basiertes Digitalthermometer ON-OFF Temperaturregler Messung der Temperatur und Luftfeuchtigkeit Ultraschall-Entfernungsmessung Höhe einer Person (Stadiometer) Messung der Herzfrequenz (Puls) Andere mit dem Kit gelieferte Sensoren Alarm bei Diebstahl Tonaktiviertes Licht Infrarot-Hindernisvermeidung mit Summton WS2812 RGB-LED-Ring Zeitstempel für Temperatur- und Luftfeuchtigkeitswerte Netzwerk-Programmierung WLAN-Scanner Fernsteuerung über den Internetbrowser (mit einem Smartphone oder PC) – Webserver Speichern von Temperatur- und Luftfeuchtigkeitsdaten in der Cloud Low-Power-Betrieb Aufwecken des Prozessors mit einem Timer
€ 89,95€ 69,95Bestpreis
-

Elektor Bundles Elektor Raspberry Pi Pico Kit für Fortgeschrittene (Bundle)
Umfassendes Buch-Hardware-Bundle für den RP2040-Mikrocontroller mit über 80 Projekten Entdecken Sie in diesem Bundle das Potenzial der modernen Controller-Technologie mit dem Raspberry Pi Pico. Das leicht verständliche Handbuch eignet sich sowohl für Anfänger als auch für erfahrene Benutzer und führt Sie von den Grundlagen der Elektronik bis hin zu den komplexen Aspekten der digitalen Signalverarbeitung. Mit dem Raspberry Pi Pico, dem speziellen Hardware-Kit und der MicroPython-Programmierung lernen Sie die wichtigsten Prinzipien des Schaltungsdesigns, der Datenerfassung und -verarbeitung. Machen Sie praktische Erfahrungen mit über 80 Projekten wie einer Stoppuhr mit OLED-Display, einem Laser-Entfernungsmesser und einem servogesteuerten Lüfter. Diese Projekte sollen Ihnen helfen, das Gelernte in realen Szenarien anzuwenden. Das Buch behandelt auch fortgeschrittene Themen wie drahtlose RFID-Technologie, Objekterkennung und Sensorintegration für die Robotik. Ganz gleich, ob Sie Ihre Kenntnisse in der Elektronik erweitern oder tiefer in eingebettete Systeme eintauchen möchten, dieses Bundle ist die perfekte Ressource, um das volle Potenzial des Raspberry Pi Pico zu erkunden. Inhalt des Bundles 1x Projektbuch (287 Seiten) 1x Smart Car Kit Bauteile 2x Lötfreies Steckbrett (400 Löcher) 1x Lötfreies Steckbrett (170 Löcher) 5x bunte 5-mm-LEDs (Grün, Rot, Blau, Gelb und Weiß) 1x Lasersender 1x Passiver Summer 1x Micro-USB-Kabel (30 cm) 1x 65 Überbrückungskabel 1x 20 cm männlicher auf weiblicher Dupont-Draht 1x Transparentes Gehäuse 1x Magnet (Durchmesser: 8 mm, Dicke: 5 mm) 1x Drehpotentiometer 10x 2 KΩ Widerstände 2x M2, 5x30 mm Kupfersäulen 10x Kreuzschlitz-Flachkopfschrauben 10x M2,5 Sechskantmuttern aus Nickel 1x 2-Zoll-Mehrzweckschraubendreher Module 1x RGB-Modul 1x 9G-Servo 1x Dual-Achsen-XY-Joystick-Modul 1x RC522 RFID-Modul 1x 4-Bit-Digital-LED-Display-Modul 1x Ampel-Anzeigemodul 1x Drehgebermodul 1x 1602 LCD-Anzeigemodul (blau) 1x Fotowiderstandsmodul 1x Gleichstrommotor mit männlichem Dupont-Kabel 1x Lüfterflügel 1x Regentropfen-Modul 1x OLED-Modul 1x Membranschalter-Tastatur 1x Mini-Magnetfedermodul 1x Infrarot-Fernbedienung 1x Infrarot-Empfängermodul 1x DC-Schrittmotor-Treiberplatine 1x Button Sensoren 1x Vibrationssensor 1x Bodenfeuchtesensor 1x Schallsensor 1x Mini-PIR-Bewegungssensor 1x Temperatur & Feuchtigkeitssensor 1x Flammensensor 2x Crash-Sensor 2x Tracking-Sensor 1x Ultraschallsensor
€ 99,95€ 59,95Bestpreis
-

Elektor Digital Hochfrequenz-Baubuch (PDF)
Die Hochfrequenztechnik ist eines der Gebiete, auf denen man auch heute noch eigene Ideen in die Tat umsetzen kann. Unzählige Schaltungsvarianten mit besonderen Zielsetzungen geben Raum für sinnvolle Experimente und Projekte. Vieles kann man nicht einfach kaufen. Detektorradios ohne eigene Energiequelle, einfache Röhrenempfänger mit einem Hauch von Nostalgie, die ersten Empfangsversuche mit dem Software Defined Radio oder Spezialempfänger für den Amateurfunk, all dies lässt sich mit wenig Aufwand realisieren. Lange Zeit war das Radiobasteln der Einstieg in die Elektronik. Inzwischen gibt es auch andere Wege, vor allem über Computer, Mikrocontroller und die Digitaltechnik. Allerdings kommen die analogen Wurzeln der Elektronik oft zu kurz. Die Radiotechnik eignet sich besonders gut als Lernfeld der Elektronik, weil man hier mit den einfachsten Grundlagen beginnen kann. Aber auch die Verbindung zur modernen Digitaltechnik liegt auf der Hand, wenn es z. B. um moderne Abstimmverfahren wie PLL und DDS oder um moderne DSP-Radios geht. Dieses Buch gibt einen Überblick und stellt eine Sammlung einfacher Projekte vor. Der Autor möchte Sie dabei unterstützen, eigene Ideen zu entwickeln, eigene Empfänger zu entwerfen und sie zu erproben.
€ 32,80
Mitglieder: € 29,52
-
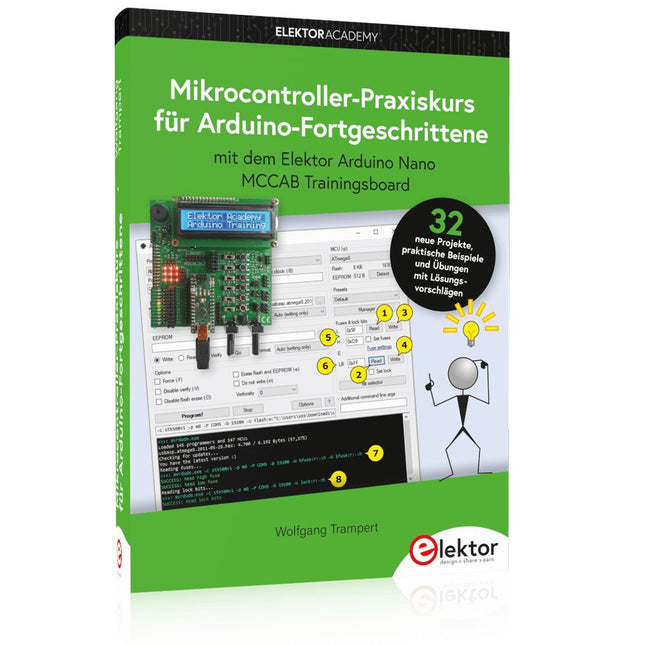
Elektor Publishing Mikrocontroller-Praxiskurs für Arduino-Fortgeschrittene
32 neue Projekte, praktische Beispiele und Übungen mit dem Elektor Arduino Nano MCCAB Trainingsboard Die Elektronik und die Mikrocontrollertechnik bieten die Möglichkeit, kreativ tätig zu sein. Mit diesem Mikrocontroller-Praxiskurs besteht die Möglichkeit, eigene Arduino-Projekte zu realisieren und solche Erfolgsmomente erleben zu können. Im Idealfall funktioniert beim ersten Einschalten alles so, wie man es sich vorgestellt hat. In der Praxis läuft es dagegen selten wie erwartet. Dann braucht man Kenntnisse, um den Grund für das Nichtfunktionieren effizient suchen und finden zu können. In diesem Buch für Fortgeschrittene steigen wir tief in die Welt der Mikrocontroller und der Arduino IDE ein, um neue Verfahren und Details kennen zu lernen, und erfolgreich noch anspruchsvollere Situationen angehen und lösen zu können. Mit diesem Buch gibt der Autor dem Leser das nötige Rüstzeug, um eigenständig Projekte zu kreieren und auch schnell Fehler finden zu können. Anstatt nur fertige Lösungen zu bieten, erklärt er die Hintergründe, die verwendete Hardware und die eventuell benötigten Tools. Er stellt Aufgaben, bei denen der Leser seine eigene Kreativität einbringt und den Arduino-Sketch selbst schreibt. Falls man einmal keine vernünftige Idee hat und nicht weiterkommt, gibt es natürlich zu jedem Projekt und zu jeder Aufgabe einen Lösungsvorschlag mit zugehöriger Software, der im Buch ausführlich kommentiert und erklärt wird. Sie erfahren mit diesem Praxiskurs mehr über das Innenleben des Arduino Nano und des darauf befindlichen Mikrocontrollers. Sie lernen Hardware-Module kennen, mit denen Sie neue interessante Projekte realisieren werden. Sie beschäftigen sich mit Softwareverfahren wie z. B. "Zustandsmaschinen", durch deren Anwendung sich Aufgabenstellungen oft einfacher und übersichtlicher lösen lassen. Die zahlreichen praktischen Projekt- und Übungs-Sketche realisieren wir wieder auf dem vom "Mikrocontroller-Praxiskurs für Arduino-Einsteiger" bekannten MCCAB Trainingsboard, das die gesamte Hardware-Peripherie und die Bedienungselemente enthält, die wir für die Ein-/Ausgabe-Operationen unserer Sketche benötigen. Leser, die das MCCAB Trainingsboard noch nicht besitzen, können die benötigte Hardware separat erwerben, oder alternativ auch auf einem Breadboard aufbauen.
-
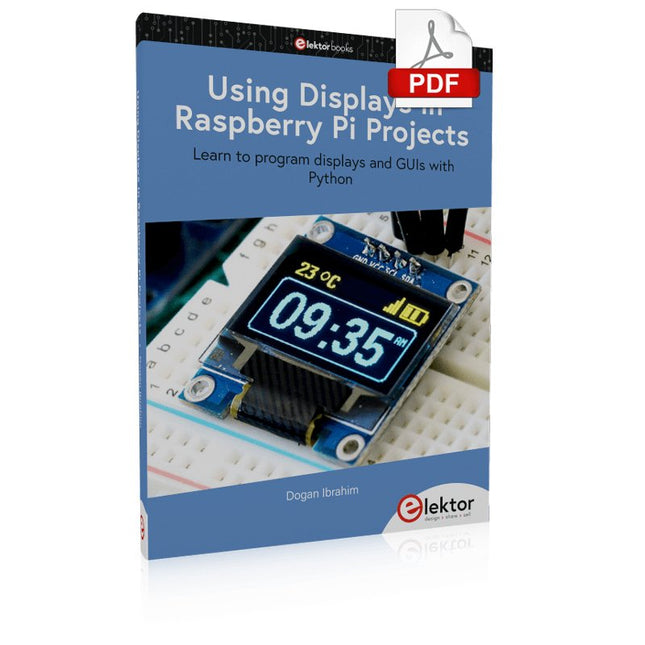
Elektor Digital Using Displays in Raspberry Pi Projects (E-book)
Learn to program displays and GUIs with Python This book is about Raspberry Pi 4 display projects. The book starts by explaining how to install the latest Raspbian operating system on an SD card, and how to configure and use the GPIO ports. The core of the book explains the following topics in simple terms with fully tested and working example projects: Simple LED projects Bar graph LED projects Matrix LED projects Bitmap LED projects LED strips LCDs OLED displays E-paper displays TFT displays 7-inch touch screen GUI Programming with Tkinder One unique feature of this book is that it covers almost all types of display that readers will need to use in their Raspberry Pi based projects. The operation of each project is fully given, including block diagrams, circuit diagrams, and commented full program listings. It is therefore an easy task to convert the given projects to run on other popular platforms, such as Arduino or PIC microcontrollers. Python program listings of all Raspberry Pi projects developed in this book are available for download at Elektor.com. Readers can use these programs in their projects. Alternatively, they can modify the programs to suit their applications.
€ 32,95
Mitglieder: € 29,66
-

Elektor Publishing Elektronenröhren in der Praxis
Grundlagen, Schaltungen und sichere Anwendungen für Einsteiger und Fortgeschrittene Elektronenröhren üben bis heute eine besondere Faszination aus. Ihre langlebige Funktion, ihre Robustheit und ihr charakteristisches Verhalten unterscheiden sie grundlegend von moderner Halbleitertechnik. Trotz ihres Alters sind Röhren keineswegs nur historische Bauteile, sondern finden auch heute noch Anwendung in Audiotechnik, Messtechnik und vor allem im Hobbybereich. Dieses Buch richtet sich an Elektronikinteressierte und Bastler, die Elektronenröhren nicht nur in der Theorie kennenlernen und verstehen, sondern auch in der Praxis einsetzen möchten. Es vermittelt die Grundlagen der Röhrentechnik, erklärt die unterschiedlichen Bauformen und Bezeichnungen, zeigt typische Schaltungen und geht außerdem auf Spannungsversorgung und Netzteile sowie auf Messungen und sicherheitsrelevante Aspekte ein. Der Schwerpunkt liegt auf praxisnahen Erklärungen und realistischen Beispielen aus der Werkstatt. Zahlreiche Hinweise helfen, typische Fehler zu vermeiden, Schaltungen aufzubauen und Röhrengeräte sowie deren Aufbau zu verstehen. Grundkenntnisse der Elektronik werden vorausgesetzt. „Elektronenröhren in der Praxis“ bietet einen verständlichen und fundierten Einstieg in die Röhrentechnik – sachlich, nachvollziehbar und mit klarem Fokus auf die praktische Anwendung.
€ 34,80
Bestpreis
-

Elektor Digital Coding Modbus TCP/IP for Arduino (E-book)
Example projects with Node-RED, MQTT, WinCC SCADA, Blynk, and ThingSpeak This comprehensive guide unlocks the power of Modbus TCP/IP communication with Arduino. From the basics of the Modbus protocol right up to full implementation in Arduino projects, the book walks you through the complete process with lucid explanations and practical examples. Learn how to set up Modbus TCP/IP communication with Arduino for seamless data exchange between devices over a network. Explore different Modbus functions and master reading and writing registers to control your devices remotely. Create Modbus client and server applications to integrate into your Arduino projects, boosting their connectivity and automation level. With detailed code snippets and illustrations, this guide is perfect for beginners and experienced Arduino enthusiasts alike. Whether you‘re a hobbyist looking to expand your skills or a professional seeking to implement Modbus TCP/IP communication in your projects, this book provides all the knowledge you need to harness the full potential of Modbus with Arduino. Projects covered in the book: TCP/IP communication between two Arduino Uno boards Modbus TCP/IP communication within the Node-RED environment Combining Arduino, Node-RED, and Blynk IoT cloud Interfacing Modbus TCP/IP with WinCC SCADA to control sensors Using MQTT protocol with Ethernet/ESP8266 Connecting to ThingSpeak IoT cloud using Ethernet/ESP8266
€ 32,95
Mitglieder: € 29,66
-

Elektor Digital Oscilloscopes (E-book)
Understanding and Using Them Effectively What happens in electronics is invisible to the naked eye. The instrument that allows to accurately visualize electrical signals, the one through which the effects of electronics become apparent to us, is the oscilloscope. Alas, when one first ventures into electronics, it is often without an oscilloscope. And one is left fumbling, both physically and mentally. Observing an electrical signal on a screen for the first time is a revelation. Nobody wishes to forgo that marvel again. There is no turning back. In electronics, if one wishes to progress with both enjoyment and understanding, an oscilloscope is essential. This marks the beginning of a period of questioning: how to choose one? And no sooner is that question answered than a whole string of others arises, which can be summed up in just one: how does one use the oscilloscope in such a way that what it displays truly reflects the reality of the signals? Rémy Mallard is a passionate communicator with a gift for making complex technical subjects understandable and engaging. In this book, he provides clear answers to essential questions about using an oscilloscope and offers a wealth of guidance to help readers explore and understand the electrical signals behind electronic systems. With his accessible style and practical insights, this book is a valuable tool for anyone eager to deepen their understanding of electronics.
€ 34,95
Mitglieder: € 31,46
-

Elektor Labs Elektor Super Servo Tester Kit
Der Elektor Super Servo Tester kann Servos steuern und Servosignale messen. Es können bis zu vier Servokanäle gleichzeitig getestet werden. Der Super Servo Tester wird als Bausatz geliefert. Alle zum Zusammenbau des Super Servo Testers erforderlichen Teile sind im Bausatz enthalten. Für den Zusammenbau des Bausatzes sind grundlegende Lötkenntnisse erforderlich. Der Mikrocontroller ist bereits programmiert. Der Super Servo Tester verfügt über zwei Betriebsmodi: Steuerung/Manuell und Messen/Eingänge. Im Control/Manual Modus generiert der Super Servo Tester an seinen Ausgängen Steuersignale für bis zu vier Servos oder für den Flugregler oder ESC. Die Signale werden über die vier Potentiometer gesteuert. Unter Measure/Inputs misst der Super Servo Tester die an seine Eingänge angeschlossenen Servosignale. Diese Signale können beispielsweise von einem Regler, einem Flugregler, dem Empfänger oder einem anderen Gerät stammen. Die Signale werden auch an die Ausgänge weitergeleitet, um die Servos oder den Flugregler bzw. ESC zu steuern. Die Ergebnisse werden auf dem Display angezeigt. Technische Daten Betriebsmodi Control/Manual & Measure/Inputs Kanäle 3 Servosignaleingänge 4 Servosignalausgänge 4 Alarm Summer & LED Anzeige 0,96' OLED (128 x 32 Pixel) Eingangsspannung an K5 7-12 VDC Eingangsspannung an K1 5-7,5 VDC Eingangsstrom 30 mA (9 VDC an K5, nichts an K1 und K2 angeschlossen) Abmessungen 113 x 66 x 25 mm Gewicht 60 g Lieferumfang Widerstände (0,25 W) R1, R3 1 kΩ, 5% R2, R4, R5, R6, R7, R9, R10 10 kΩ, 5% R8 22 Ω, 5% P1, P2, P3, P4 10 kΩ, lin/B, vertikales Potentiometer Kondensatoren C1 100 µF 16 V C2 10 µF 25 V C3, C4, C7 100 nF C5, C6 22 pF Halbleiter D1 1N5817 D2 LM385Z-2.5 D3 BZX79-C5V1 IC1 7805 IC2 ATmega328P-PU, programmiert LED1 LED, 3 mm, rot T1 2N7000 Außerdem BUZ1 Piezo-Summer mit Oszillator K1, K2 2-reihiger, 12-poliger Pinheader, 90° K5 Barrel jack K4 1-reihige, 4-polige Stiftbuchse K3 2-reihiger, 6-fach geschachtelter Pinheader S1 Slide Switch DPDT S2 Slide Switch SPDT X1 Crystal, 16 MHz 28-polige DIP-Buchse für IC2 Elektor Platine OLED-Display, 0,96', 128 x 32 Pixel, 4-pin I²C-Interface Links Elektor Magazine Elektor Labs
€ 59,95€ 49,95Bestpreis
-
Elektor Labs Elektor Milliohmmeter-Adapter
Der Elektor Milliohmmeter-Adapter nutzt die Präzision eines Multimeters zur Messung sehr niedriger Widerstandswerte. Er wandelt einen Widerstand in eine Spannung um, die mit einem Standardmultimeter gemessen werden kann. Der Elektor Milliohmmeter-Adapter misst Widerstände unter 1 mΩ mit der 4-Leiter-Methode (Kelvin). Er eignet sich zum Auffinden von Kurzschlüssen auf Leiterplatten. Der Adapter bietet drei Messbereiche – 1 mΩ, 10 mΩ und 100 mΩ –, die über einen Schiebeschalter ausgewählt werden können. Integrierte Kalibrierwiderstände sind ebenfalls enthalten. Der Elektor Milliohmmeter-Adapter wird mit drei 1,5-V-AA-Batterien betrieben (nicht im Lieferumfang enthalten). Technische Daten Messbereiche 1 mΩ, 10 mΩ, 100 mΩ, 0,1% Stromversorgung 3x 1,5 V AA-Batterien (nicht im Lieferumfang enthalten) Abmessungen 103 x 66 x 18 mm (kompatibel mit Hammond 1593N-Gehäuse, nicht im Lieferumfang enthalten) Besonderheit Integrierte Kalibrierwiderstände Downloads Documentation
€ 34,95
Mitglieder: € 31,46
-
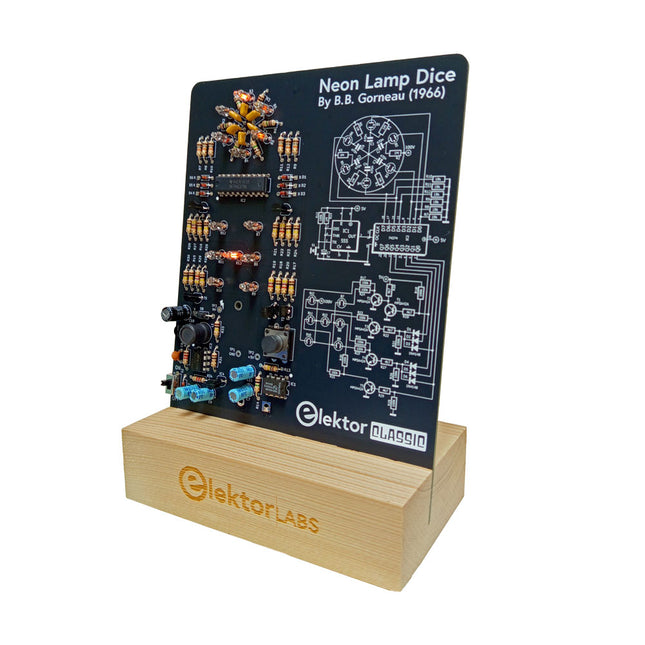
Elektor Labs Elektor Neon-Glimmlampenwürfel
Ein Retro-Würfel mit Neon-Charakter LED-basierte Würfel sind weit verbreitet, doch ihr Licht ist kalt. Nicht so dieser elektronische Neonwürfel, der seinen Wert mit dem warmen Schein von Neonröhren anzeigt. Er eignet sich perfekt für Spiele an kalten, dunklen Winterabenden. Die Würfelpunkte sind Neonlampen, und der Zufallszahlengenerator verfügt über sechs Neonröhren, die seine Funktion anzeigen. Obwohl der Würfel über eine integrierte 100-V-Stromversorgung verfügt, ist er absolut sicher. Wie bei allen Elektor Classic-Produkten ist auch bei diesem Würfel der Schaltplan auf der Vorderseite aufgedruckt, während sich auf der Rückseite eine Erklärung zur Funktionsweise befindet. Der Glimmlampenwürfel wird als Kit mit leicht zu lötenden bedrahteten Bauteilen geliefert. Die Stromversorgung erfolgt über eine 9-V-Batterie (nicht im Lieferumfang enthalten). Features Warmer Vintage-Glanz Elektor Heritage Schaltsymbole Erprobt und getestet von Elektor Labs Lern- und Technikprojekt Nur bedrahtete Bauteile Lieferumfang Platine Alle Komponenten Holzständer Erforderlich 9 V Batterie Stückliste Widerstände (THT, 150 V, 0.25 W) R1, R2, R3, R4, R5, R6, R14 = 1 MΩ R7, R8, R9, R10, R11, R12 = 18 kΩ R13, R15, R16, R17, R18, R21, R23, R24, R25, R26, R28, R30, R33 = 100 kΩ R32, R34 = 1.2 kΩ R19, R20, R22, R27, R29 = 4.7 kΩ R31 = 1 Ω Kondensatoren C1, C2, C3, C4, C5, C6 = 470 nF, 50 V, 5 mm pitch C7, C9, C11, C12 = 1 µF, 16 V, 2 mm pitch C8 = 470 pF, 50 V, 5 mm pitch C10 = 1 µF, 250 V, 2.5 mm pitch Induktivitäten L1 = 470 µH Halbleiter D1, D2, D3, D4, D5, D6, D7 = 1N4148 D8 = STPS1150 IC1 = NE555 IC2 = 74HC374 IC3 = MC34063 IC4 = 78L05 T1, T2, T3, T4, T5 = MPSA42 T6 = STQ2LN60K3-AP Sonstiges K1 = PP3 9 V Batteriehalter NE1, NE2, NE3, NE4, NE5, NE6, NE7, NE8, NE9, NE10, NE11, NE12, NE13 = Neonlicht S2 = Miniatur-Schiebeschalter S1 = Druckknopf (12 x 12 mm)
-

Elektor Digital The Arduino-Inside Measurement Lab (E-book)
An 8-in-1 test & measurement instrument for the electronics workbench A well-equipped electronics lab is crammed with power supplies, measuring devices, test equipment and signal generators. Wouldn‘t it be better to have one compact device for almost all tasks? Based on the Arduino, a PC interface is to be developed that’s as versatile as possible for measurement and control. It simply hangs on a USB cable and – depending on the software – forms the measuring head of a digital voltmeter or PC oscilloscope, a signal generator, an adjustable voltage source, a frequency counter, an ohmmeter, a capacitance meter, a characteristic curve recorder, and much more. The circuits and methods collected here are not only relevant for exactly these tasks in the "MSR" electronics lab, but many details can also be used within completely different contexts.
€ 29,95
Mitglieder: € 26,96
-

Elektor Publishing Vintage Radio Equipment
Resonances From Aether Days A Pictorial and Technical Analysis from WWII to the Internet Age From the birth of radio to the late 1980s, much of real life unfolded through shortwave communication. World War II demonstrated—beyond a shadow of a doubt—that effective communications equipment was a vital prerequisite for military success. In the postwar years, shortwave became the backbone on which many of the world's most critical services depended every day. All the radio equipment—through whose cathodes, grids, plates, and transistors so much of human history has flowed—is an exceptional subject of study and enjoyment for those of us who are passionate about vintage electronics. In this book, which begins in the aftermath of World War II, you’ll find a rich collection of information: descriptions, tips, technical notes, photos, and schematics that will be valuable for anyone interested in restoring—or simply learning about—these extraordinary witnesses to one of the most remarkable eras in technological history. My hope is that these pages will help preserve this vast treasure of knowledge, innovation, and history—a heritage that far transcends the purely technical.
€ 79,95
Mitglieder: € 71,96
-

Elektor Publishing Practical Microcontroller Cryptography
From Simple Ciphers to Secure Systems Understanding how to apply cryptography on modern microcontrollers is essential for building secure, reliable, and trustworthy systems. This book explains cryptography in the context of embedded hardware, from classical ciphers that illustrate core principles to modern techniques such as AES for practical high-security applications. By combining mathematical theory with real-world microcontroller implementations, readers learn not only how cryptography works, but also how to implement it effectively on systems with limited processing power and memory. The book is intended for students starting out in cryptography, hobbyists securing personal projects, and engineers looking for a structured guide to embedded security. The book covers these key topics in applied cryptography: Classical ciphers on Arduino Uno and Raspberry Pi Pico, with full programs: Spartan Scytale, Hebrew Atbash, Caesar, ROT13, Alberti Disk, Vigenère, Affine, Polybius, Playfair, Beaufort, Ottoman Codebook, and One-Time Pad. Hacking classical ciphers using microcontrollers, with examples. Pseudo-random (PRNG) and true random number generation (TRNG) on microcontrollers. Symmetric-key cryptography with full programs: DES and AES-128/256. Memory and speed constraints of cryptography on microcontrollers. Asymmetric cryptography: public/private keys, digital signatures, key distribution and derivation (KDF), RSA, and SHA-256 implementations. A complete secure communication program using RSA and AES-256. A glossary of commonly used cryptography terms.
€ 34,95
Mitglieder: € 31,46
-

Elektor Digital Elektronik-Grundlagen und Einsteiger-Projekte (PDF)
Die Hobbyelektronik ist reizvoll, macht Spaß und bringt nützliche Erfahrungen, die auch im Beruf oder bei der Berufswahl entscheidend sein können. Wer die Elektronik von den Wurzeln her kennt, kann auch eigene Schaltungen entwerfen und Projekte entwickeln. Entscheidend ist, dass man sich auch den kleineren Problemen widmet, die ja auch in größeren Projekten immer wieder wichtig werden können. Alles beginnt mit der analogen Elektronik. Man sollte die einfachsten Bauteile und Schaltungen genau kennen und ihr Verhalten sowie mögliche Probleme verstehen. Der beste Weg dazu sind reale Experimente, die Theorie allein reicht nicht. Dieses Buch bietet eine große Zahl praktisch nutzbarer Einsteiger-Schaltungen, mit denen jeder die nötigen Erfahrungen sammeln kann. Mit der breiten Einführung von Mikrocontrollern wurde ein neues Kapitel der Elektronik aufgeschlagen. Immer mehr Aufgaben, die ursprünglich mit diskreten Bauelementen oder konventionellen ICs gelöst wurden, erledigt inzwischen ein Mikrocontroller. Der Einstieg ist dank Bascom, Arduino, micro:bit und Co. immer einfacher geworden. Das Buch zeigt zahlreiche überschaubare Mikrocontroller-Anwendungen. Ab jetzt wird weniger gelötet und mehr programmiert.
€ 32,80
Mitglieder: € 29,52
-

Elektor Digital FPGA Programming and Hardware Essentials (E-book)
Kick off with the MAX1000 and VHDPlus Ready to Master FPGA Programming? In this guide, we’re diving into the world of Field Programmable Gate Arrays (FPGAs) – a configurable integrated circuit that can be programmed after manufacturing. Imagine bringing your ideas to life, from simple projects to complete microcontroller systems! Meet the MAX1000: a compact and budget-friendly FPGA development board packed with features like memory, user LEDs, push-buttons, and flexible I/O ports. It’s the ideal starting point for anyone wanting to learn about FPGAs and Hardware Description Languages (HDLs). In this book, you’ll get hands-on with the VHDPlus programming language – a simpler version of VHDL. We’ll work on practical projects using the MAX1000, helping you gain the skills and confidence to unleash your creativity. Get ready for an exciting journey! You’ll explore a variety of projects that highlight the true power of FPGAs. Let’s turn your ideas into reality and embark on your FPGA adventure – your journey starts now! Exciting Projects You’ll Find in This Book Arduino-Driven BCD to 7-Segment Display Decoder Use an Arduino Uno R4 to supply BCD data to the decoder, counting from 0 to 9 with a one-second delay Multiplexed 4-Digit Event Counter Create an event counter that displays the total count on a 4-digit display, incrementing with each button press PWM Waveform with Fixed Duty Cycle Generate a PWM waveform at 1 kHz with a fixed duty cycle of 50% Ultrasonic Distance Measurement Measure distances using an ultrasonic sensor, displaying the results on a 4-digit 7-segment LED Electronic Lock Build a simple electronic lock using combinational logic gates with push buttons and an LED output Temperature Sensor Monitor ambient temperature with a TMP36 sensor and display the readings on a 7-segment LED Downloads Software
€ 32,95
Mitglieder: € 29,66
-

Elektor Publishing Professional SMD Assembly
Practical Low-Cost Methods for Reliable PCB Production This book explains how to carry out reliable SMD assembly using affordable tools and small-scale equipment. It follows the complete workflow step by step, including tool selection, solder paste handling, stencil use, component placement, reflow methods, inspection, and rework. The focus is on bench-level and small-lab production rather than industrial assembly lines. It shows practical methods for building single and double-sided SMD boards with repeatable results. Topics include solder paste and flux, temperature profiles, hot air and hotplate techniques, small reflow ovens, inspection methods, and defect correction. Checklists and example workflows are included to help reduce errors and improve consistency. Key features: Tools and supplies for SMD assembly and rework Solder paste types, storage, and handling Stencils and paste application methods Pick and place workflow and component orientation Temperature profiles and reflow methods Hot air, hotplate, and reflow oven processes Inspection and quality control Common defects such as tombstoning and solder bridges Practical rework and component replacement Bench-level professional workflows and checklists This book is designed as a practical bench reference for anyone who wants to assemble and troubleshoot their own SMD boards with reliable results.
€ 24,95
Mitglieder: € 22,46
-
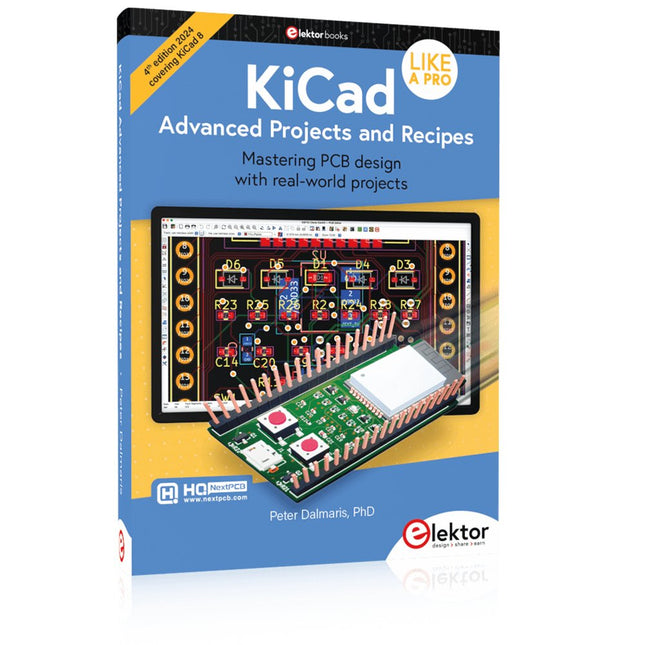
Elektor Publishing KiCad Like A Pro – Advanced Projects and Recipes
Mastering PCB design with real-world projects This book builts on KiCad Like a Pro – Fundamentals and Projects and aims to help you practice your new KiCad skills by challenging you in a series of real-world projects. The projects are supported by a comprehensive set of recipes with detailed instructions on how to achieve a variety of simple and complex tasks. Design the PCBs for a solar power supply, an LED matrix array, an Arduino-powered datalogger, and a custom ESP32 board. Understand the finer details of the interactive router, how to manage KiCad project teams with Git, how to use an autorouter on 2 and 4-layer PCBs, and much more. KiCad 8 is a modern, cross-platform application suite built around schematic and design editors. This stable and mature PCB tool is a perfect fit for electronic engineers and makers. With KiCad 8, you can create PCBs of any complexity and size without the constraints associated with the commercial packages. Here are the most significant improvements and features in KiCad 8, both over and under the hood: Modern user interface, completely redesigned from earlier versions Improved and customizable electrical and design rule checkers Theme editor allowing you to fully customize the look of KiCad on your screen Ability to import projects from Eagle, CADSTART, and more An improved and tightly integrated SPICE circuit simulator Autorouting with the Freerouting plugin Filters define which elements of a layout are selectable Enhanced interactive router helps you draw single tracks and differential pairs with precision New or enhanced tools to draw tracks, measure distances, tune track lengths, etc. Enhanced tool for creating filled zones A customizable coordinate system facilitates data exchange with other CAD applications Realistic ray-tracing capable 3D viewer Differential pair routing Rich repositories of symbol, footprint, and 3D shape libraries Python scripting API for programmatic customization and extensions Improved footprint wizard for fast custom footprints
€ 49,95
Mitglieder: € 44,96
-

Elektor Digital C Programming with Arduino (E-book)
Technology is constantly changing. New microcontrollers become available every year. The one thing that has stayed the same is the C programming language used to program these microcontrollers. If you would like to learn this standard language to program microcontrollers, then this book is for you! Arduino is the hardware platform used to teach the C programming language as Arduino boards are available worldwide and contain the popular AVR microcontrollers from Atmel. Atmel Studio is used as the development environment for writing C programs for AVR microcontrollers. It is a full-featured integrated development environment (IDE) that uses the GCC C software tools for AVR microcontrollers and is free to download. At a glance: Start learning to program from the very first chapter No programming experience is necessary Learn by doing – type and run the example programs A fun way to learn the C programming language Ideal for electronic hobbyists, students and engineers wanting to learn the C programming language in an embedded environment on AVR microcontrollers Use the free full-featured Atmel Studio IDE software for Windows Write C programs for 8-bit AVR microcontrollers as found on the Arduino Uno and MEGA boards Example code runs on Arduino Uno and Arduino MEGA 2560 boards and can be adapted to run on other AVR microcontrollers or boards Use the AVR Dragon programmer/debugger in conjunction with Atmel Studio to debug C programs
€ 39,95
Mitglieder: € 35,96


