Produkte
-

Elektor 03-04/2025 (DE)
Diese Ausgabe steht allen GOLD- und GREEN-Mitgliedern auf der ElektorMagazine-Website zum Download bereit! Sie sind noch kein Mitglied? Hier klicken! Die Open-Source-Prozessorarchitektur RISC-V16 Boards und MCUs, die Sie kennen sollten Audio-Player mit FPGA und EqualizerTeil 1. Digitale Audiosignale mischen mit einem MKR Vidor 4000 von Arduino Laserkopf für Pico-basierte SanduhrZeichnen mit Licht Nehmen Sie teil am STM32 Edge AI Contest! Umweltüberwachung von Pflanzen mit mehreren SensorenDrahtlose Messung der Wasserversorgung und Lichtverhältnisse Maixduino: Automatischer KI-TüröffnerGesichtserkennung mit einer Kamera Embedded-Elektronik 2024KI wird die Branche neu definieren Ladungsbasiertes In-Memory Compute bei EnCharge AI KI-Inferencing bei 10-fach geringerer Leistungsaufnahme zu 20-fach geringeren Kosten Click-Board hilft bei der Entwicklung und dem Training von ML-Modellen für die Schwingungsanalyse Der Elektor Mini-WheelieEin Bausatz für einen selbstbalancierenden Roboter MCU, ich sehe dich!MCUViewer, ein Open-Source-Multiplattform-Debugging-Werkzeug USB-2.0-IsolatorGeräte galvanisch isoliert per USB verbinden Eingriff vor dem SchadenPredictive Maintenance in der Praxis SPoE - Elektromagnetische VerträglichkeitSingle-Pair mit Power-over-Ethernet im EMV-Fokus Retro-TechnikWie das Farbfernsehen eine neue Welt schuf EKG-MonitorMit Hexabitz-Modulen und einem STM32CubeMonitor Der Kampf um KI at the Edge HaLow erreicht Rekorddistanz von 16 km für WLAN bei 900 MHz Erster CHERI RISC-V-Embedded Chip und Early Access Programm Die dritte Generation der Waldbrandfrüherkennung nutzt Satellitenverbindungen Aus dem Leben gegriffenDie Qual der Wahl Aller Anfang......ist nicht schwer: Wir setzen die Filterung und Klangregelung fort. Riesen-LED-UhrNeuauflage eines Elektor-Klassikers Ein modularer Ansatz für die SensorprüfungDas Sensor Evaluation Board mit ESP32-S3 2025: Eine Odyssee in die KIDer Aufstieg der Basismodelle und ihre Rolle bei der Demokratisierung der KImocratizing AI Standalone MIDI-Synthesizer mit Raspberry PTeil 1: Eine Plattform für Edge-KI-Experimente vorbereiten Projekt 2.0Korrekturen, Updates und Leserbriefe CPU, GPU, DSP, FPGA; ein universeller KI-RISC-V-Prozessor kann alles! CEO-Interview: Ventivas dünne und kühle Technologie Dual-Core-Programmierung beim Raspberry Pi PicoEinstieg in die Welt der parallelen Programmierung
€ 14,90
-

Elektor Digital Elektor 03-04/2025 (PDF) DE
Diese Ausgabe steht allen GOLD- und GREEN-Mitgliedern auf der ElektorMagazine-Website zum Download bereit! Sie sind noch kein Mitglied? Hier klicken! Die Open-Source-Prozessorarchitektur RISC-V16 Boards und MCUs, die Sie kennen sollten Audio-Player mit FPGA und EqualizerTeil 1. Digitale Audiosignale mischen mit einem MKR Vidor 4000 von Arduino Laserkopf für Pico-basierte SanduhrZeichnen mit Licht Nehmen Sie teil am STM32 Edge AI Contest! Umweltüberwachung von Pflanzen mit mehreren SensorenDrahtlose Messung der Wasserversorgung und Lichtverhältnisse Maixduino: Automatischer KI-TüröffnerGesichtserkennung mit einer Kamera Embedded-Elektronik 2024KI wird die Branche neu definieren Ladungsbasiertes In-Memory Compute bei EnCharge AI KI-Inferencing bei 10-fach geringerer Leistungsaufnahme zu 20-fach geringeren Kosten Click-Board hilft bei der Entwicklung und dem Training von ML-Modellen für die Schwingungsanalyse Der Elektor Mini-WheelieEin Bausatz für einen selbstbalancierenden Roboter MCU, ich sehe dich!MCUViewer, ein Open-Source-Multiplattform-Debugging-Werkzeug USB-2.0-IsolatorGeräte galvanisch isoliert per USB verbinden Eingriff vor dem SchadenPredictive Maintenance in der Praxis SPoE - Elektromagnetische VerträglichkeitSingle-Pair mit Power-over-Ethernet im EMV-Fokus Retro-TechnikWie das Farbfernsehen eine neue Welt schuf EKG-MonitorMit Hexabitz-Modulen und einem STM32CubeMonitor Der Kampf um KI at the Edge HaLow erreicht Rekorddistanz von 16 km für WLAN bei 900 MHz Erster CHERI RISC-V-Embedded Chip und Early Access Programm Die dritte Generation der Waldbrandfrüherkennung nutzt Satellitenverbindungen Aus dem Leben gegriffenDie Qual der Wahl Aller Anfang......ist nicht schwer: Wir setzen die Filterung und Klangregelung fort. Riesen-LED-UhrNeuauflage eines Elektor-Klassikers Ein modularer Ansatz für die SensorprüfungDas Sensor Evaluation Board mit ESP32-S3 2025: Eine Odyssee in die KIDer Aufstieg der Basismodelle und ihre Rolle bei der Demokratisierung der KImocratizing AI Standalone MIDI-Synthesizer mit Raspberry PTeil 1: Eine Plattform für Edge-KI-Experimente vorbereiten Projekt 2.0Korrekturen, Updates und Leserbriefe CPU, GPU, DSP, FPGA; ein universeller KI-RISC-V-Prozessor kann alles! CEO-Interview: Ventivas dünne und kühle Technologie Dual-Core-Programmierung beim Raspberry Pi PicoEinstieg in die Welt der parallelen Programmierung
€ 11,90
-

Elektor 03-04/2026 (DE)
Diese Ausgabe steht allen GOLD- und GREEN-Mitgliedern auf der ElektorMagazine-Website zum Download bereit! Sie sind noch kein Mitglied? Hier klicken! PIO-Programmierung des Raspberry Pi PicoNeun Befehle, viele Möglichkeiten KI aus dem Browser befreienSo nutzen Sie KI-CLIs zum Programmieren, Kompilieren und Validieren von Embedded-Projekten Der Scrutiny DebuggerDebuggen, Visualisieren und Testen von Embedded-C/C++ Code Sigfox-Breakout-Board (Teil 1)Ein selbst gebautes Funk-BoB Rauscharmes Labor-Netzteil (Teil 2)Konstruktion, Montage und praktische Implementierung Einfacher Signalgenerator mit dem RP2040Analoge und digitale Signale für rund 10 Euro Matter und Edge-KI für die Smart Homes der ZukunftBieten die neuesten Updates von Matter und der Aufstieg der Edge-KI Entwicklern endlich die Werkzeuge, um das versprochene intelligente und vernetzte Smart Home zu schaffen? Die SMU für alleSiglent bringt die SMM3000X-Serie auf den Markt DifferenzdrucksensorenVorausschauende Wartung in HLK-Systemen Security by DesignSchadensbegrenzung durch Entwicklungsprinzipien Embedded Security ist nicht mehr optional CRA und PQC setzen neue Prioritäten für Embedded-SicherheitWarum auch kleine IoT- und Industrie-Unternehmen einen Upgrade-Plan benötigen embedded world 2026Interview mit Benedikt Weyerer, Executive Director der embedded world I3C in der PraxisMit Hardware von ST und Microchip Das BLEnky-ProjektSchnelles Prototyping für Bluetooth-Low-Energy-Anwendungen PulsbreitensteuerungVom einfachen Thermostat bis zum geglätteten Analogsignal AudiotronicsKlangvolle Elektronik zum Selberbauen ESP32-Audio-Transceiver-Board (Teil 4)Taktsynchronisation – und eine kabelgebundene Option 2026: Eine KI-OdysseeDer Vibe-Coding-Kater von 2025 Symmetrische DC-LastGleichstromlast, statisch oder dynamisch und symmetrisch Gesichter zählen mit MaixCAMEine einfache Methode zur Erfassung von Publikumsgrößen
€ 15,90
-

Elektor Digital Elektor 03-04/2026 (PDF) DE
Diese Ausgabe steht allen GOLD- und GREEN-Mitgliedern auf der ElektorMagazine-Website zum Download bereit! Sie sind noch kein Mitglied? Hier klicken! PIO-Programmierung des Raspberry Pi PicoNeun Befehle, viele Möglichkeiten KI aus dem Browser befreienSo nutzen Sie KI-CLIs zum Programmieren, Kompilieren und Validieren von Embedded-Projekten Der Scrutiny DebuggerDebuggen, Visualisieren und Testen von Embedded-C/C++ Code Sigfox-Breakout-Board (Teil 1)Ein selbst gebautes Funk-BoB Rauscharmes Labor-Netzteil (Teil 2)Konstruktion, Montage und praktische Implementierung Einfacher Signalgenerator mit dem RP2040Analoge und digitale Signale für rund 10 Euro Matter und Edge-KI für die Smart Homes der ZukunftBieten die neuesten Updates von Matter und der Aufstieg der Edge-KI Entwicklern endlich die Werkzeuge, um das versprochene intelligente und vernetzte Smart Home zu schaffen? Die SMU für alleSiglent bringt die SMM3000X-Serie auf den Markt DifferenzdrucksensorenVorausschauende Wartung in HLK-Systemen Security by DesignSchadensbegrenzung durch Entwicklungsprinzipien Embedded Security ist nicht mehr optional CRA und PQC setzen neue Prioritäten für Embedded-SicherheitWarum auch kleine IoT- und Industrie-Unternehmen einen Upgrade-Plan benötigen embedded world 2026Interview mit Benedikt Weyerer, Executive Director der embedded world I3C in der PraxisMit Hardware von ST und Microchip Das BLEnky-ProjektSchnelles Prototyping für Bluetooth-Low-Energy-Anwendungen PulsbreitensteuerungVom einfachen Thermostat bis zum geglätteten Analogsignal AudiotronicsKlangvolle Elektronik zum Selberbauen ESP32-Audio-Transceiver-Board (Teil 4)Taktsynchronisation – und eine kabelgebundene Option 2026: Eine KI-OdysseeDer Vibe-Coding-Kater von 2025 Symmetrische DC-LastGleichstromlast, statisch oder dynamisch und symmetrisch Gesichter zählen mit MaixCAMEine einfache Methode zur Erfassung von Publikumsgrößen
€ 11,90
-
Elektor Digital Elektor 05-06/2020 (PDF)
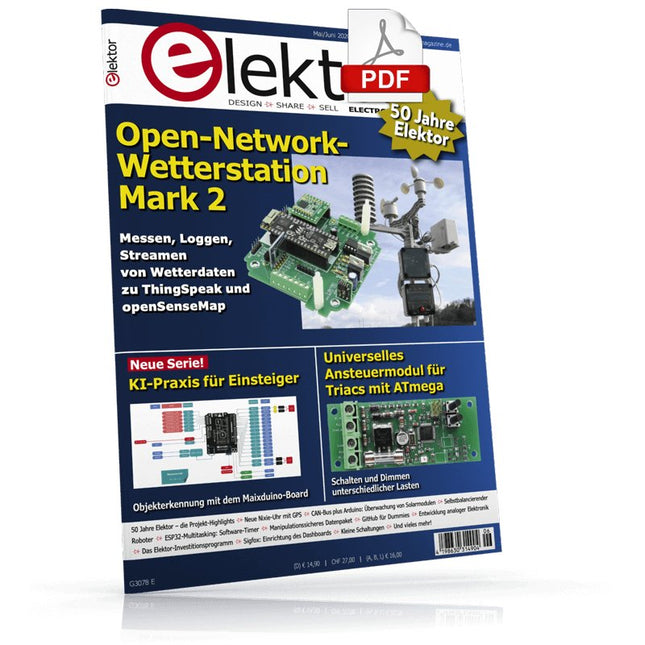
50 Jahre Elektor – die Projekt-HighlightsMarkantes und Außergewöhnliches aus einem halben Jahrhundert Technik-Geschichte Elektor wird 50Stimmen zum Jubiläum Start-Up-Update: Das Elektor-Investitionsprogramm Open-Network-Wetterstation Mark 2Teil 1: Einführung und Hardware KI für Einsteiger (1)Objekterkennung mit dem Maixduino-Board Universelles Ansteuermodul für Triacs mit ATmegaSchalten und Dimmen unterschiedlicher Lasten Nachruf: Gerhard Haas Gewusst wie: GitHub für DummiesWie man etwas von GitHub herunterlädt Mein IoT-Button: Der Knopf fürs NetzTeil 2: Prototyping mit Board und Cloud Sprachsynthesizer TMS0280Bemerkenswerte Bauteile InteraktivKorrekturen & Updates || Fragen & Antworten BASIC für ESP32/ESP8266 (2)Sanduhr mit ESP8266 und Annex WiFi RDS Automatische Identifizierung mithilfe der RFID-Lesegeräte von Elatec Von Entwicklern für EntwicklerTipps & Tricks, Best Practice und andere nützliche Infos BalBot: Ein selbstbalancierender RoboterModerne Beschleunigungssensoren erleichtern den Bau Aller Anfang...muss nicht schwer sein! Von der Pike auf gelerntNeues aus der Elektor-Ideenkiste Manipulationssicheres DatenpaketDaten sicher mit der Post verschicken Reloaded: Neue Nixie-Uhr mit GPSEin Engineering-Bulletin für begeisterte Nutzer Praktisches ESP32-MultitaskingTeil 3: Software-Timer Mit dem Fuchs ins IoT (4)Einrichtung des Dashboards Zutritt für Unbefugte verboten!Ein Blick ins Allerheiligste aller Elektroniker Review: Elektronische USB-Last Joy-iT HD35Elektronische Last zum Test der Belastbarkeit von USB-Ports CAN-Bus plus Arduino: Überwachung von SolarmodulenErkennen und Lokalisieren von problematischen Panels in großen Anordnungen Entwicklung analoger ElektronikFall Nr. 1 – Teil 3: Optimierung des Vorverstärkerverhaltens und Kompromisse Review: Labornetzteil PeakTech 6080 AViel Netzteil für wenig Geld Eine große HerausforderungSichere Produkte im IoT-Zeitalter HexadokuSudoku für Elektroniker
€ 11,90
-

Elektor Digital Elektor 05-06/2021 (PDF)
DIY-LIPO-SUPERCHARGER-KITVom Prototyp zum Massenmarkt 60 JAHRE ELEKTOR TISCHMULTIMETER SDM3045X VON SIGLENTGenauer, mehr Stellen und besser bedienbar DC-STROMZANGE SELBST GEBAUTHall-Sensor + Ferrit-Kerne + Arduino TEMPERATURGESTEUERTE LÖTSTATION 2021Einfach selbstgebaut! PARALLAX PROPELLER 2Teil 2: Entwicklungsumgebung und Code WLAN- STATT LORA-SCHALTERIntegriert in Home Assistant mit ESPHome KEINE ANGST VOR DEM MOBILFUNKMODULWarum Sie Ihr eigenes Mobilfunkmodul entwerfen sollten ZEITERFASSUNG MIT ESP32 UND TOGGLHeimarbeiten mit dem M5Stack RASPBERRY PI PICO UND DER MIKROCONTROLLER RP2040 MICROPYTHON FÜR MIKROCONTROLLERBildschirme im Kleinformat: Displaytechnik GLEICHSPANNUNGSWANDLER 12 V AUF 200 VSichere Hochspannung für Röhrenverstärker DER HITZE AUF DER SPURThermo-Kamera Seek Shot Pro OBJEKTORIENTIERTES PROGRAMMIERENEine kurze Einführung unter C++ ZUTRITT FÜR UNBEFUGTE VERBOTEN!Ein analoger Synthesizer aus dem Home Lab von Kurt Diedrich JAVA AUF DEM RASPBERRY PITeil 1: GPIOs DIP-SCHALTERBemerkenswerte Bauteile PROJEKT 2.0Korrekturen, Updates und Leserbriefe WEM GEHÖRT DAS PRODUKT?Das Recht auf Reparatur gewinnt an Schwung AUS DEM LEBEN GEGRIFFENDas große Buch der Patzer DER MICRO-PROFESSOR: ASSEMBLER LERNEN AUF Z80Weiterbildung anno 1981 ALLER ANFANG …muss nicht schwer sein! HEXADOKUThe Original Elektorized Sudoku
€ 11,90
-
Elektor Digital Elektor 05-06/2022 (PDF)
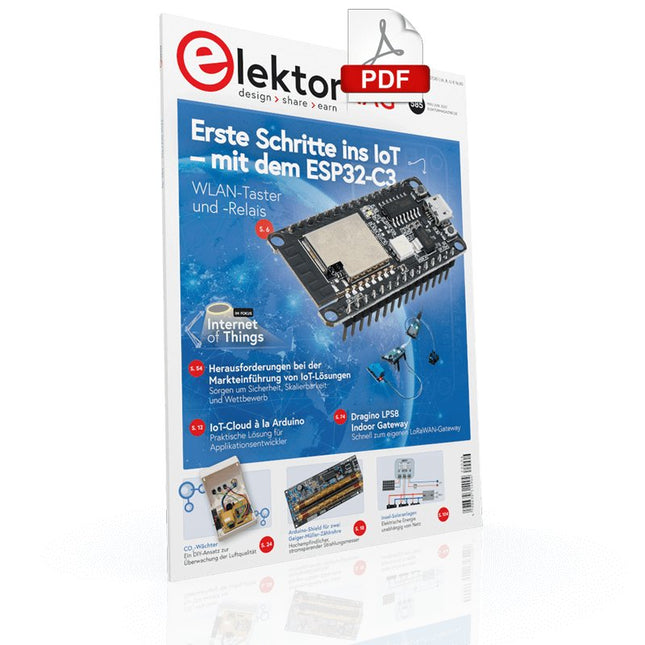
Erste Schritte ins IoT - mit dem ESP32-C3 WLAN-Taster und -Relais IoT-Cloud à la Arduino Erster Kontakt mit der Arduino-Cloud Arduino-Shield für zwei Geiger-Müller-Zählrohre Ein hochempfindlicher, sehr stromsparender Strahlungsmesser CO2-Wächter Ein DIY-Ansatz zur Überwachung der Luftqualität MonkMakes: Luftqualitäts-Messgerätekit für den Raspberry Pi Misst Temperatur und CO2e Aller Anfang ... muss nicht schwer sein: Willkommen bei der Diode! Beherrschen Sie die Fachsprache? Fünf praktische Tipps für Ingenieure Tipps & Tricks beim Bauteiltest Recycling ohne teures Messeequipment Stromsparende Maulwurfscheuche Ein ATtiny13 ersetzt einen 555er Lichtschalter DeLux Eine Lösung für hochpräzises lichtgesteuertes Schalten Herausforderungen bei der Markteinführung von IoT-Lösungen Sorgen um Sicherheit, Skalierbarkeit und Wettbewerb Infografik 5-6/2022 Lieber doch verkabelt Tipps zur Entwicklung einer 1-GBit/s-Schnittstelle im Industrieumfeld Objekterkennung in Echtzeit für MCUs mit Edge Impulse FOMO Wanderfeldröhren Bemerkenswerte Bauteile NB-IoT - ein Überblick Standards, Abdeckung, Verträge und Module Dragino LPS8 Indoor-Gateway Schnell zum eigenen LoRaWAN-Gateway ATtiny-Mikrocontroller mit C und Assembler erforschen Beispiel-Kapitel: I/O-Ports des ATtiny Projekt 2.0 Korrekturen, Updates und Leserbriefe LoRa-GPS-Tracker - ein Update Daten abholen und visualisieren mit dem Raspberry Pi Schaltungssimulation mit TINA Design Suite und TINACloud Beispiel-Kapitel: Sinusförmige Oszillatoren WinUI 3: Neues Grafik-Framework für Windows-Apps Eine erste App für Elektroniker GUIs mit Python: Die schlechteste GUI der Welt Insel-Solaranlagen Elektrische Energie unabhängig vom Netz Das 10-Jahres-Handy Erneuern Sie Ihre Erwartungen! Hexadoku
€ 11,90
-
Elektor Digital Elektor 05-06/2023 PDF (DE)
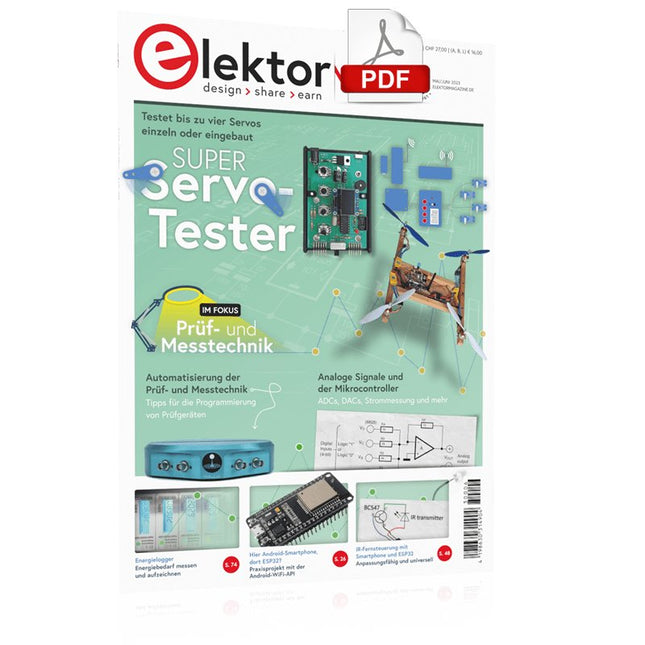
Diese Ausgabe steht allen GOLD- und GREEN-Mitgliedern auf der ElektorMagazine-Website zum Download bereit! Sind Sie noch kein Mitglied? Hier klicken! Super-Servo-Tester Bis zu vier Servos einzeln oder eingebaut testen Analoge Signale und der Mikrocontroller ADCs, DACs, Strommessung und mehr Messe München 2023 Sub-Nyquist-Sampling in der Praxis Höhere Frequenzen mittels Unterabtastung sicher erfassen Hier Android-Smartphone, dort ESP32? Praxisprojekt mit der Android WiFi-API Aktives 1-kHz-Filter für Verzerrungsmessungen Bessere Messungen durch Optimierung des Messsignals Aller Anfang... muss nicht schwer sein: Wir multivibrieren weiter! Projekt 2.0 Korrekturen, Updates und Leserbriefe Das neue I3C-Protokoll Würdiger I2C-Nachfolger oder viel Rauch ums Nichts? BlueRC: IR-Fernsteuerung mit Smartphone und ESP32 Anpassungsfähig und universell Mikrocontroller-Dokumentationen verstehen Teil 2: Register und Blockschaltbilder Automatisierung der Prüf- und Messtechnik Programmieren von Prüfgeräten, damit Sie tun, was Sie wollen Infografik: Messen und Testen Überspannungsschutz für sicheren Betrieb Transientenschutz für nicht-isolierte DC/DC-Leistungsmodule Mess- und Prüfgeräte von Wiha Installationstester und Messgeräte, auf die Sie sich verlassen können Automatisierung von Tests und Zusammenarbeit bei Testergebnissen Aus dem Leben gegriffen Elektronik auf hohem Niveau Energielogger Energie messen und aufzeichnen Aufgebaut: Das 4tronix MARS Rover Kit Parkscheibe mit E-Paper Display Ein innovativer digitaler Ersatz eCO2-Telegram-Bot Luftqualitätsmessung mit Telegram-Anbindung Hinter den Kulissen von High-End-Audio im Eigenbau Elektor-Ingenieur Ton Giesberts im Interview über die hohe Kunst des Analogdesigns Das besondere Projekt Es gibt noch viel zu tun! RFID-Tag lesen und RFID-Türschloss Projektbeispiele aus dem Arduino-Experimentierpaket von Elektor Oszilloskop-Stromsonde für HF Hochfrequenz-Strommessung leicht gemacht Nichts für Anfänger – Makerfabs 6 DOF Roboterarm Mit Raspberry Pi Pico und MicroPython Generative KI Wer hat das eigentlich gemacht? Hexadoku
€ 11,90
-
Elektor Digital Elektor 05-06/2024 (PDF)
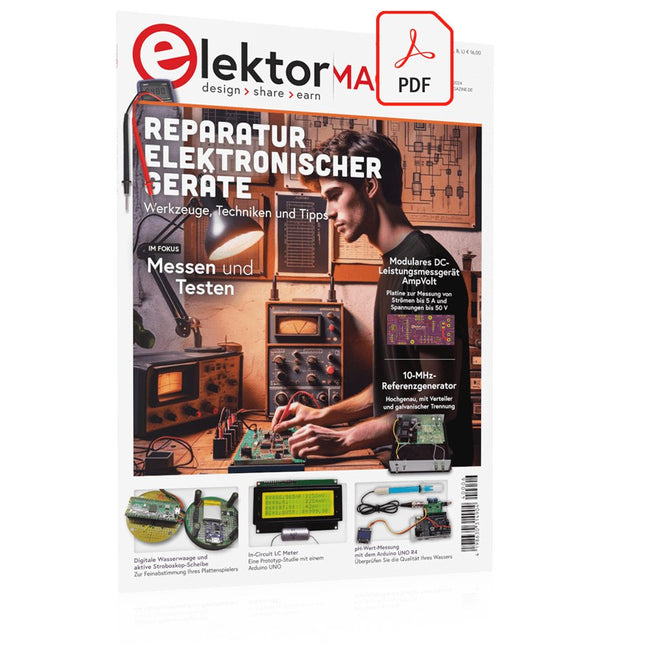
Diese Ausgabe steht allen GOLD- und GREEN-Mitgliedern auf der ElektorMagazine-Website zum Download bereit! Sie sind noch kein Mitglied? Hier klicken! STM32 Wireless Innovation Design Contest – Die Gewinner stehen fest In-Circuit LC-MeterEine Prototyp-Studie Das modulare DC-Leistungsmessgerät AmpVoltTeil 1: Platine zur Messung von Strömen bis 5 A und Spannungen bis 50 V embedded world 2024 Reparatur von elektronischen GerätenWerkzeuge, Techniken und Tipps Aller Anfang ...muss nicht schwer sein: Wir setzen die Verstärkertheorie fort! Ein einfacher DDS-SignalgeneratorDirekte Digitale Synthese in ihrer reinsten Form Sparkplug im ÜberblickEine Spezifikation für MQTT-Daten Bemerkenswerte BauteileZeile für Zeile: CRTCs Radargesteuerte BeleuchtungAutomatisches Treppenhauslicht mit Anwesenheitsdetektion Digitale Wasserwaage und aktive Stroboskop-Scheibe für PlattenspielerFeinabstimmung Ihres Plattenspielers mit nur einem Gerät Open Source und seine Bedeutung für die Elektronikindustrie (2) M12-Rundsteckverbinder mit A-KodierungErste Wahl für industrielle Anwendungen Arduino-MesslaborEin 8-in-1-Test- und Messgerät für das heimische Elektroniklabor Soundkarte als Betrag/Phase-Impedanz-AnalysatorFür Frequenzen von 100 Hz bis 90 kHz pH-Wert-Messung mit dem Arduino UNO R4Überprüfen Sie die Qualität Ihres Wassers Aus dem Leben gegriffenStartrampe für Pangpong-Popöchen Digitales Speicheroszilloskop FNIRSI 1014DGute Leistung für knappe Budgets 2024: Eine Odyssee in die KIWie man die Objekterkennung zum Laufen bringt 10-MHz-ReferenzgeneratorHochgenau, mit Verteiler und galvanischer Trennung Projekt-Update #2: Energiemessgerät mit ESP32Einige Weiterentwicklungen Projekt 2.0Korrekturen, Updates und Leserbriefe Ein Interview mit Eben Upton, Geschäftsführer von Raspberry PiDer Raspberry Pi 5 und darüber hinaus
€ 11,90
-
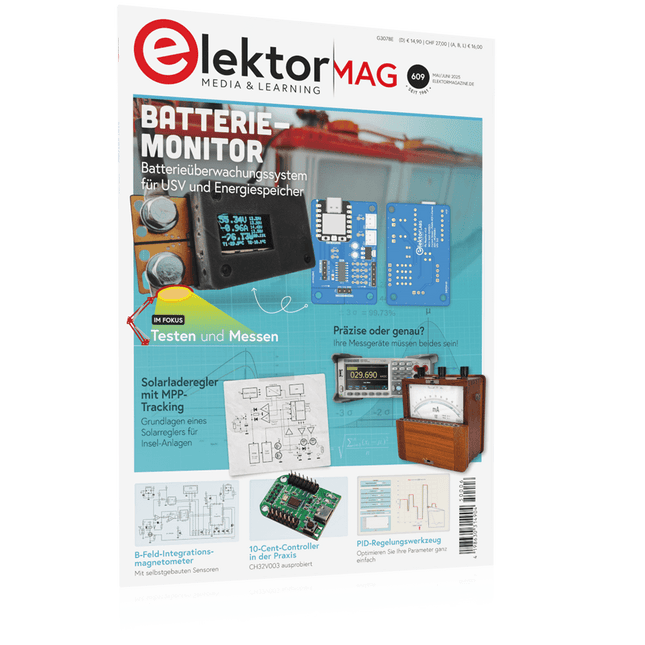
Elektor 05-06/2025 (DE)
Diese Ausgabe steht allen GOLD- und GREEN-Mitgliedern auf der ElektorMagazine-Website zum Download bereit! Sie sind noch kein Mitglied? Hier klicken! PbMonitor v1.0Ein Batterieüberwachungssystem für USV und Energiespeicher Solarladeregler mit MPP-TrackingTeil 1: Grundlagen eines Solarreglers für Insel-Anlagen B-Feld-Integrationsmagnetometer mit selbstgebauten Sensoren Präzise, richtig oder genau?Ihre Messgeräte müssen alles sein! AD7124 – Ein Präzisions-ADC in der PraxisHinweise für die Sensor-Signalaufbereitung PID-RegelungswerkzeugOptimieren Sie ganz einfach Ihre Parameter embedded world 2025 Aller Anfang ......muss nicht schwer sein: Klangeinstellung! Academy Pro BoxBook + Online Course + Hardware Milliohmmeter-AdapterNutzen Sie die Präzision Ihres Multimeters! Der nächste Meilenstein bei HalbleiternWeiter in Richtung 1,4 nm Steckverbinder in DurchstecktechnikDas Beste aus zwei Welten: THR FrequenzzählerPortabel und mit automatischer GPS-Kalibrierung Analoge MessgeräteBemerkenswerte Bauteile Stand-alone-QuarztesterWie genau ist Ihre Taktquelle? Preiswerter I²C-TesterSchließen Sie I²C-Chips direkt an Ihren PC an Aus dem Leben gegriffenWer das Kleine nicht ehrt... 2025: Eine Odyssee in die KIDie transformativen Auswirkungen auf die Softwareentwicklung Projekt 2.0Korrekturen, Updates und Leserbriefe Standalone-MIDI-Synthesizer mit Raspberry PiTeil 2: Setup mit Intelligenz aufwerten Nortonisierter Wien-Brücken-OszillatorKleine Änderungen führen zu bedeutenden Verbesserungen 10-Cent-Controller in der PraxisRISC-V-Mikrocontroller CH32V003 und MounRiver Studio ausprobiert Audio-Player mit FPGA und EqualizerTeil 2: Lautstärkeregelung, erweitertes Mischen und ein Web-Interface
€ 14,90
-
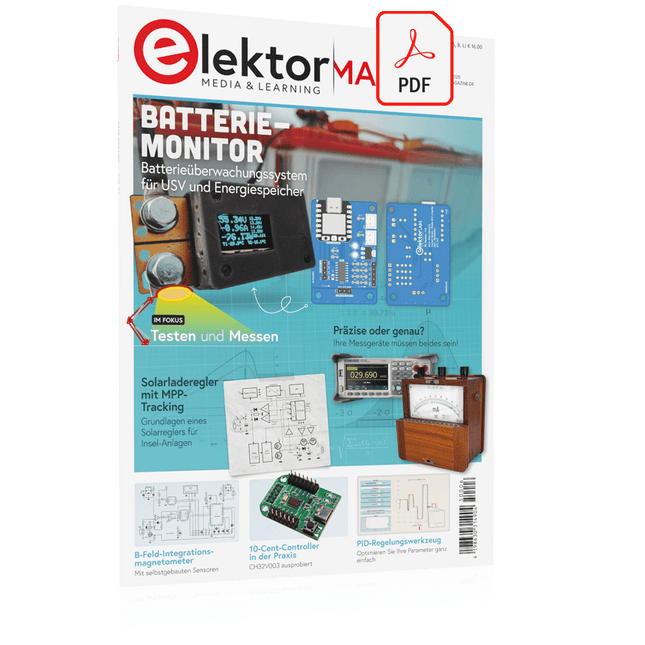
Elektor Digital Elektor 05-06/2025 (PDF) DE
Diese Ausgabe steht allen GOLD- und GREEN-Mitgliedern auf der ElektorMagazine-Website zum Download bereit! Sie sind noch kein Mitglied? Hier klicken! PbMonitor v1.0Ein Batterieüberwachungssystem für USV und Energiespeicher Solarladeregler mit MPP-TrackingTeil 1: Grundlagen eines Solarreglers für Insel-Anlagen B-Feld-Integrationsmagnetometer mit selbstgebauten Sensoren Präzise, richtig oder genau?Ihre Messgeräte müssen alles sein! AD7124 – Ein Präzisions-ADC in der PraxisHinweise für die Sensor-Signalaufbereitung PID-RegelungswerkzeugOptimieren Sie ganz einfach Ihre Parameter embedded world 2025 Aller Anfang ......muss nicht schwer sein: Klangeinstellung! Academy Pro BoxBook + Online Course + Hardware Milliohmmeter-AdapterNutzen Sie die Präzision Ihres Multimeters! Der nächste Meilenstein bei HalbleiternWeiter in Richtung 1,4 nm Steckverbinder in DurchstecktechnikDas Beste aus zwei Welten: THR FrequenzzählerPortabel und mit automatischer GPS-Kalibrierung Analoge MessgeräteBemerkenswerte Bauteile Stand-alone-QuarztesterWie genau ist Ihre Taktquelle? Preiswerter I²C-TesterSchließen Sie I²C-Chips direkt an Ihren PC an Aus dem Leben gegriffenWer das Kleine nicht ehrt... 2025: Eine Odyssee in die KIDie transformativen Auswirkungen auf die Softwareentwicklung Projekt 2.0Korrekturen, Updates und Leserbriefe Standalone-MIDI-Synthesizer mit Raspberry PiTeil 2: Setup mit Intelligenz aufwerten Nortonisierter Wien-Brücken-OszillatorKleine Änderungen führen zu bedeutenden Verbesserungen 10-Cent-Controller in der PraxisRISC-V-Mikrocontroller CH32V003 und MounRiver Studio ausprobiert Audio-Player mit FPGA und EqualizerTeil 2: Lautstärkeregelung, erweitertes Mischen und ein Web-Interface
€ 11,90
-

Elektor 05-06/2026 (DE)
Diese Ausgabe steht allen GOLD- und GREEN-Mitgliedern auf der ElektorMagazine-Website zum Download bereit! Sie sind noch kein Mitglied? Hier klicken! PbMonitor v2.0 – UpdateBatterieüberwachung mit verbessertem Analogdesign Audio-LatenzmessungEigenständiges Werkzeug zur Bewertung von Fehlern und Latenzen bei der Audioübertragung Rechtecksignal vs. Bode-DiagrammÜberprüfung der Leistungsfähigkeit eines Audiogeräts embedded world 2026 Clever coden mit KIKI in der Softwareentwicklung für Elektroniker Audioanalyser QA403Bezahlbare Präzision für Audio-Profis und -Hobbyisten EasyGimbalAutonomes Kamera-Tracking mit KI, Schrittmotor und Servo Sigfox-Breakout-Board (Teil 2)Nachrichten senden SchaltungsschutzÜberspannungen mit TVS-Dioden beherrschen Neue Ansätze für BatterieprüfungenEine neue Ära der Diagnostik AudiotronicsEin erster Vorverstärker CANopenTermEin Open-Source-Werkzeug für CAN – für Maker und Ingenieure Stabilisierung von Operationsverstärkernbei kapazitiver Last Projekt 2.0Korrekturen, Aktualisierungen und Leserbriefe SignalkonditionierungTipps und Tricks zur Anpassung von Spannungsbereichen TDR-Aufsatz für OszilloskopeLängenmessung, Kurzschluss, Fehlanpassung: Kabel mit Reflexionen messen! Aus dem Leben gegriffenLED It Be Lautsprecher-Oszillator und ResonanztesterEin experimentelles Projekt für Ihre Lautsprecher Elektor-Community-Tipps zu Test und Messung ESP32-Audio-Transceiver-Board (Teil 5)Audioverarbeitung und Fernsteuerung 2026: Eine KI-OdysseeKI hat ein Kontextproblem Batteriespeicher für BalkonkraftwerkeKleine Akkus mit großer Wirkung
€ 15,90
-

Elektor Digital Elektor 05-06/2026 (PDF) DE
Diese Ausgabe steht allen GOLD- und GREEN-Mitgliedern auf der ElektorMagazine-Website zum Download bereit! Sie sind noch kein Mitglied? Hier klicken! PbMonitor v2.0 – UpdateBatterieüberwachung mit verbessertem Analogdesign Audio-LatenzmessungEigenständiges Werkzeug zur Bewertung von Fehlern und Latenzen bei der Audioübertragung Rechtecksignal vs. Bode-DiagrammÜberprüfung der Leistungsfähigkeit eines Audiogeräts embedded world 2026 Clever coden mit KIKI in der Softwareentwicklung für Elektroniker Audioanalyser QA403Bezahlbare Präzision für Audio-Profis und -Hobbyisten EasyGimbalAutonomes Kamera-Tracking mit KI, Schrittmotor und Servo Sigfox-Breakout-Board (Teil 2)Nachrichten senden SchaltungsschutzÜberspannungen mit TVS-Dioden beherrschen Neue Ansätze für BatterieprüfungenEine neue Ära der Diagnostik AudiotronicsEin erster Vorverstärker CANopenTermEin Open-Source-Werkzeug für CAN – für Maker und Ingenieure Stabilisierung von Operationsverstärkernbei kapazitiver Last Projekt 2.0Korrekturen, Aktualisierungen und Leserbriefe SignalkonditionierungTipps und Tricks zur Anpassung von Spannungsbereichen TDR-Aufsatz für OszilloskopeLängenmessung, Kurzschluss, Fehlanpassung: Kabel mit Reflexionen messen! Aus dem Leben gegriffenLED It Be Lautsprecher-Oszillator und ResonanztesterEin experimentelles Projekt für Ihre Lautsprecher Elektor-Community-Tipps zu Test und Messung ESP32-Audio-Transceiver-Board (Teil 5)Audioverarbeitung und Fernsteuerung 2026: Eine KI-OdysseeKI hat ein Kontextproblem Batteriespeicher für BalkonkraftwerkeKleine Akkus mit großer Wirkung
€ 11,90
-
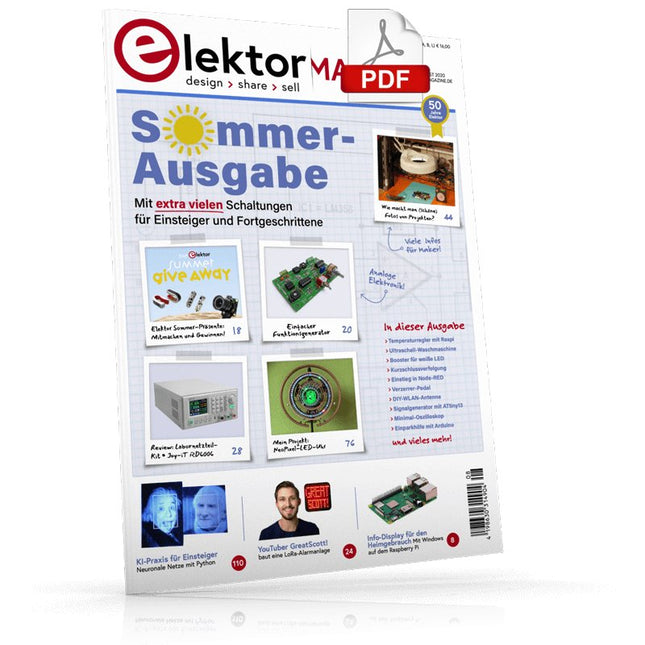
Elektor Digital Elektor 07-08/2020 (PDF)
Elektor hilft!Elektronik in herausfordernden Zeiten Info-Display für den HeimgebrauchMit Windows auf dem Raspberry Pi Einstieg in Node-REDEin visuelles blockbasiertes Open-Source-Programmierwerkzeug Elektor Sommer-Präsente Einfacher FunktionsgeneratorMit umgekehrter Signalerzeugung GreatScott! baut ein LoRa-Alarmsystem Review: Labornetzteil-Kit JOY-iT RD6006 Review: Interface-Board GreatFET One Von der Pike gelernt – XXLDiesmal: Altes aus der Elektor-Ideenkiste Des armen Mannes externe 2,4-GHz-WLAN-Antenne Einfacher Ein-Aus-Temperaturregler mit Raspberry Pi-HAT Wie macht man (schöne) Fotos von Platinen…… und elektronischen Bauteilen? Review: I²CDriver Core Review: Touchscreen Joy-View 13 LED-Booster für MikrocontrollerMit nur einem Bauteil! Experimentelle Ultraschall-Waschmaschine Review: Signalgenerator JOY-IT JDS2915Dual-Signalgenerator mit Frequenzzähler im Metallgehäuse Ampelsteuerung in PIC-Assembler Der ewige Blinker Experimenteller Hall-Sensor Kurzschlussverfolgung mit dem Milliohm- oder ESR-Meter Review: Elektor SDR-Praxis-Bundle Elektor Labs Pipeline Elektor KickstarterNun, Sie haben eine Idee um was es sich handelt Brauchen Sie wirklich dieses ganze Zeugs?Dies ist der Ort, an dem ich viele Stunden damit verbringe, an Elektronikprojekten zu arbeiten... Zutritt für Unbefugte verboten!Ein Blick ins Allerheiligste aller Elektroniker Hello, World! Wir sind Elektor, wir sind sozial! M4 + 2x A7 + GPU: Ein ungleiches DreamteamDer neue STM32MP1-SoC für gehobene Ansprüche Testing Rig für 16F18877 und ähnliche PICs Mikrocontroller-Kommunikation über SPI Sechs Oszillatoren (und der Millereffekt) Absolutes Minimal-Oszilloskop mit LED-Display Knight Rider: LED-Lauflicht mit dem ESP32 LW/MW-AM-Signalgenerator mit ATtiny13 Minimalistisches Dipmeter Preiswerter E-ScooterWas taugt ein „zugelassener“ 300-€-E-Tretroller von Lidl? Ultraschall-Rückwärtseinparkhilfe mit Arduino Uno Verzerrer-Pedal mit Operationsverstärker und Raumladungsröhren Grundlegendes für den Elektronik-Arbeitsplatz KI für Einsteiger (2)Neuronale Netze mit Linux und Python
€ 11,90
-

Elektor Digital Elektor 07-08/2021 (PDF)
KOCHSHOW À LA ELEKTOR LORA MIT DEM RASPBERRY PI PICOViel Spaß mit MicroPython! WAS IST RISC-V?Warum die Industrie einen neuen Prozessorkern so spannend findet 60 JAHRE ELEKTORSommer-Projekte VIELSEITIGE SPANNUNGSVERSORGUNG FÜR BREADBOARDSPositive und negative 5-V-Ausgangsspannungen von USB RASPBERRY PI PICO ESSENTIALSEin Beispiel-Kapitel: WLAN mit dem Raspberry Pi Pico MAGNETISCHE LEVITATION AUF DIE EINFACHE ART PARALLAX PROPELLER 2Teil 3: Smart Pins und serielle Daten (UART) NUCLEO-BOARDS PROGRAMMIEREN MIT DER STM32CUBE-IDEEin Beispiel-Kapitel: FreeRTOS für die STM32 MCU VON ENTWICKLERN FÜR ENTWICKLERTipps & Tricks, Best Practice und andere nützliche Infos DIGITALE PINZETTE MINIWARE DT71 WEARABLE-WLAN GADGETESPHome wieder im Einsatz! ALLER ANFANG …muss nicht schwer sein! EINFACHE SKETCHES MIT DEM QWIIC-ÖKOSYSTEM JAVA AUF DEM RASPBERRY PITeil 2: Steuerung von GPIOs mit einem Spring-REST-Service RASPBERRY PI COMPUTE MODULE 4Ein Raspberry Pi für die Industrie PORTABLES AUTONOMES FEINSTAUBMESSGERÄT FÜR 2,5-ΜM-PARTIKELBehalten Sie Ihre Gesundheit im Auge AUS DER LEBEN GEGRIFFENDie Zukunft war in der Vergangenheit besser MICROPYTHON FÜR DEN ESP32 UND CO.Teil 1: Installation und erste Programme LADUNGSGEKOPPELTE BAUTEILE IN OSZILLOSKOPENBemerkenswerte Bauteile ESD – DER UNSICHTBARE BLITZZerfetzt Halbleiter wie ein Blitz einen Baum SOLARANLAGE FÜR MÄHROBOTERÖkologisch - preiswert - einfach! EUROPAS BEMÜHUNGEN, BIG TECH ZU ZÄHMEN HEXADOKUThe Original Elektorized Sudoku
€ 11,90
-
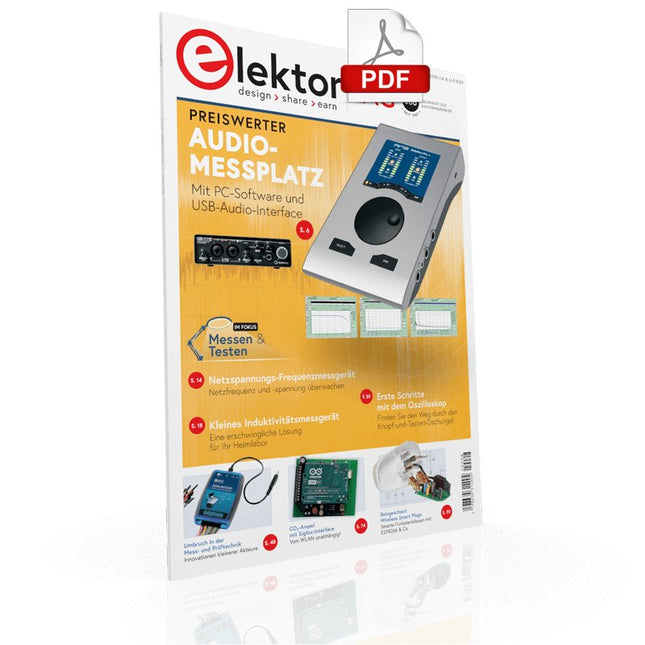
Elektor Digital Elektor 07-08/2022 (PDF)
Preiswerter Audio-Messplatz Mit PC-Software und USB-Audio-Interface Netzspannungs-Frequenzmessgerät Technische Daten - 3D-Modell Kleines Induktivitätsmessgerät Eine kostengünstige Lösung für Ihr Heimlabor Reiten auf der Schallwelle Ein Blick auf das Makerfabs Acoustic Levitation Kit Aller Anfang... muss nicht schwer sein: Dioden als Gleichrichter E-FFWD: Der Blick wieder nach vorne gerichtet! Erste Schritte mit dem Oszilloskop Finden Sie den Weg durch den Knopf-und-Tasten-Dschungel Raspberry Pi Pico als Software Defined Radio Für das MSF-Zeitsignal Feuchtigkeitssensoren für Gießanlagen Automatische Bewässerung Umbruch in der Mess- und Prüftechnik Innovationen kleinerer Interaktionen Infografik 7-8/2022 Inspiration: Was wirklich wichtig ist Interview mit dem Unternehmer Walter Arkesteijn von InnoFaith Beauty Sciences EMV-Störungen durch Speicherdrosseln minimieren Grafische Benutzeroberflächen mit Python: Tic Tac Toe - Das Spiel Reed-Relais Bemerkenswerte Bauteile Einfaches analoges ESR-Messgerät mit Drehspulinstrument-Genauigkeit CO2-Ampel mit Sigfox-Interface Vom WLAN unabhängig! Frauen in der Technik „Es geht nur so lange um Leistung, bis diese Leistung Titten hat.“ Low-Budget Tablet-Oszilloskop ADS1013D Gutes Preis-/Leistungsverhältnis? Aufgeschraubt und reingeschaut: Funk-Smart-Plugs Smarte Funksteckdosen mit ESP8266 & Co. Hautwiderstand und Hautkapazität Kleine Experimente mit der menschlichen Hülle Aus dem Leben gegriffen Der Prophet gilt nichts im Vaterland Messgerät Pokit – die eierlegende Wollmilchsau? Klein und mit vielen Messmöglichkeiten Hexadoku Sudoku für Elektroniker
€ 11,90
-

Elektor Digital Elektor 07-08/2023 (PDF)
Diese Ausgabe steht allen GOLD- und GREEN-Mitgliedern auf der ElektorMagazine-Website zum Download bereit! Sind Sie noch kein Mitglied? Hier klicken! Drehscheibentelefon als Fernbedienung Licht einschalten, wählen Sie die 1, Kaffeemaschine einschalten, wählen Sie die 2 GPS-gestützte Geschwindigkeitsüberwachung Nie mehr Rasen, nie mehr Knöllchen! RGB-Stroboskop mit Arduino Farbenfrohe Anwendung eines nützlichen Werkzeugs Drahtloser Notruf-Taster Erhöhte Sicherheit mit LoRa Aller Anfang... …muss nicht schwer sein: Folgen Sie dem Emitter! Beliebige und unabhängige Hysteresestufen für Komparatoren mit Simulationen, Tabellenkalkulationen und etwas Algebra ESP32-basierter Impedanz-Analysator Einfach, kompakte Bauteile und preiswert! Das besondere Projekt Ermutigung zum Heimwerken Mikrocontroller-Praxiskurs für Arduino-Einsteiger mit Trainingsboard All-in-One-Trainingshardware für den Mikrocontroller-Kurs Aus dem Leben gegriffen Moderner Luddismus Sensor 1x1: Temperatur-Sensor DS18B20 Anschluss am 1-Draht-Bus Rettet Matter das Smart Home? Neue Standards zur Vereinfachung der Hausautomatisierung Eine Frage der Zusammenarbeit Entwickeln mit dem Board Thing Plus Matter und dem Simplicity Studio Infografik: IoT und Sensoren Matter, ExpressLink, Rainmaker – Worum geht es eigentlich? Interview mit Amey Inamdar von Espressif Development-Kits für IoT- und IIoT-Anwendungen Über die Auswahl von Mikrocontroller-Entwicklungsboards Kondensatoren verhalten sich nicht immer kapazitiv Eine NTP-Uhr mit CircuitPython Warum Sie diese Programmiersprache verwenden sollten Bauen Sie ein cooles IoT-Display Mit dem Phambili Newt Der Doppler-Bewegungssensor HB100 Theorie und Praxis eines ungewöhnlichen Sensors Eine Anleitung zur Bare-Metal-Programmierung Teil 1: STM32 und andere Controller Siglent-Multimeter SDM3045X Mikroprozessoren für virtuelle Systeme Bemerkenswerte Bauteile Mikrocontroller-Dokumentation verstehen Teil 3: Blockdiagramme und mehr LoRa-Wetterstation mit niedriger Stromaufnahme Bauen Sie Ihre entfernte Wetterstation selbst! Transverter für das 70-cm-Band Klima ruft Ingenieure Bewegen Sie sich schnell und reparieren Sie die Dinge Hexadoku
€ 11,90
-
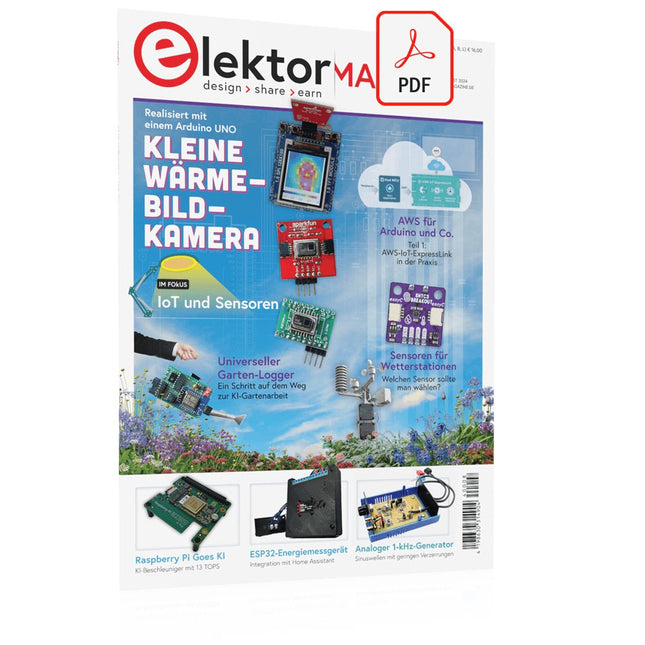
Elektor Digital Elektor 07-08/2024 (PDF)
Diese Ausgabe steht allen GOLD- und GREEN-Mitgliedern auf der ElektorMagazine-Website zum Download bereit! Sie sind noch kein Mitglied? Hier klicken! Kleine WärmebildkameraRealisiert mit einem Arduino UNO Projekt-Update #3: Energiemessgerät mit ESP32Integration und Test mit Home Assistant 2024: Eine Odyssee in die KIVerbessern der Objekterkennung: Nutzung verfeinerter Techniken Raspberry Pi Goes KINeues Kit enthält M.2-HAT mit KI-Beschleuniger Sensoren für WetterstationenWelchen Sensor sollte man wählen? KI-gestützter WasserzählerTeil 1: Bringen Sie Ihren alten Zähler ins IoT! Ein GSM-AlarmNutzung der GSM-Technologie für die Fernüberwachung von Garagen Low-Power-Thread-Geräte optimiert und getestetNiedriger Energiebedarf ... Niedrige Leistung? Aus dem Leben gegriffenDer Gender-Gap Nebelkammer selbstgebautUnsichtbare Strahlung sichtbar machen SparkFun Thing Plus MatterEin vielseitiges Matter-basiertes IoT-Entwicklungsboard IoT-RetrofittingRS232-Geräte fit für Industrie 4.0 machen IoT mit 8-Bit-Mikrocontrollern Technologie als Motor der NachhaltigkeitNeuerungen führen zu Energieeffizienz in vielen Applikationen AWS für Arduino und Co.Teil 1: AWS-IoT-ExpressLink in der Praxis Luftstromdetektor (nur) mit ArduinoKeine externen Sensoren erforderlich! WasserleckdetektorVerbunden mit der Arduino-Cloud QuarzeBemerkenswerte Bauteile Universeller Garten-LoggerEin Schritt auf dem Weg zur KI-gestützten Gartenarbeit Analoger 1-kHz-GeneratorSinuswellen mit geringen Verzerrungen Miletus: Web-Apps offline nutzenSystem- und Gerätezugriff inklusive Von 4G zu 5GIst es wirklich so einfach? Aller Anfang...muss nicht schwer sein: Der Ausgleich
€ 11,90
-

Elektor 07-08/2025 (DE)
Diese Ausgabe steht allen GOLD- und GREEN-Mitgliedern auf der ElektorMagazine-Website zum Download bereit! Sie sind noch kein Mitglied? Hier klicken! OBD2-Sensor-DashboardEchtzeitdaten statt alter Zeigerinstrumente OBD2: Drehzahlmesser und Schaltblitz nachrüstenRetro, aber praktisch LiDAR- und Vision-Sensoren für die Robotik Sensor+Test 2025 und PCIM 2025 Berührungslose E-Feld-MessungenTeil 1. Eine vibrierende Membran zur Erfassung von Gleichspannungen oder statischen elektrischen Feldern Drahtloser Benachrichtigungsdienst für den BriefkastenVon optischen Sensoren bis zu Empfängern: Entdecken Sie verschiedene Optionen Elektor Mini-WheelieEin selbst-balancierender Roboter SolarzellenBemerkenswerte Bauteile Erste Schritte mit einem modernen RadarsensorPräzise Messungen auf Ihrem Radar? Aus dem Leben gegriffenPapierfabrik CybersecuritySchwere Zeiten für Hacker Siglent präsentiert seine neuen Multi-Kanal-OszilloskopeFür den Einsatz in Leistungselektronik und Embedded Design Bluetooth 6.0 verbessert Distance-Ranging-ApplikationenNeue Version bietet bessere Positionsbestimmungs- und Ortungsdienste für Geräte Kommunikation mit dem BeagleY-AI erkunden Projekt 2.0Korrekturen, Updates und Leserbriefe Aller Anfang ...ist nicht schwer: Das Ende der Operationsverstärker Ein mächtiger KI-Code-AssistentCode-Entwicklung mit Continue und Visual Studio Code Solarladeregler mit MPP-TrackingTeil 2: Die Schaltung Hinderniserkennung mit UltraschallEin einfaches Projekt zur Unterstützung von Menschen mit Sehbehinderungen 2025: Odyssee in die KIHalbjahresrückblick Standalone-MIDI-Synthesizer mit Raspberry PiTeil 3. Mit künstlicher Intelligenz und einer Benutzeroberfläche Meshtastic: Ein DemonstrationsprojektIntelligentes Mesh-Netzwerk auf Basis von LoRa-Funkmodulen Analoger Audio-GeneratorSinus-Generator mit einstellbarer Frequenz
€ 14,90
-

Elektor Digital Elektor 07-08/2025 (PDF) DE
Diese Ausgabe steht allen GOLD- und GREEN-Mitgliedern auf der ElektorMagazine-Website zum Download bereit! Sie sind noch kein Mitglied? Hier klicken! OBD2-Sensor-DashboardEchtzeitdaten statt alter Zeigerinstrumente OBD2: Drehzahlmesser und Schaltblitz nachrüstenRetro, aber praktisch LiDAR- und Vision-Sensoren für die Robotik Sensor+Test 2025 und PCIM 2025 Berührungslose E-Feld-MessungenTeil 1. Eine vibrierende Membran zur Erfassung von Gleichspannungen oder statischen elektrischen Feldern Drahtloser Benachrichtigungsdienst für den BriefkastenVon optischen Sensoren bis zu Empfängern: Entdecken Sie verschiedene Optionen Elektor Mini-WheelieEin selbst-balancierender Roboter SolarzellenBemerkenswerte Bauteile Erste Schritte mit einem modernen RadarsensorPräzise Messungen auf Ihrem Radar? Aus dem Leben gegriffenPapierfabrik CybersecuritySchwere Zeiten für Hacker Siglent präsentiert seine neuen Multi-Kanal-OszilloskopeFür den Einsatz in Leistungselektronik und Embedded Design Bluetooth 6.0 verbessert Distance-Ranging-ApplikationenNeue Version bietet bessere Positionsbestimmungs- und Ortungsdienste für Geräte Kommunikation mit dem BeagleY-AI erkunden Projekt 2.0Korrekturen, Updates und Leserbriefe Aller Anfang ...ist nicht schwer: Das Ende der Operationsverstärker Ein mächtiger KI-Code-AssistentCode-Entwicklung mit Continue und Visual Studio Code Solarladeregler mit MPP-TrackingTeil 2: Die Schaltung Hinderniserkennung mit UltraschallEin einfaches Projekt zur Unterstützung von Menschen mit Sehbehinderungen 2025: Odyssee in die KIHalbjahresrückblick Standalone-MIDI-Synthesizer mit Raspberry PiTeil 3. Mit künstlicher Intelligenz und einer Benutzeroberfläche Meshtastic: Ein DemonstrationsprojektIntelligentes Mesh-Netzwerk auf Basis von LoRa-Funkmodulen Analoger Audio-GeneratorSinus-Generator mit einstellbarer Frequenz
€ 11,90
-
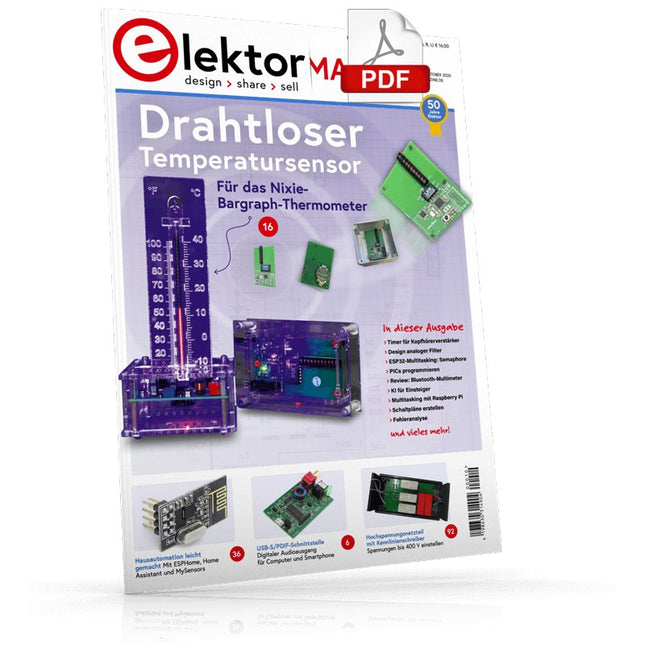
Elektor Digital Elektor 09-10/2020 (PDF)
USB-S/PDIF-SCHNITTSTELLEDigitaler Audioausgang für Computer, Laptop, Tablet oder Smartphone PRAKTISCHES ESP32-MULTITASKING (4)Binäre Semaphore DRAHTLOSER TEMPERATURSENSORfür das Nixie-Bargraph-Thermometer MULTITASKING MIT RASPBERRY PIAm Beispiel einer Ampelsteuerung TIMER FÜR KOPFHÖRERVERSTÄRKER OPEN-NETWORK-WETTERSTATION MARK 2Teil 2: Software HAUSAUTOMATION LEICHT GEMACHTMit ESPHome, Home Assistant und MySensors DIE SPEICHER-KATHODENSTRAHLRÖHREBemerkenswerte Bauteile KI FÜR EINSTEIGER (3)Ein eigenes Neuronales Netz PICS PROGRAMMIEREN - VON DER PIKE AUFSinusschwingung mit Assembler IKEA-HACKTuning einer preiswerten Ikea-Lampe mit NeoPixel-LEDs und WLAN LASSEN SIE IHR HOBBYPROJEKT NICHT IN DER ECKE VERSTAUBENAngebotsorientiertes Zeitmanagement und spiralförmige Entwicklung ALLER ANFANG...muss nicht schwer sein! ZUTRIFF FÜR UNBEFUGTE VERBOTEN!Ein Blick ins Allerheiligste aller Elektroniker 8-BIT-MIKROCONTROLLER UND DARÜBER HINAUSInterview mit Tam Hanna VON DER PIKE AUF GELERNTAus der Elektor-Ideenkiste REVIEW: BLUETOOTH-MULTIMETER OWON OW18E INTERAKTIVKorrekturen & Upadates || Fragen & Antworten AUS DEM LEBEN GEGRIFFENBleifreies Löten und das europäische Regelwerk EIN VIELVERSPRECHENDES PROJEKT: NEUES LCR-MESSGERÄT FÜR 50 HZ BIS 2 MHZMessgenauigkeit und Komfort FEHLERANALYSETipps zu FMEA, hohen Strömen und mehr VON ENTWICKLERN FÜR ENTWICKLERTipps & Tricks, Best Practices und andere nützliche Infos REVIEW: ELEKTRONISCHE LAST SIGLENT SDL1020X-E HOCHSPANNUNGSNETZTEIL MIT KENNLINIENSCHREIBERSpannungen bis 400 V einstellen und Kennlinien für Röhren und Transistoren erstellen HEXADOKUSudoku für Elektroniker DESIGN ANALOGER FILTER (TEIL 1) SCHALTPLÄNE ERSTELLEN
€ 11,90
-
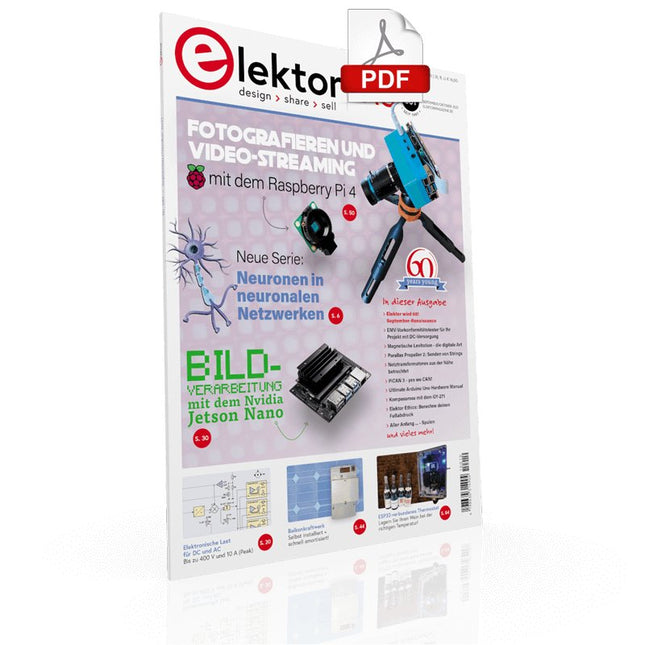
Elektor Digital Elektor 09-10/2021 (PDF)
DIE NEURONEN IN NEURONALEN NETZWERKEN VERSTEHEN Teil 1. Künstliche Neuronen EMV-VOR-KONFORMITÄTSTESTER FÜR IHR PROJEKT MIT DC-VERSORGUNG Teil 1: Was ist eine Netznachbildung? ELEKTRONISCHE LAST FÜR DC UND AC Bis zu 400 V und 10 A ALLER ANFANG … ist gar nicht schwer! NVIDIA JETSON NANO - BILDVERARBEITUNG FÜR EINSTEIGER Teil 1: Hard- und Software im Überblick NETZTRANSFORMATOREN AUS DER NÄHE BETRACHTET Wie verhalten Sie sich beim Ein- und Ausschalten? PICAN 3 – JA, DAS KÖNNEN WIR! CAN-Zusatzboard für Raspberry Pi 4 BALKONKRAFTWERK Selbst installiert = schnell amortisiert! FOTOGRAFIEREN UND VIDEO-STREAMING MIT DEM RASPBERRY PI 4 Die High-Quality-Kamera des Raspberry Pi in der Praxis VERWENDUNG VON DISPLAYS IN RASPBERRY-PI-PROJEKTEN Beispiel-Kapitel: Organische Leuchtdioden-Displays (OLED) PARALLAX-PROPELLER 2 Teil 4: Senden von Strings 60 JAHRE ELEKTOR: SEPTEMBER-RENAISSANCE Der Plan, der Plan, ein leerer Wahn ... ZUTRITT FÜR UNBEFUGE VERBOTEN ERWÜNSCHT In Friesland, wo die Röhren blühen ... HYBRIDE SCHALTUNGEN Bemerkenswerte Bauteile KOMPASSROSE MIT DEM GY-271 Oder, warum man mit dem Handy aufpassen muss… KENNEN SIE IHREN FUSSABDRUCK Berechnen Sie die CO2-Bilanz Ihrer Elektronik ESP32-VERBUNDENES THERMOSTAT Lagern Sie Ihren Wein bei der richtigen Temperatur! MAGNETISCHE LEVITATION DIE DIGITALE ART Ein ESP32 Pico ersetzt den analogen Komparator ULTIMATE ARDUINO UNO HARDWAREHANDBUCH Ein beispielhaftes Kapitel: Bootloader für den Haupt-Mikrocontroller MICROPYTHON FÜR DEN ESP32 UND CO. Teil 2. Matrix-Displays einfach ansteuern MADMACHINE SWIFTIO-KARTE Moderne Sprache trifft moderne Hardware AUS DEM LEBEN GEGRIFFEN Eine elektronische On/Off-Beziehung HEXADOKUS Sudoku für Elektroniker
€ 11,90
-
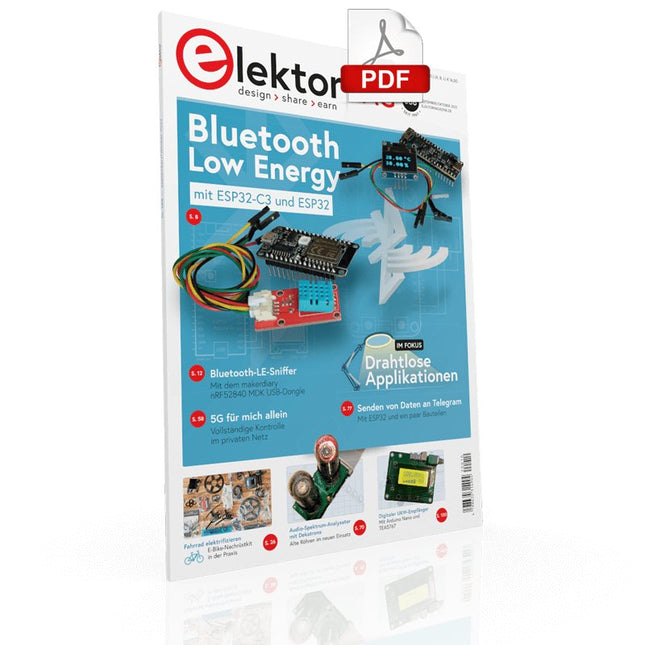
Elektor Digital Elektor 09-10/2022 (PDF)
Diese Ausgabe steht allen GOLD- und GREEN-Mitgliedern auf der ElektorMagazine-Website zum Download bereit! Sind Sie noch kein Mitglied? Hier klicken! electronica Fast Forward Start- & Scale-Up Awards Die Vorbereitungen laufen auf Hochtouren! Bluetooth Low Energy mit dem ESP32-C3 und ESP32 Es muss nicht immer WLAN sein! Bluetooth-LE-Sniffer Mit dem Makerdiary nRF52840 MDK USB-Dongle Magischer RGB-LED-Würfel Hardware-Design rund um einen RP2040 Automatischer Ein-/Ausschalter für Lötpastenkompressor Elektor - live und in Farbe Livestreams, Webinare und Kurse für Ingenieure und Maker Fahrrad elektrifizieren E-Bike-Nachrüstkit in der Praxis Aller Anfang ... Muss nicht schwer sein: Multiplikation von Spannungen Aus dem Leben gegriffen Nebenbeschäftigungen Teensy 4.0 – warum ist das Board so schnell? Oder: Geschwindigkeit ist keine Hexerei! Simulation von Audio-Leistungsverstärkern mit TINA Der „Try-Before-You-Build“-Ansatz LoRaWAN-Knoten im IoT Ein Beispiel-Kapitel: Die LoRaWAN-Module Dragino LHT65, LDS01 und LDS02 Projekt 2.0 Korrekturen, Updates und Leserbriefe 5G für mich allein Vollständige Kontrolle über 5G-Implementierungen in privaten Mobilfunknetzen Infografik 7-8/2022 Wie lernt mein Gerät zu funken? Applikationen mit WiFi-Schnittstellen ausrüsten Rheinturmuhr – Wecker de luxe Audio-Spektrum-Analysator mit Dekatrons Eine neue Art, alte Röhren zu verwenden Senden von Daten an Telegram Ein ESP32 und ein paar Bauteile besorgt den Job32 and a Few Parts Fliege-Bandsperre für Audio-Messungen Besseres Messen durch Notch-Filterung CO2-Messgerät auseinandergenommen Ist das Gerät für Ihre Projekte hackbar? Spielereien mit PUTs Analoge Entwürfe mit dem programmierbaren Unijunction-Transistor Ein runder Touchscreen für den Raspberry Pi HyperPixel 2.1 Round von Pimoroni Fernwirken und die Erkennung von Verbindungsverlusten mit Hilfe von nRF24L01+ Modulen Digitaler UKW-Empfänger Mit Arduino Nano und TEA5767 OLED-Display - aus SPI mach I²C Zutritt für Unbefugte verboten! Ein Hobby geht nicht in die Rente! Ein Jahrzehnt der Ethik in der Elektronik Tessel Renzenbrink sinniert über die digitale Gesellschaft Hexadoku Sudoku für Elektroniker
€ 11,90
-
Elektor Digital Elektor 09-10/2023 (PDF)
Diese Ausgabe steht allen GOLD- und GREEN-Mitgliedern auf der ElektorMagazine-Website zum Download bereit! Sind Sie noch kein Mitglied? Hier klicken! Raspberry Pi Pico als Spektrum-Analyser FFTs auf preiswerter Hardware-Basis ±40 V linearer Spannungsregler Eine alternative Stromversorgung für die Fortissimo-100-Endstufe ... und andere! Drahtlose MCU-Kommunikation flexibel gemacht EEPROM eröffnet Netzwerk-Perspektiven für drahtlose MCUs 5.000 € zu gewinnen! Machen Sie mit beim STM32 Wireless Innovation Design Contest! 2023: Odyssee in der KI Loslegen mit dem Code-Interpreter von ChatGPT LoRa, ein Schweizer Taschenmesser Teil 1: Das LoRa-Protokoll und seine Vorteile Einstellbare Stromsenke mit integriertem Taktgeber Zum Testen von Netzteilen, Spannungswandlern und Batterien Zwei neue Arduino UNO R4 Boards: Minima und WiFi Logarithmische Potentiometer Sie sind exponentiell! Motortreiber-Breakout-Board Ein BoB für einen 5-A-Treiber für DC-Motoren mit einer Größe von 3×3 mm Aus dem Leben gegriffen Gefährliche Elektronik Ist Mobilfunk die energiesparendste Option für das IoT? LTE-M und NB-IoT: Energieanforderungen in LPWAN-Implementierungen Kabellose Kommunikation in IoT-Systemen mit MKR Modulen von Arduino Kommunikationsstandards des Arduino-Moduls für IoT AC-Verluste in magnetischen Bauteilen Erhalten Sie heiße Induktivitäten! Messungen für eine optimale Cloud-Implementierung Matter-Implementierung: Was braucht es, um Matter-Geräte einzusetzen? Neue 2,4 GHz-Funkeinheiten von Circuit Design Prädestiniert für Fernsteuerung und Überwachung PIC o'Clock – am Puls der Zeit Design eines SDR-Zeitzeichen-Empfängers Sorgfaltspflichtrichtlinie „Weiter so“ ist nicht genug Aller Anfang... Ist gar nicht schwer: Spannungsverstärkung Infraschall-Rekorder mit dem Arduino Pro Mini Ein Beispielprojekt aus dem Elektor-Buch „Arduino & Co.“ Cloud-basierter Energiezähler Mit ESP32-Modul und PZEM-004T-Spannungs-/Stromsensor Eine Anleitung zur Bare-Metal-Programmierung Teil 2: Exaktes Timing, UART und Debugging
€ 11,90


