Topseller
-
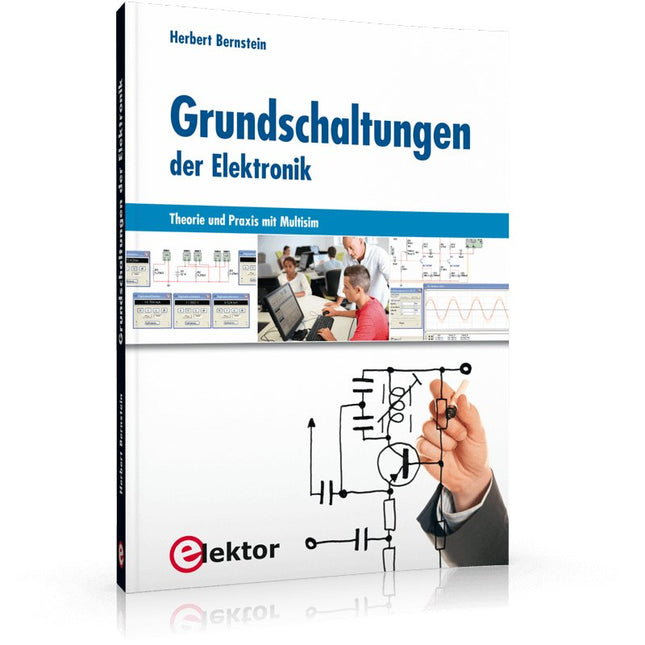
Elektor Publishing Grundschaltungen der Elektronik
Dieses Buch ist ein Nachschlagewerk mit praxisorientierten Fakten und ausführlichen Erklärungen. Der Autor hat selbst für komplexe Vorgänge oder Formeln praktische kurze Erklärungen und Näherungsrechnungen entwickelt, ohne die Darstellungen zu simplifizieren. Als Ausgangspunkt wurde das Simulationsprogramm Multisim gewählt, das zahlreiche Bauelemente und umfangreiche Messinstrumente zur Verfügung stellt. Damit hat man ein praxisnahes Fachbuch und Nachschlagewerk für Schule, Studium und Weiterbildung im Beruf. Das Buch ist in sechs Kapitel gegliedert: Messgeräte: Arbeiten mit Multimeter, Funktionsgenerator und Zweikanal-Oszilloskop Dioden: Einweg-, Brückengleichrichter, Schalter, Spannungsbegrenzer, Z-Diode, Leuchtdioden, 7-Segment-, Bargraf-Anzeige und Optokoppler Verstärkerschaltungen: Kleinsignalverstärker, ein- und zweistufige Verstärker, Leistungsverstärker für A-, B- und AB-Betrieb, Wechselstromverstärker, Differenzverstärker, FET-Verstärker und Arbeiten mit dem Operationsverstärker Transistoren: Als Schalter eingesetzt, Schaltungen mit komplementären Transistoren, astabile und monostabile Kippschaltung, Flipflops Signalgeneratoren: Rechteckgenerator, Sägezahngenerator, Dreieck-Rechteck-Generator, Sinusgenerator, LC-Oszillator, Phasenschiebergenerator, Wien-Robinson-Generator, Oszillator mit Quarz Impulsformer mit Schmitt-Trigger und Komparator: Schmitt-Trigger mit Transistoren und FET, Dämmerungsschalter, Temperaturüberwachung, TTL-Baustein 74132, Amplitudenbegrenzer, Differenzier- und Integrierschaltung Der in mehrere Hauptkapitel gegliederte Inhalt ist so aufbereitet, dass Nachschlagen und Finden der gewünschten Themen sehr einfach ist. Neben den passiven Bauelementen (Widerständen, Kondensatoren und Spulen) nehmen die Halbleiterelemente (Dioden, Transistoren und Feldeffekttransistoren) sowie Operationsverstärker und digitale Schaltkreise einen breiten Raum ein.
€ 49,00
Bestpreis
-

Elektor Digital Nucleo Boards Programming with the STM32CubeIDE (E-book)
Hands-on in more than 50 projects STM32 Nucleo family of processors are manufactured by STMicroelectronics. These are low-cost ARM microcontroller development boards. This book is about developing projects using the popular STM32CubeIDE software with the Nucleo-L476RG development board. In the early Chapters of the book the architecture of the Nucleo family is briefly described. The book covers many projects using most features of the Nucleo-L476RG development board where the full software listings for the STM32CubeIDE are given for each project together with extensive descriptions. The projects range from simple flashing LEDs to more complex projects using modules, devices, and libraries such as GPIO, ADC, DAC, I²C, SPI, LCD, DMA, analogue inputs, power management, X-CUBE-MEMS1 library, DEBUGGING, and others. In addition, several projects are given using the popular Nucleo Expansion Boards. These Expansion Boards plug on top of the Nucleo development boards and provide sensors, relays, accelerometers, gyroscopes, Wi-Fi, and many others. Using an expansion board together with the X-CUBE-MEMS1 library simplifies the task of project development considerably. All the projects in the book have been tested and are working. The following sub-headings are given for each project: Project Title, Description, Aim, Block Diagram, Circuit Diagram, and Program Listing for the STM32CubeIDE. In this book you will learn about STM32 microcontroller architecture; the Nucleo-L476RG development board in projects using the STM32CubeIDE integrated software development tool; external and internal interrupts and DMA; DEBUG, a program developed using the STM32CubeIDE; the MCU in Sleep, Stop, and in Standby modes; Nucleo Expansion Boards with the Nucleo development boards. What you need a PC with Internet connection and a USB port; STM32CubeIDE software (available at STMicroelectronics website free of charge) the project source files, available from the book’s webpage hosted by Elektor; Nucleo-L476RG development board; simple electronic devices such as LEDs, temperature sensor, I²C and SPI chips, and a few more; Nucleo Expansion Boards (optional).
€ 39,95
Mitglieder: € 35,96
-

Elektor Publishing PLC Programming with the Raspberry Pi and the OpenPLC Project
ModbusRTU and ModbusTCP examples with the Arduino Uno and ESP8266 Introduction to PLC programming with OpenPLC, the first fully open source Programmable Logic Controller on the Raspberry Pi, and Modbus examples with Arduino Uno and ESP8266 PLC programming is very common in industry and home automation. This book describes how the Raspberry Pi 4 can be used as a Programmable Logic Controller. Before taking you into the programming, the author starts with the software installation on the Raspberry Pi and the PLC editor on the PC, followed by a description of the hardware. You'll then find interesting examples in the different programming languages complying with the IEC 61131-3 standard. This manual also explains in detail how to use the PLC editor and how to load and execute the programs on the Raspberry Pi. All IEC languages are explained with examples, starting with LD (Ladder Diagram) over ST (Structured Control Language) to SFC (Special Function Chart). All examples can be downloaded from the author's website. Networking gets thorough attention too. The Arduino Uno and the ESP8266 are programmed as ModbusRTU or ModbusTCP modules to get access to external peripherals, reading sensors and switching electrical loads. I/O circuits complying with the 24 V industry standard may also be of interest for the reader. The book ends with an overview of commands for ST and LD. After reading the book, the reader will be able to create his own controllers with the Raspberry Pi.
€ 39,95
Mitglieder: € 35,96
-

The Elektor RF & Communications Collection (USB-Stick)
Dieser USB-Stick enthält eine Auswahl von mehr als 350 Artikeln über HF, Funk und Kommunikation, die im Elektor-Magazin veröffentlicht wurden. Der Inhalt besteht sowohl aus Hintergrundartikeln als auch aus Projekten zu den folgenden Themen: Grundlegende funkbezogene Schaltungen sowie komplexere Schaltungen wie Filter, Oszillatoren und Verstärker. Entwurf, Konstruktion und Theorie von Antennen zum effizienten Senden und Empfangen von Funksignalen. Entwurf und Analyse von RF-Schaltungen einschließlich Filtern, Mischern, PLLs und Frequenzsynthesizern. Werkzeuge und Techniken zur Vorhersage der Ausbreitungswege von Funkwellen und zur Messung der RF-Signalstärke. Techniken zur Verarbeitung digitaler Signale in HF-Systemen, einschließlich Modulations- und Demodulationsverfahren. Projekte zu Funkempfängern, AM, FM, SSB, CW, DRM, DAB, DAB+, Software Defined Radio und mehr. Projekte zu Wi-Fi, Bluetooth, LoRaWAN und mehr. Sie können die Artikelsuchfunktion nutzen, um bestimmte Inhalte im Volltext zu finden. Die Ergebnisse werden immer als vorformatierte PDF-Dokumente angezeigt. Mit Adobe Reader können Sie die Artikel durchblättern und mit der integrierten Suchfunktion von Adobe Reader nach einzelnen Wörtern und Ausdrücken suchen.
€ 49,95€ 39,95Bestpreis
-
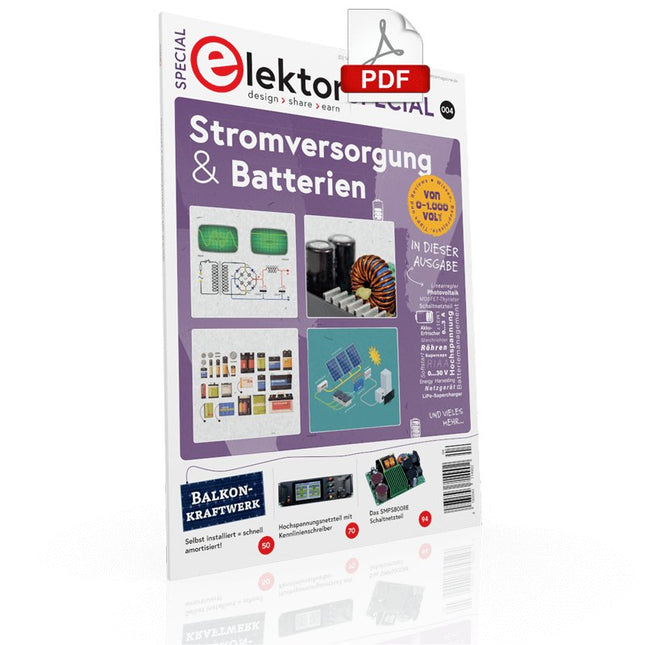
Elektor Digital Elektor Special: Stromversorgung & Batterien (PDF)
Der einfache „Stromversorgung“ genannte Schaltungsteil wird sowohl bei der Entwicklung als auch bei der Reparatur von Elektronik enorm unterschätzt. Dabei ist die Vielfalt bei Netzteilen oder neudeutsch „PSU“ enorm. Es gibt sie in den unterschiedlichsten Ausführungen: mit Gleich- oder Wechselspannung, als Generator, Akku oder Batterie, als Solar-Panel, extern oder eingebaut, linear oder „geschaltet“ – um nur einige zu nennen. Auch die Leistungsbereiche sind enorm: von Nano-Ampere bis Kilo-Ampere – dasselbe gilt für Spannungen. Bei der konkreten Umsetzung kann man zwischen ICs oder diskreten Bauteilen, zwischen fertigem Gerät bzw. Modul oder der Realisierung aus selbstverlöteten Bauteilen wählen. Dieses Special deckt die wichtigsten Merkmale und Gestaltungsaspekte von Stromversorgungen ab. Inhalt Grundlagen Batteriemanagement Was man beim Einsatz von (Lithium-)Akkus beachten muss. Festspannungsnetzgerät mit Linearregler Das beste Ergebnis gleich nach den Batterien. Lichtenergie sammeln Wie man ein Solarmodul für ein Energy-Harvesting-Projekt verwenden kann. Netzbetriebene Versorgungsgeräte Basisschaltungen und Tipps für Transformatoren, Gleichrichtung, Siebung und Stabilisierung. Sanftanlauf Der hohe Einstrompuls sollte vermieden werden. Steuerbarer Gleichrichter Einige Vorschläge, um die Verlustleistung im Längsregler möglichst gering zu halten. Komponenten Arbeitsblatt: Spannungsreglerserie LM117 / LM217 / LM317 Superkondensatoren Bewertungen Labornetzteil-Kit Joy-iT RD6006 Elektronische Last Siglent SDL1020X-E Projekte Balkon-Kraftwerk Selbst installiert = schnell amortisiert! DIY-LiPo-Kompressor-Kit Vom Prototyp zum Massenmarkt. Doppelanoden-MOSFET-Thyristor Schneller und effizienter als herkömmliche SCRs. Batterie-Entsafter Nicht wegwerfen, ausquetschen! Hochspannungsnetzteil mit Kennlinienschreiber Spannungen bis 400 V einstellen und Kennlinien für Röhren und Transistoren erstellen. Hochspannungsnetzteil Für RIAA-Röhrenvorverstärker und andere Anwendungen. Mikroversorgung Eine Laborstromversorgung für universelle Anwendungen. Phantom-Speisung mit geschalteten Kondensatoren Spannungsverdreifachung mit zwei ICs. Das SMPS800RE Schaltnetzteil für den Elektor Fortissimo-100 Zuverlässig, leicht und unkompliziert. Weicher Start Schont das Netzgerät und die Last. UniLab 2 Geschaltetes Labornetzteil 0…30 V/3 A Tipps Softstart für Step-Down-Schaltregler Stromabschaltung mit minimalen Verlusten Powerbank-Geheimnisse Künstliche Masse Akku-Erfrischer Akkupack-Entlader Parallelschaltung von Spannungsreglern
€ 11,90
Mitglieder: € 10,71
-
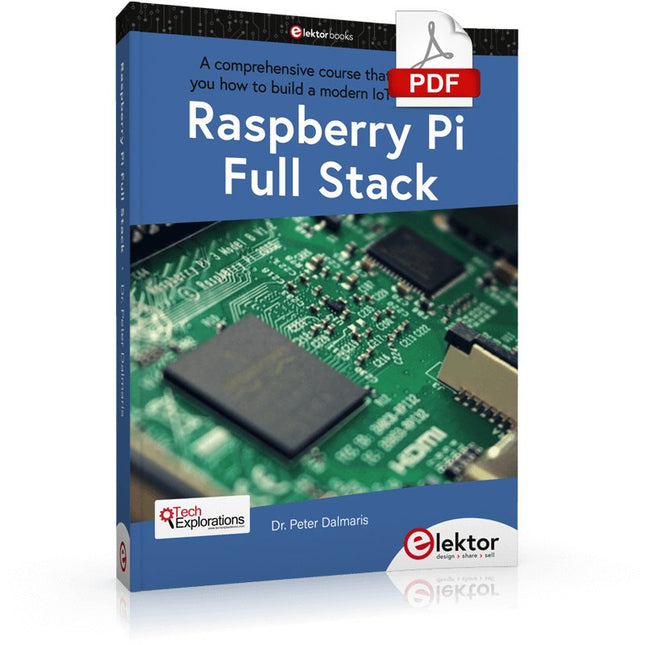
Elektor Digital Raspberry Pi Full Stack (E-book)
Dieses Buch nimmt Sie mit auf eine spannende Tour durch die Entwicklung von Full-Stack-Webanwendungen mit Raspberry Pi. Sie lernen, wie Sie eine Anwendung von Grund auf erstellen. Sie erwerben Erfahrung und Wissen über Technologien, darunter: Das Linux-Betriebssystem und die Befehlszeile. Die Programmiersprache Python. Die GPIOs (General Purpose Input Output Pins) des Raspberry Pi. Der Nginx-Webserver. Flask Python-Mikroframework für Webanwendungen. JQuery und CSS zum Erstellen von Benutzeroberflächen. Umgang mit Zeitzonen. Erstellen von Diagrammen mit Plotly und Google Charts. Datenerfassung mit Google Sheet. Entwickeln von Applets mit IFTTT. Sichern Sie Ihre Anwendung mit SSL. Empfangen Sie mit Twilio Textnachrichten auf Ihrem Telefon. In diesem Buch erfahren Sie außerdem, wie Sie einen drahtlosen Arduino-Sensorknoten aus der Ferne einrichten und Daten von ihm sammeln. Ihre Raspberry Pi-Webanwendung kann Arduino-Knotendaten auf die gleiche Weise verarbeiten, wie sie Daten von ihrem integrierten Sensor verarbeitet. Raspberry Pi Full Stack vermittelt Ihnen viele Fähigkeiten, die für die Erstellung von Web- und Internet-of-Things-Anwendungen unerlässlich sind. Die Anwendung, die Sie in diesem Projekt erstellen, ist eine Plattform, die Sie erweitern können. Dies ist nur der Anfang dessen, was Sie mit einem Raspberry Pi und den Software- und Hardwarekomponenten tun können, die Sie lernen werden. Dieses Buch wird vom Autor durch einen eigenen Diskussionsbereich unterstützt.
€ 34,95
Mitglieder: € 31,46
-

Elektor Publishing High-End Tube Amplifier Design
A Toolbox for Audio Lovers and Engineers Without any ambition to reach scientific levels, this book aims to be a toolbox for both audio lovers and high-end equipment designers. The elementary theory presented is the bare minimum for readers to grasp the operation and practical use of electrical, electromagnetic, physics, and electronic operations available in the designers’ toolbox. Each tool is explained in a minimum of words and theory without needless coverage of underlying equations or figures. The book chapters guide you through the process of designing quality amplifiers with vacuum tubes, from the very beginning, considering both technical and subjective requirements – in theory and practice. The book is a compilation of the author’s notes used in his professional and educational career but was nevertheless primarily written as a result of true love for the audiophile hobby.
€ 69,95
Mitglieder: € 62,96
-
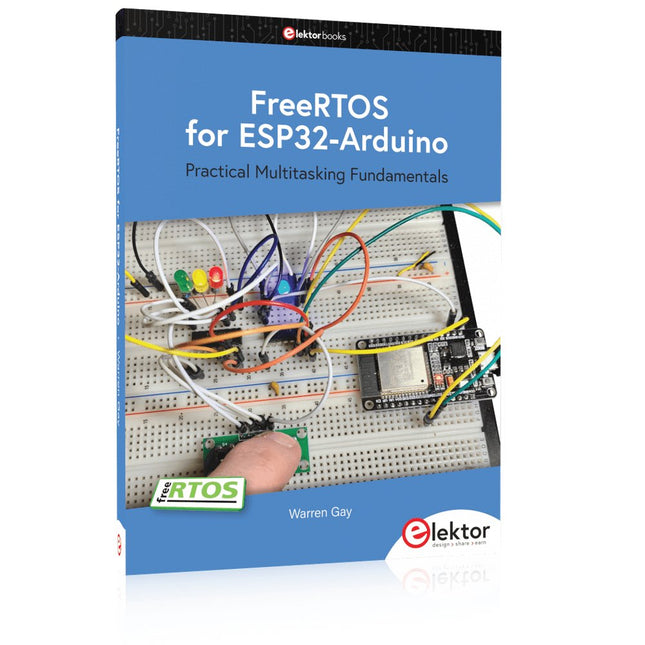
Elektor Publishing FreeRTOS for ESP32-Arduino
Practical Multitasking Fundamentals Programming embedded systems is difficult because of resource constraints and limited debugging facilities. Why develop your own Real-Time Operating System (RTOS) as well as your application when the proven FreeRTOS software is freely available? Why not start with a validated foundation? Every software developer knows that you must divide a difficult problem into smaller ones to conquer it. Using separate preemptive tasks and FreeRTOS communication mechanisms, a clean separation of functions is achieved within the entire application. This results in safe and maintainable designs. Practicing engineers and students alike can use this book and the ESP32 Arduino environment to wade into FreeRTOS concepts at a comfortable pace. The well-organized text enables you to master each concept before starting the next chapter. Practical breadboard experiments and schematics are included to bring the lessons home. Experience is the best teacher. Each chapter includes exercises to test your knowledge. The coverage of the FreeRTOS Application Programming Interface (API) is complete for the ESP32 Arduino environment. You can apply what you learn to other FreeRTOS environments, including Espressif’s ESP-IDF. The source code is available from GitHub. All of these resources put you in the driver’s seat when it is time to develop your next uber-cool ESP32 project. What you will learn: How preemptive scheduling works within FreeRTOS The Arduino startup “loopTask” Message queues FreeRTOS timers and the IDLE task The semaphore, mutex, and their differences The mailbox and its application Real-time task priorities and its effect Interrupt interaction and use with FreeRTOS Queue sets Notifying tasks with events Event groups Critical sections Task local storage The gatekeeper task
€ 49,95
Mitglieder: € 44,96
-
Elektor Digital PID-basierte digitale Regelungstechnik mit Raspberry Pi und Arduino Uno (PDF)
Der Arduino Uno ist ein Open-Source-Mikrocontroller-Entwicklungssystem, das Hardware, eine integrierte Entwicklungsumgebung (IDE) und eine Vielzahl von Bibliotheken umfasst. Es wird von einer riesigen Gemeinschaft von Programmierern, Elektronikern, Enthusiasten und Akademikern unterstützt. Insbesondere die Bibliotheken erleichtern die Programmierarbeit und reduzieren die Entwicklungszeiten, da sie das Erstellen von Programmen erheblich erleichtern. Der Raspberry Pi 4 kann in vielen Projekten wie Audio- und Videoanwendungen, aber auch in Industriesteuerungen, Robotik, Spielen usw. eingesetzt werden. Dazu bietet er auch WiFi- und Bluetooth-Fähigkeiten, wodurch er sich zudem hervorragend für internetbasierte Steuerungs- und Überwachungsanwendungen eignet. In diesem Buch werden sowohl der Raspberry Pi 4 als auch der Arduino Uno in PID-basierten automatischen Steuerungsanwendungen eingesetzt. Nach einer grundlegenden Theorie der Regelsysteme werden funktionierende und getestete Projekte zur Steuerung realer Systeme mit PID-Reglern vorgestellt. Die Open-Loop-Eigenschaften, die Abstimmung der PID-Parameter und das Closed-Loop-Zeitverhalten der Systeme werden zusammen mit Blockdiagrammen, Schaltplänen und PID-Regelalgorithmen ausführlich diskutiert. Vollständige Programme für den Raspberry Pi und den Arduino Uno runden die im Buch vorgestellten Projekte ab. Die Regelsysteme können problemlos auch auf andere Projekte angewendet werden und die für den Raspberry Pi 4 angegebenen Programme sollten auch mit anderen Modellen der Raspberry Pi-Familie reibungslos funktionieren. Das Buch behandelt folgende Themen: Steuer- und Regelsysteme Analoge und digitale Sensoren Übertragungsfunktionen und zeitkontinuierliche Systeme Systemantwortfunktionen erster und zweiter Ordnung Zeitdiskrete digitale Systeme Zeitkontinuierliche PID-Regler Zeitdiskrete PID-Regler Zweipunkt-Temperaturregelung mit Raspberry Pi und Arduino Uno PID-basierte Temperaturregelung mit Raspberry Pi und Arduino Uno Motorsteuerung mit Raspberry Pi und Arduino Uno Wasserstandsregelung mit Raspberry Pi und Arduino Uno PID-basierte LED-Helligkeitsregelung mit Raspberry Pi und Arduino Uno
€ 32,80
Mitglieder: € 29,52
-
Elektor Publishing Hochfrequenz-Baubuch
Die Hochfrequenztechnik ist eines der Gebiete, auf denen man auch heute noch eigene Ideen in die Tat umsetzen kann. Unzählige Schaltungsvarianten mit besonderen Zielsetzungen geben Raum für sinnvolle Experimente und Projekte. Vieles kann man nicht einfach kaufen. Detektorradios ohne eigene Energiequelle, einfache Röhrenempfänger mit einem Hauch von Nostalgie, die ersten Empfangsversuche mit dem Software Defined Radio oder Spezialempfänger für den Amateurfunk, all dies lässt sich mit wenig Aufwand realisieren. Lange Zeit war das Radiobasteln der Einstieg in die Elektronik. Inzwischen gibt es auch andere Wege, vor allem über Computer, Mikrocontroller und die Digitaltechnik. Allerdings kommen die analogen Wurzeln der Elektronik oft zu kurz. Die Radiotechnik eignet sich besonders gut als Lernfeld der Elektronik, weil man hier mit den einfachsten Grundlagen beginnen kann. Aber auch die Verbindung zur modernen Digitaltechnik liegt auf der Hand, wenn es z. B. um moderne Abstimmverfahren wie PLL und DDS oder um moderne DSP-Radios geht. Dieses Buch gibt einen Überblick und stellt eine Sammlung einfacher Projekte vor. Der Autor möchte Sie dabei unterstützen, eigene Ideen zu entwickeln, eigene Empfänger zu entwerfen und sie zu erproben.
€ 39,80
Bestpreis
-

FNIRSI FNIRSI FNB58 USB-Tester (mit Bluetooth)
Der FNB58 USB-Tester (mit Bluetooth) ist ein umfassendes und sehr genaues USB-Spannungs- und Strommessgerät. Es verfügt über ein 2,0"-TFT-Farbdisplay, eine integrierte USB-A-, Micro-USB- und USB-C-Schnittstelle. Mit diesem Gerät können Sie die Stromversorgung oder den Stromverbrauch von Produkten oder die Ladeleistung von Handys und Netzteilen messen. Sie können auch das Schnellladeprotokoll von Ladegeräten bestimmen. Features USB-A- und USB-C-Schnittstelle 2,0-Zoll-HD-Display Daten auf einen Blick Umfassende Kompatibilität Ultrapräzise Datenerkennung Spielen Sie mit der Schnellladetechnologie Automatische Protokollerkennung (PD2.0, 3.0, 3.1, PPS, QC2.0, 3.0, FCP, SCP, AFC, PE, DASH VOOC, SuperVOOC und mehr) Einfache Benutzeroberfläche, einfach zu bedienen 4 Funktionskurvenanzeigen (Echtzeit-Spannungs- und Stromkurve, Offline-Kurvenaufzeichnung, D+/D- Spannungskurve, Hochgeschwindigkeits-Stromversorgungswelligkeitsmessung) Kabelerkennung 10 Gruppen zur Energieaufzeichnung der Batteriekapazitätsberechnung PC-Konnektivität für Datenprotokollierung und Firmware-Updates Bluetooth-App für Android-Geräte Technische Daten Spannungsbereich 4-28 V Strombereich 0-7 A Leistungsbereich 0-120 W Äquivalenter Innenwiderstand der Last 0-9999,9 Ω D+/D- Spannung 0-3,3 V Kapazität 0-9999,99 Ah Stromverbrauch 0-9999,99 Wh Kabelwiderstand 0-9999,9 Ω Schnittstellen Micro-USB, USB-A, USB-C Abmessungen 42 x 13 x 82 mm Downloads Manual Firmware V0.68
€ 49,12
-

Elektor Digital Heimautomation und Elektronik für Anfänger (PDF)
Projekte mit Arduino, ESPHome, Home Assistant und Raspberry Pi & Co Dieses E-Book enthält verschiedene Projektbeispiele und beginnt mit einer Einführung in die Elektronik. Es erklärt unter anderem, wie man Home Assistant auf einem Raspberry Pi installiert, wie man Raumklimasensoren für Temperatur und Luftfeuchtigkeit nutzt, das MQTT-Protokoll sowie weitere Schnittstellen einsetzt und ESPHome verwendet, um Sensoren und Aktoren in Home Assistant zu integrieren. Zahlreiche Video-Tutorials ergänzen das Buch. Grundlagen der Elektrotechnik Das Buch beginnt mit einer Einführung in die Elektrotechnik. Ihr lernt die Grundlagen von Spannung, Strom, Widerständen, Dioden und Transistoren. Arduino und Mikrocontroller Ein kompletter Abschnitt widmet sich dem Arduino Uno. Ihr lernt den Aufbau kennen, schreibt erste Programme und erarbeitet praktische Beispiele. Home Assistant und Automatisierung Ihr erfahrt, wie Home Assistant auf einem Raspberry Pi eingerichtet wird, und lernt den Umgang mit Automatisierungen, Szenen und Geräten. Zusätzlich wird auf Zigbee, MQTT und ESP-NOW eingegangen – wichtige Technologien für die Heimautomation. ESP8266, ESP32 und ESP32-CAM Die beliebten ESP-Mikrocontroller werden ausführlich behandelt. Nach einer theoretischen Einführung folgen praktische Projekte, die euch zeigen, wie ihr das Beste aus diesen Geräten herausholen könnt. Sensoren und Aktoren Das Buch erklärt die Funktionsweise und Anwendung zahlreicher Sensoren wie Temperatur- und Luftfeuchtigkeitssensoren, Bewegungsmelder und RFID-Reader. Bei den Aktoren werden Schrittmotoren, e-ink Displays, Servo-Motoren und vieles mehr beleuchtet. Zu allen Geräten gibt es praxisnahe Anwendungsbeispiele. ESPHome Dieses Kapitel zeigt euch, wie ihr Sensoren und Aktoren ohne Programmieraufwand in Home Assistant integriert. Ihr werdet Schritt für Schritt durch die Einrichtung mit ESPHome geführt. LEDs und Lichttechnik In diesem Kapitel lernt ihr verschiedene LED-Typen und deren Einsatzmöglichkeiten kennen. Grundlagen der Lichttechnik werden ebenfalls erklärt. Node-RED Ein eigenes Kapitel ist Node-RED gewidmet. Ihr erlernt die Grundlagen dieses leistungsstarken Tools und werdet Schritt für Schritt durch die Einrichtung und Nutzung geführt. Integrierte Schaltkreise (ICs) In der Elektronik gibt es zahlreiche ICs, die uns das Leben erleichtern. Ihr lernt die wichtigsten kennen und wendet das Wissen in praktischen Projekten an. Programmieren für Profis Fortgeschrittene Themen wie die korrekte Verwendung von Tastern, der Einsatz von Interrupts und die Nutzung eines NTP-Servers für Zeit-Synchronisation werden in diesem Kapitel detailliert behandelt. Downloads GitHub
€ 59,95
Bestpreis
-

Elektor Special: Sensoren für Wetter und Umwelt
Bauen Sie Ihre perfekte Wetterstation oder forschen Sie zusammen mit der ganzen Welt an Umweltdaten. Mit vielen praktischen Projekten für Arduino, Raspberry Pi, NodeMCU, ESP32 und weiteren Developmentboards. Wetterstationen erfreuen sich seit Jahrzehnten großer Beliebtheit. Ob in aktuellen oder längst eingestellten Elektronik-Magazinen – regelmäßig finden sich Beiträge zum Eigenbau einer Wetterstation. Im Laufe der Jahre wurden diese Systeme immer ausgefeilter und können heute nahtlos in das Smart Home integriert werden. Allerdings erfordert dies oft die Bindung an einen (teuren) Markenhersteller, der sämtliche Komponenten abdeckt. Mit Ihrer eigenen Wetterstation können Sie jedoch mühelos mithalten – und sogar Messwerte erfassen, die kommerzielle Geräte nicht bieten. Dabei kommt der Spaß nicht zu kurz: Sie erweitern spielerisch Ihr Wissen über Elektronik, moderne Mikrocontroller-Developmentboards und Programmiersprachen. Schon für weniger als zehn Euro können Sie erste Umweltdaten erfassen und Ihr System Schritt für Schritt mit wachsendem Interesse weiter ausbauen. Aus dem Inhalt: Wind und Wetter auf der Spur Wetterdisplay mit OpenWeatherMap und Vakuum-Fluoreszenzanzeige Flüchtige organische Verbindungen in der Atemluft Mit MQ-Sensoren arbeiten: Kohlenmonoxid messen – geruchlos aber extrem giftig CO2-Ampel mit ThingSpeak-IoT-Anbindung Ein Gießautomat für Ihre Pflanzen Gutes Raumklima: Temperatur und Luftfeuchtigkeit sind wichtige Kriterien Schickes Thermometer mit alter Röhrentechnik Nostalgisches Wetterhäuschen für die ganze Familie Luftdruck und Temperatur genau messen Sonnenbrand-Warngerät DIY-Sensor für die Sonnenscheindauer Das Smartphone zeigt’s an: Nebel oder klare Sicht? Erdbeben erkennen Pegelstände von Gewässern und Behältern pH-Wert von Gewässern bestimmen Radioaktive Strahlung erkennen Mit GPS wissen Sie weltweit, wo ihr Sensor ist Logdateien mit Zeitstempel auf SD-Karten speichern LoRaWAN, The Things Network und ThingSpeak LoRaWAN-Gateway für TTN betreiben Mega-Display mit Wettervorhersage
€ 14,90
Mitglieder: € 13,41
-
Elektor Publishing Node-RED and Raspberry Pi Pico W
From basics to flows for sensors, automation, motors, MQTT, and cloud services This book is a learning guide and a reference. Use it to learn Node-RED, Raspberry Pi Pico W, and MicroPython, and add these state-of-the-art tools to your technology toolkit. It will introduce you to virtual machines, Docker, and MySQL in support of IoT projects based on Node-RED and the Raspberry Pi Pico W. This book combines several elements into a platform that powers the development of modern Internet of Things applications. These elements are a flow-based server, a WiFi-enabled microcontroller, a high-level programming language, and a deployment technology. Combining these elements gives you the tools you need to create automation systems at any scale. From home automation to industrial automation, this book will help you get started. Node-RED is an open-source flow-based development tool that makes it easy to wire together devices, APIs, and online services. Drag and drop nodes to create a flowchart that turns on your lights at sunset or sends you an email when a sensor detects movement. Raspberry Pi Pico W is a version of the Raspberry Pi Pico with added 802.11n Wi-Fi capability. It is an ideal device for physical computing tasks and an excellent match to the Node-RED. Quick book facts Project-based learning approach. Assumes no prior knowledge of flow-based programming tools. Learn to use essential infrastructure tools in your projects, such as virtual machines, Docker, MySQL and useful web APIs such as Google Sheets and OpenWeatherMap. Dozens of mini-projects supported by photographs, wiring schematics, and source code. Get these from the book GitHub repository. Step-by-step instructions on everything. All experiments are based on the Raspberry Pi Pico W. A Wi-Fi network is required for all projects. Hardware (including the Raspberry Pi Pico W) is available as a kit. Downloads GitHub
€ 49,95
Mitglieder: € 44,96
-

Elektor Digital Programming with Node-RED (E-book)
Design IoT Projects with Raspberry Pi, Arduino and ESP32 The Internet of Things (IoT) is becoming a major application area for embedded systems. As a result, more and more people are becoming interested in learning about embedded design and programming. Technical colleges and universities are moving away from legacy 8 and 16-bit microcontrollers and are introducing 32-bit embedded microcontrollers to their curriculums. Many IoT applications demand precision, high processing power, and low power consumption. Produced by IBM, Node-RED is an open-source visual editor for wiring the Internet of Things. Node-RED comes with a large number of nodes to handle a multitude of tasks. The required nodes are selected and joined together to perform a particular task. Node-RED is based on flow type programming where nodes are configured and joined together to form an application program. There are nodes for performing complex tasks, including web access, Twitter, E-mail, HTTP, Bluetooth, MQTT, controlling GPIO ports, etc. One particularly nice aspect of Node-RED is that the programmer does not need to learn how to write complex programs. For example, an email can be sent by simply joining nodes together and writing only a few lines of code. The aim of this book is to teach how Node-RED can be used in projects. The main hardware platform used with most of the projects in this book is Raspberry Pi 4. Chapters are included to show how Node-RED can be also be used with Arduino Uno, ESP32 DevKitC, and the ESP8266 NodeMCU microcontroller development boards.
€ 34,95
Mitglieder: € 31,46
-
Elektor Publishing PID-basierte digitale Regelungstechnik mit Raspberry Pi und Arduino Uno
Der Arduino Uno ist ein Open-Source-Mikrocontroller-Entwicklungssystem, das Hardware, eine integrierte Entwicklungsumgebung (IDE) und eine Vielzahl von Bibliotheken umfasst. Es wird von einer riesigen Gemeinschaft von Programmierern, Elektronikern, Enthusiasten und Akademikern unterstützt. Insbesondere die Bibliotheken erleichtern die Programmierarbeit und reduzieren die Entwicklungszeiten, da sie das Erstellen von Programmen erheblich erleichtern. Der Raspberry Pi 4 kann in vielen Projekten wie Audio- und Videoanwendungen, aber auch in Industriesteuerungen, Robotik, Spielen usw. eingesetzt werden. Dazu bietet er auch WiFi- und Bluetooth-Fähigkeiten, wodurch er sich zudem hervorragend für internetbasierte Steuerungs- und Überwachungsanwendungen eignet. In diesem Buch werden sowohl der Raspberry Pi 4 als auch der Arduino Uno in PID-basierten automatischen Steuerungsanwendungen eingesetzt. Nach einer grundlegenden Theorie der Regelsysteme werden funktionierende und getestete Projekte zur Steuerung realer Systeme mit PID-Reglern vorgestellt. Die Open-Loop-Eigenschaften, die Abstimmung der PID-Parameter und das Closed-Loop-Zeitverhalten der Systeme werden zusammen mit Blockdiagrammen, Schaltplänen und PID-Regelalgorithmen ausführlich diskutiert. Vollständige Programme für den Raspberry Pi und den Arduino Uno runden die im Buch vorgestellten Projekte ab. Die Regelsysteme können problemlos auch auf andere Projekte angewendet werden und die für den Raspberry Pi 4 angegebenen Programme sollten auch mit anderen Modellen der Raspberry Pi-Familie reibungslos funktionieren. Das Buch behandelt folgende Themen: Steuer- und Regelsysteme Analoge und digitale Sensoren Übertragungsfunktionen und zeitkontinuierliche Systeme Systemantwortfunktionen erster und zweiter Ordnung Zeitdiskrete digitale Systeme Zeitkontinuierliche PID-Regler Zeitdiskrete PID-Regler Zweipunkt-Temperaturregelung mit Raspberry Pi und Arduino Uno PID-basierte Temperaturregelung mit Raspberry Pi und Arduino Uno Motorsteuerung mit Raspberry Pi und Arduino Uno Wasserstandsregelung mit Raspberry Pi und Arduino Uno PID-basierte LED-Helligkeitsregelung mit Raspberry Pi und Arduino Uno
€ 39,80
Bestpreis
-

Elektor Publishing FreeCAD for Electronics Applications
Practical Introduction to 3D Modeling from Enclosure to Front Panel Embedding a vintage component, creating a professional looking home for a circuit board, or even designing a complex apparatus complete with a chassis – these and many other challenges turn into a stimulating pleasure with FreeCAD. Once you have internalized the basic processes, there are virtually no limits to your imagination. Starting to use a new software is never straightforward – especially with a tool as versatile as FreeCAD. Manageable, but at the same time easily usable individual components provide the starting point in this book. Putting these components together later results in assemblies. In the FreeCAD universe, a workable trajectory is demonstrated. The described procedure is illustrative so the examples are easily applied to custom tasks. The devices were made by the author and illustrated with photos. Creating a 3D design is requiring some effort but the initial investment pays off soon. Besides the impressive spatial representation of the projects, the extracted drawings yield a solid base for documentation and production. Extended FreeCAD capabilities like the unfolding of sheet metal parts enormously add to efficiency and pushes models forward into practical assembly. Soon you will definitely not want to do without FreeCAD!
€ 44,95
Mitglieder: € 40,46
-

Elektor Bundles 555 Timer Projects (Bundle)
This bundle is all about designing projects based on the 555 timer IC. The book features over 45 fully tested and documented projects. Together with the kit, which contains more than 130 through-hole components, you can build all the projects described on a breadboard. The setup also makes it easy to modify and experiment with the projects. Over 45 Builds for the Legendary 555 Chip (and the 556, 558) Some of the projects in the book are: Alternately Flashing Two LEDs Changing LED Flashing Rate Touch Sensor On/Off Switch Switch On/Off Delay Light-Dependent Sound Dark/Light Switch Tone Burst Generator Long Duration Timer Chasing LEDs LED Roulette Game Traffic Lights Continuity Tester Electronic Lock Switch Contact Debouncing Toy Electronic Organ Multiple Sensor Alarm System Metronome Voltage Multipliers Electronic Dice 7-Segment Display Counter Motor Control 7-Segment Display Dice Electronic Siren Various Other Projects Kit Contents Resistors 1x 15 kΩ 1x 68 kΩ 2x 47 kΩ 1x 82 kΩ 2x 820 Ω 1x 8.2 kΩ 3x 10 kΩ 1x 1.8 kΩ 1x 6.8 kΩ 14x 2.2 kΩ 10x 680 Ω 1x 27 kΩ 1x 5.6 kΩ 1x 560 kΩ 1x 4.7 kΩ 1x 3.3 kΩ 3x 33 kΩ 1x 36 kΩ 2x 100 kΩ 5x 1 kΩ 1x 3.9 kΩ 2x 56 kΩ 2x 12 kΩ 1x 10 kΩ potentiometer 1x 1 MΩ potentiometer 2x 50 kΩ potentiometer 3x 20 kΩ potentiometer 1x 10 kΩ potentiometer 1x 10 kΩ potentiometer 1x 50 kΩ potentiometer 1x 100 kΩ potentiometer 1x 50 kΩ potentiometer Capacitors 1x 0.33 μF 1x 1 μF 1x 10 nF 1x 22 nF 1x 47 nF 1x 100 nF 1x 10 μF electrolytic 1x 33 μF electrolytic 2x 100 μF electrolytic LEDs 10x 5 mm red LED 10x 3 mm red LED 3x 3 mm yellow LED 3x 3 mm green LED 1x Common-cathode 7-segment LED Semiconductors 3x 555 timer 1x CD4017 counter 1x CD4026 counter 1x CD4011 NAND gate 4x 1N4148 diode 1x IRFZ46N MOSFET 1x Thermistor 1x Light dependent resistor (LDR) Miscellaneous 1x Passive buzzer 1x Active buzzer 1x SG90 servo 1x 8 Ω mini loudspeaker 1x 9 V DC brushed motor 1x 5 V relay 1x 9 V battery clip 7x Pushbutton switches 1x Breadboard 1x Breadboard jumper wires
€ 69,95€ 54,95Bestpreis
-

Elektor Bundles Arduino UNO Q (Bundle)
Dieses Bundle enthält das Arduino UNO Q (2 GB) und das neue Buch "Arduino UNO Q and AI". Das Arduino UNO Q ist das erste UNO-Board mit einer hybriden Dual-Brain-Architektur, die einen leistungsstarken Linux-Prozessor mit einem Echtzeit-Mikrocontroller kombiniert – und so fortschrittliche Rechenleistung und präzise Steuerung auf einem Board vereint. Angetrieben von einer Qualcomm Dragonwing QRB2210 MPU mit Debian Linux und einer STM32U585-MCU für Echtzeitaufgaben ist das UNO Q für Anwendungen der nächsten Generation konzipiert. Von Edge-Computing und KI bis hin zu Robotik und Automatisierung bietet es hohe Leistung, ohne dabei an Benutzerfreundlichkeit einzubüßen. Schließen Sie einfach Ihre Peripheriegeräte an und legen Sie los – es ist keine zusätzliche Hardware erforderlich. Features Dual-Core-Architektur: Linux-MPU + Echtzeit-MCU Qualcomm Dragonwing QRB2210 mit Debian-Linux-Unterstützung STM32U585-Mikrocontroller für deterministische Steuerung Führt Arduino-Sketches über Zephyr OS aus Ideal für KI-, IoT-, Robotik- und Industrieprojekte Technische Daten Mikroprozessor (MPU) Qualcomm Dragonwing QRB2210:Quad-Core Arm Cortex-A53 @ 2,0 GHzAdreno GPU 3D-Grafikbeschleuniger2× ISP (13 MP + 13 MP oder 25 MP) @ 30 fps Mikrocontroller (MCU) STM32U585Arm Cortex-M33 bis zu 160 MHz2 MB Flash-Speicher786 KB SRAM RAM 2 GB LPDDR4 Stromversorgung Über USB-C-Anschluss: max. 5 V bei 3 AEingangsspannung (VIN): 7–24 V Speicher 16 GB eMMC USB 1× USB-C-Anschluss mit Host-/Geräterollenumschaltung, Stromrollenumschaltung und Videoausgang Konnektivität Wi-Fi 5 (2,4/5 GHz) mit integrierter AntenneBluetooth 5.1 mit integrierter Antenne Schnittstellen I²C/I³CSPIPWMCANUARTPSSIGPIOJTAGADC Video Videoausgabe über USB-CMIPI-DSI-Pins am JMEDIA-Header Extra 4× RGB-LEDs (vom Benutzer steuerbar)8× 13 blaue LED-Matrix1× Qwiic-Anschluss (3,3 V, I²C)1× BenutzertasteJCTL: MPU-Ferndebugging Anschluss Audio Mikrofon-Eingang / Kopfhörer-Ausgang / Line-Ausgang am JMISC MPU-Betriebssystem Linux Debian OS mit Upstream-Unterstützung Echtzeit-Betriebssystem Arduino Core auf Zephyr OS Containerisierung Docker- und Docker Compose-Unterstützung Unterstützte Betriebssysteme für Arduino App Lab Windows: Windows 10 oder höher (64-Bit)macOS: macOS 11 oder höher (64-Bit)Linux: Ubuntu 22.04 oder höher und Debian Trixie (64-Bit) Abmessungen 68,85 × 53,34 mm (UNO-Formfaktor) Downloads Datasheet User Manual Pinout Schematics Buch: Arduino UNO Q and AI – Learn to Build Intelligent Embedded Systems Entwickeln Sie intelligentere Embedded-Systeme mit dem Arduino UNO Q. Dieses Buch vermittelt Ihnen die Werkzeuge, das Wissen und das Vertrauen, um Ideen in intelligente, funktionierende Lösungen mit der Arduino UNO Q-Plattform umzusetzen. Entdecken Sie, wie Sie intelligente Embedded-Systeme mit dem Arduino UNO Q und KI realisieren können. Schöpfen Sie das volle Potenzial des Arduino UNO Q aus – einer Next-Generation-Plattform, die die Echtzeit-Leistung des STM32U585-Mikrocontrollers mit der Flexibilität eines Qualcomm Dragonwing QRB2210-Mikroprozessors kombiniert. Lernen Sie, wie Sie reale Anwendungen schnell prototypisieren können – mit der Arduino IDE für Low-Level-Embedded-Steuerung und Python im Arduino App Lab für High-Level-Entwicklung. Gewinnen Sie Sicherheit durch praxisnahe Projekte, die Sie Schritt für Schritt von den grundlegenden Funktionen bis hin zu vollständig funktionsfähigen Systemen führen. Entdecken Sie sofort einsatzbereite, KI-basierte Arduino App Lab-Beispiele und erfahren Sie, wie diese Ihre Entwicklung beschleunigen und die Time-to-Market verkürzen können. Steigen Sie in die Welt der Edge AI ein – mit einer klaren und praxisorientierten Einführung in das Edge Impulse Studio, ganz ohne Vorkenntnisse im Bereich KI. Folgen Sie einem vollständigen, praxisnahen Workflow zur Entwicklung einer Keyword-Spotting-KI-Anwendung – von der Datenerfassung über das Training und die Optimierung bis hin zur On-Device-Inferenz mit dem Edge Impulse Studio. Schließen Sie die Lücke zwischen Embedded-Systemen und Machine Learning und lernen Sie, wie Sie Intelligenz direkt auf Ihre Hardware bringen. Ideal für Embedded-Entwickler, Lehrkräfte, Studierende und Maker, die bei der KI-gestützten Produktentwicklung einen Schritt voraus sein möchten. Dieses Bundle enthält: Arduino UNO Q (2 GB) (Einzelpreis: 50 €) Buch: Arduino UNO Q and AI (Einzelpreis: 35 €)
€ 84,95€ 74,95Bestpreis
-

Elektor Digital Elektor Special: Solaranlagen und Photovoltaik (PDF)
Der Themenbereich Solartechnik hat in 2023 vor allem auch wegen der Aussetzung der Mehrwertsteuer für alle Produkte und Dienstleistungen im direkten Zusammenhang mit Solaranlagen einen beispiellosen Boom in Deutschland erfahren. Die Nachfrage nach Anlagen aller Arten und Größenordnungen ist enorm gestiegen. Dieses Special bietet viele kleine Schaltungen vom Solar-Akkulader über solare Nachführsteuerungen bis hin zu Regelungen für Warmwasseranlagen und Tipps aus den unterschiedlichsten Bereichen der Solartechnik. Außerdem gibt es noch einen umfangreichen Beitrag zum Thema Balkonkraftwerke und wie man diese „ins Internet“ bringt plus praktische Informationen zum Aufbau und der Technik hinter Solarmodulen. Inhalt Grundlagen Photovoltaik-Systeme Berechnen und RealisierenGrundlegende Zusammenhänge und neue Entwicklungen zum Thema Energiegewinnung aus der Sonne. LichtsensorikTageslicht mit LEDs gemessen. SonnenstromSolares Laden mit und ohne Laderegler. Kabelquerschnitte und Energieverluste in SolaranlagenWichtige Gedanken zu unterschiedlichen Maximalwerten im Hinblick auf den Strom, der durch Solaranlagenkabel fließen darf. SolarmoduleWas Sie schon immer über Solarpanels wissen wollten… Ideal Diode Controller„Dioden“ mit geringer Verlustleistung. Projekte EnergieloggerEnergie messen und aufzeichnen. Winzige SolarversorgungSonnenlicht rein, 3,3 V raus. DIY-DTUDaten kleiner Wechselrichter per μC auslesen. Solar ChargerSolarladegerät für unterwegs. Regelung für Solar-WarmwasseranlagenEnergiegewinnung auf hohem Niveau. MPP T-SolarladerMaximale Leistung aus der Sonne. HeliostatSonne und Sternen auf der Spur. Solar-LeuchteEinfach (und) funktionell. Solarspannungswandler für IoT-GeräteDas Licht in Innenräumen nutzen. Akkulader für GlobetrotterEnergie vom Himmel. Solar-AkkuladerMit Schutz gegen Tiefentladung. Akkulader mit SolarzellenPIC12C671 umgeht Über- und Tiefenladen. Spannungswandler für Photovoltaik-ModuleEin Beitrag von Transfer MultisortElektronik. Solar-LadereglerFür Panele bis 53 Watt. Sonnenkur für müde Akkus Überwachung von SolarmodulenErkennen und Lokalisieren von problematischen Panels in großen Anordnungen. Akkulader mit Solarzellen und MAX1771. Balkonkraftwerk 2.0Alles neu: Solarpanels, Aufstellung und Wechselrichter. Tipps Solar-Feuchtesensor Solar-Lader mit hohem Wirkungsgrad Shunt für Solaranlage Nachführung für Solarmodul zBot: Solar/Batterie-Stromversorgung Simpler Solar-Lader Solarzellen-Spannungsanzeige Solar-Nachtlicht Alternativer Solarakkulader
€ 11,90
Mitglieder: € 10,71
-

Elektor Digital LTspice Essentials (E-book)
An Introduction to Circuit Simulation LTspice, developed by Analog Devices, is a powerful, fast, and free SPICE simulator, schematic capture, and waveform viewer with a large database of components supported by SPICE models from all over the world. Drawing a schematic in LTspice is easy and fast. Thanks to its powerful graphing features, you can visualize the voltages and currents in a circuit, and also the power consumption of its components and much more. This book is about learning to design and simulate electronic circuits using LTspice. Among others, the following topics are treated: DC and AC circuits Signal diodes and Zener diodes Transistor circuits including oscillators Thyristor/SCR, diac, and triac circuits Operational amplifier circuits including oscillators The 555 timer IC Filters Voltage regulators Optocouplers Waveform generation Digital logic simulation including the 74HC family SPICE modeling LTspice is a powerful electronic circuit simulation tool with many features and possibilities. Covering them all in detail is not possible in a book of this size. Therefore, this book presents the most common topics like DC and AC circuit analysis, parameter sweeping, transfer functions, oscillators, graphing, etc. Although this book is an introduction to LTspice, it covers most topics of interest to people engaged in electronic circuit simulation. The book is aimed at electronic/electrical engineers, students, teachers, and hobbyists. Many tested simulation examples are given in the book. Readers do not need to have any computer programming skills, but it will help if they are familiar with basic electronic circuit design and operation principles. Readers who want to dive deeper can find many detailed tutorials, articles, videos, design files, and SPICE circuit models on the Internet. All the simulation examples used in the book are available as files at the webpage of this book. Readers can use these example circuits for learning or modify them for their own applications.
€ 32,95
Mitglieder: € 29,66
-
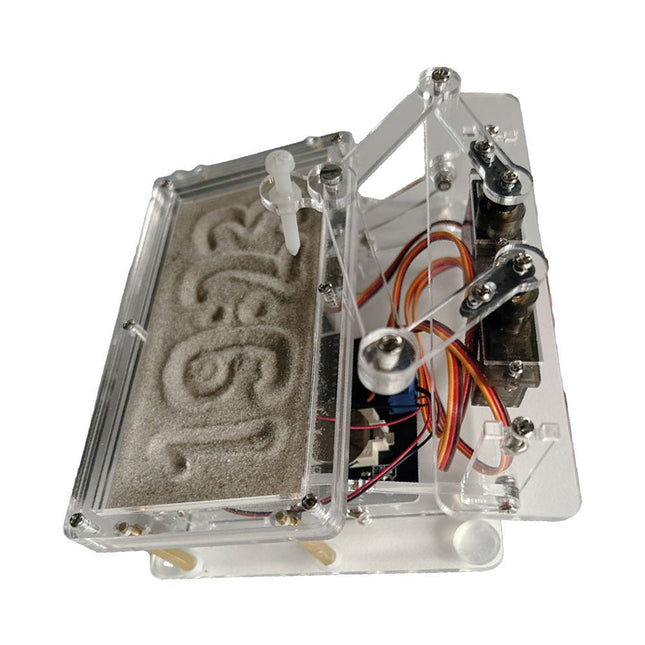
Elektor Labs Elektor Sanduhr für Raspberry Pi Pico
Raspberry Pi-basierter Eyecatcher Eine handelsübliche Sanduhr zeigt nur, wie die Zeit verrinnt. Dagegen zeigt diese Raspberry Pi Pico-gesteuerte Sanduhr die genaue Uhrzeit an, indem die vier Ziffern für Stunde und Minute in die Sandschicht „eingraviert“ werden. Nach einer einstellbaren Verzögerung wird der Sand durch zwei Vibrationsmotoren flachgedrückt und der Zyklus beginnt von vorne. Das Herzstück der Sanduhr sind zwei Servomotoren, die über einen Pantographenmechanismus einen Schreibstift antreiben. Ein dritter Servomotor hebt den Stift auf und ab. Der Sandbehälter ist mit zwei Vibrationsmotoren ausgestattet, um den Sand zu glätten. Der elektronische Teil der Sanduhr besteht aus einem Raspberry Pi Pico und einer RTC/Treiberplatine mit Echtzeituhr, plus Treiberschaltungen für die Servomotoren. Eine ausführliche Bauanleitung steht zum Download bereit. Features Abmessungen: 135 x 110 x 80 mm Bauzeit: ca. 1,5 bis 2 Stunden Lieferumfang 3x vorgeschnittene Acrylplatten mit allen mechanischen Teilen 3x Mini-Servomotoren 2x Vibrationsmotoren 1x Raspberry Pi Pico 1x RTC/Treiberplatine mit montierten Teilen Muttern, Bolzen, Abstandshalter und Drähte für die Baugruppe Feinkörniger weißer Sand
€ 49,95€ 39,95Bestpreis
-

Elektor Digital FreeRTOS for ESP32-Arduino (E-book)
Practical Multitasking Fundamentals Programming embedded systems is difficult because of resource constraints and limited debugging facilities. Why develop your own Real-Time Operating System (RTOS) as well as your application when the proven FreeRTOS software is freely available? Why not start with a validated foundation? Every software developer knows that you must divide a difficult problem into smaller ones to conquer it. Using separate preemptive tasks and FreeRTOS communication mechanisms, a clean separation of functions is achieved within the entire application. This results in safe and maintainable designs. Practicing engineers and students alike can use this book and the ESP32 Arduino environment to wade into FreeRTOS concepts at a comfortable pace. The well-organized text enables you to master each concept before starting the next chapter. Practical breadboard experiments and schematics are included to bring the lessons home. Experience is the best teacher. Each chapter includes exercises to test your knowledge. The coverage of the FreeRTOS Application Programming Interface (API) is complete for the ESP32 Arduino environment. You can apply what you learn to other FreeRTOS environments, including Espressif’s ESP-IDF. The source code is available from GitHub. All of these resources put you in the driver’s seat when it is time to develop your next uber-cool ESP32 project. What you will learn: How preemptive scheduling works within FreeRTOS The Arduino startup “loopTask” Message queues FreeRTOS timers and the IDLE task The semaphore, mutex, and their differences The mailbox and its application Real-time task priorities and its effect Interrupt interaction and use with FreeRTOS Queue sets Notifying tasks with events Event groups Critical sections Task local storage The gatekeeper task
€ 39,95
Mitglieder: € 35,96
-

Elektor Publishing The Book of 555 Timer Projects
Over 45 Builds for the Legendary 555 Chip (and the 556, 558) The 555 timer IC, originally introduced by the Signetics Corporation around 1971, is sure to rank high among the most popular analog integrated circuits ever produced. Originally called the IC Time Machine, this chip has been used in many timer-related projects by countless people over decades. This book is all about designing projects based on the 555 timer IC. Over 45 fully tested and documented projects are presented. All projects have been fully tested by the author by constructing them individually on a breadboard. You are not expected to have any programming experiences for constructing or using the projects given in the book. However, it’s definitely useful to have some knowledge of basic electronics and the use of a breadboard for constructing and testing electronic circuits. Some of the projects in the book are: Alternately Flashing Two LEDs Changing LED Flashing Rate Touch Sensor On/Off Switch Switch On/Off Delay Light-Dependent Sound Dark/Light Switch Tone Burst Generator Long Duration Timer Chasing LEDs LED Roulette Game Traffic Lights Continuity Tester Electronic Lock Switch Contact Debouncing Toy Electronic Organ Multiple Sensor Alarm System Metronome Voltage Multipliers Electronic Dice 7-Segment Display Counter Motor Control 7-Segment Display Dice Electronic Siren Various Other Projects The projects given in the book can be modified or expanded by you for your very own applications. Electronic engineering students, people engaged in designing small electronic circuits, and electronic hobbyists should find the projects in the book instructive, fun, interesting, and useful.
€ 34,95
Mitglieder: € 31,46


