
Elektor Produkte
-

Elektor Labs USB Logic Analyzer (8 Kanäle, 24 MHz)
Dieser USB Logic Analyzer ist ein 8-Kanal-Logikanalysator, bei dem jeder Eingang doppelt für die analoge Datenaufzeichnung dient. Es eignet sich perfekt zum Debuggen und Analysieren von Signalen wie I²C, UART, SPI, CAN und 1-Wire. Dabei wird ein digitaler Eingang, der mit einem zu testenden Gerät (DUT) verbunden ist, mit einer hohen Abtastrate abgetastet. Die Verbindung zum PC erfolgt via USB.Technische DatenKanäle8 digitale KanäleMaximale Abtastrate24 MHzMaximale Eingangsspannung0 V ~ 5 VBetriebstemperatur0°C ~ 70°CEingangsimpedanz1 MΩ || 10 pFUnterstützte ProtokolleI²C, SPI, UART, CAN, 1-Wire etc.PC-VerbindungUSBAbmessungen55 x 28 x 14 mmLieferumfangUSB Logic Analyzer (8 Kanäle, 24 MHz)USB-KabelJumper Wire Ribbon KabelDownloadsSoftware
€ 19,95
Mitglieder: € 17,96
-
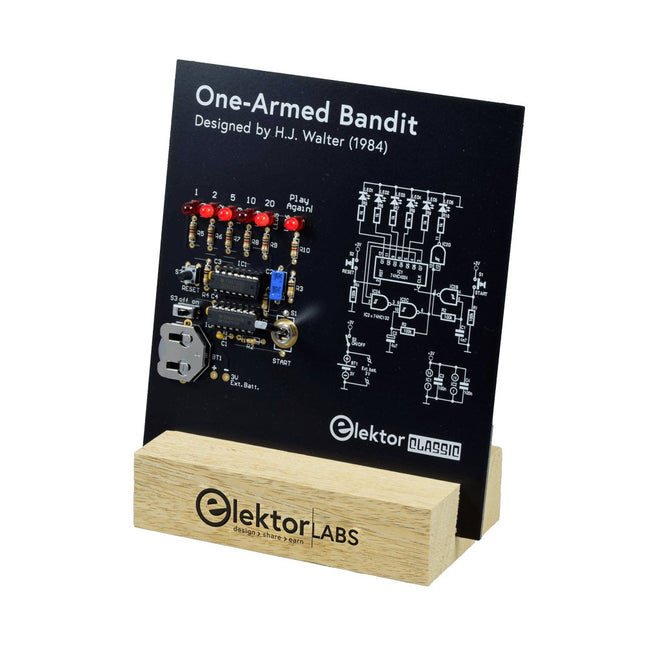
Elektor Labs Elektor Einarmiger Bandit
Ziehen Sie den Hebel nach unten, um die höchste Punktzahl zu erzielen!Dieser Elektor-Schaltungsklassiker aus dem Jahr 1984 zeigt eine spielerische Anwendung von Logik-ICs der CMOS-400x-Serie in Kombination mit LEDs, einer damals sehr beliebten Kombination. Das Projekt imitiert einen Spielautomaten mit rotierenden Ziffern.Das SpielUm das Spiel zu spielen, vereinbaren Sie zunächst die Anzahl der Runden. Spieler 1 betätigt den Schalthebel so lange wie gewünscht und lässt ihn los. Die LEDs zeigen dann die Punktzahl an, die sich aus der Summe der 50-20-10-5 aufleuchtenden Ziffern ergibt. Wenn die Play Again!-LED aufleuchtet, hat Spieler 1 eine weitere, „freie“ Runde. Wenn nicht, ist Spieler 2 am Zug. Die Spieler behalten ihre Punkte im Auge und der Spieler mit der höchsten Punktzahl gewinnt.FeaturesLEDs zeigen den Punktestand anMulti-Player und Play Again!Symbole des Elektor Heritage CircuitGetestet und geprüft von Elektor LabsEdukatives und geekiges ProjektNur Teile mit DurchgangslochLieferumfangPlatineAlle KomponentenHolzständerStücklisteWiderstände (5%, 250 mW)R1,R2,R3,R4 = 100kΩR5,R6,R7,R8,R9,R10 = 1kΩKondensatorenC1 = 4.7nF, 10%, 50V, 5mmC2 = 4.7μF, 10%, 63V, axialC3,C4 = 100nF, 10 %, 50V, Keramik X7R, 5mmHalbleiterLED1-LED6 = rot, 5mm (T1 3/4)IC1 = 74HC4024IC2 = 74HC132SonstigesS1 = Schalter, Kipphebel, 21-mm-Hebel, SPDT, tastendS2 = Schalter, taktil, 24V, 50mA, 6x6mmS3 = Schalter, Schieber, SPDTIC1,IC2 = IC-Sockel, DIP14BT1 = CR2032-Batteriehalteklammer für PlatinenmontageTischständerPCB 230098-1Nicht im Lieferumfang enthalten: BT1 = CR2032-Knopfzellenbatterie
€ 39,95€ 15,98Bestpreis
-
Elektor Digital 3D Modeling and Printing for Electronics (E-book)
Learn to 3D Model & 3D Print with Tinkercad With this book and the complementary videos, you’ll be 3D printing in no time at all. This course is meant to have you make casings for electronic components but also goes into optimizing your print technique as well as adding a little flair to your 3D creations. The course is perfect for you if you just bought your (first) 3D printer and want to print your own designs as soon as possible while also being able to get more background information. You’ll get to know the workings of a 3D printer and what software to use to model your object, not forgetting to make it print perfectly. We’ll even use the magic of 3D printing to create things that appear impossible to make (this fast and simple) with any other rapid-prototyping technique. At the end of this course, it’ll be second nature for you to design an object for 3D printing and fine-tune your print-setting to get the perfect print! The book includes the following 7 video tutorials: Introduction Basic 3D modeling for 3D printing Modeling a casing Post-processing Pushing the limits Movable parts Snap fits
€ 32,95
Mitglieder: € 29,66
-

Elektor Labs Elektor Arduino Nano MCCAB Trainingsboard
Das Elektor Arduino Nano MCCAB Trainingsboard enthält alle Bauteile (inkl. Arduino Nano), die für die Übungen des "Mikrocontroller-Praxiskurs für Arduino-Einsteiger" benötigt werden wie Leuchtdioden, Schalter, Taster, akustische Signalgeber usw. Auch externe Sensoren, Motoren oder Baugruppen können mit diesem Mikrocontroller-Übungssystem abgefragt oder gesteuert werden. Technische Daten (Arduino Nano Trainingsboard MCCAB) Stromversorgung Über die USB-Verbindung des zur Erstellung der Programme sowieso angeschlossenen PCs oder ein externes Netzteil (nicht im Lieferumfang enthalten) Betriebsspannung +5 Vcc Eingangsspannung Alle Eingänge 0 V bis +5 V VX1 und VX2 +8 V bis +12 V (nur bei Verwendung eines externen Netzteils) Mikrocontrollermodul Arduino Nano Hardwareperipherie LCD 2x16 Zeichen Potenziometer P1 & P2 JP3: Auswahl der Betriebsspannung von P1 & P2 Verteiler SV4: Verteiler für die BetriebsspannungenSV5, SV6: Verteiler für die Ein-/Ausgänge des Mikrocontrollers Schalter und Taster RESET-Taster auf dem Arduino Nano-Modul6x Tastschalter K1 … K66x Schiebeschalter S1 … S6JP2: Verbindung der Schalter mit den Eingängen des Mikrocontrollers Summer Piezo-Summer Buzzer1 mit Steckbrücke auf JP6 Leuchtanzeigen LED L auf dem Arduino Nano-Modul, verbunden mit GPIO D1311x LED: Zustandsanzeige für die Ein-/AusgängeJP6: Verbindung der LEDs LD10 … LD20 mit den GPIOs D2 … D12 Serielle SchnittstellenSPI & I²C JP4: Auswahl des Signals an Pin X der SPI-Steckerleiste SV12SV9 bis SV12: SPI-Interface (3,3 V/5 V) bzw. I²C-Interface Schaltausgang für externe Geräte SV1, SV7: Schaltausgang (maximal +24 V/160 mA, extern zugeführt)SV2: 2x13 Pins zum Anschluss externer Module 3x3 LED-Matrix (9 rote LEDs) SV3: Spalten der 3x3 LED-Matrix (Ausgänge D6 … D8)JP1: Verbindung der Reihen mit den GPIOs D3 … D5 Software Library MCCABLib Steuerung der Hardware-Komponenten (Schalter, Taster, Leuchtdioden, 3x3 LED-Matrix, Summer) auf dem MCCAB Trainingsboard Betriebstemperatur bis +40 °C Abmessungen 100 x 100 x 20 mm Technische Daten (Arduino Nano) Mikrocontroller ATmega328P Architektur AVR Betriebsspannung 5 V Flashspeicher 32 KB, davon 2 KB vom Bootloader belegt SRAM 2 KB Taktfrequenz 16 MHz Analoge IN-Pins 8 EEPROM 1 KB DC-Strom pro I/O-Pin 40 mA an einem I/O-Pin, insgesamt maximal 200 mA an allen Pins gemeinsam Eingangsspannung 7-12 V Digitale I/O-Pins 22 (6 davon sind PWM-fähig) PWM-Ausgänge 6 Stromverbrauch 19 mA Abmessungen 18 x 45 mm Gewicht 7 g Lieferumfang 1x Elektor Arduino Nano Trainingsboard (MCCAB) 1x Arduino Nano
€ 79,95
Mitglieder: € 71,96
-

Elektor Digital High-End Valve Amplifiers 2 (E-book)
Nobody has any doubt that valve amplifiers produce a remarkably beautiful sound. They have a lively, deep, clear, and expressive sound, and dynamically they do not appear to have any limitations. The author investigates, in a systematic theoretical approach, the reasons for these beautiful properties. He develops new models for power valves and transformers, thus enabling the designer to determine the properties of the amplifier during the design process. Mathematical models for the coupling of power valve(s) and output transformer are provided. These will generate new insights in a special kind of distortion: the dynamic damping factor distortion (DDFD). With mathematical models in the complex domain, especially the properties at the limits of our hearing range (from 20 Hz to 20 kHz) are investigated and the minimal stability criteria for the amplifier are formulated. The often-applied negative feedback in amplifiers is extensively modelled and discussed in relation to our hearing appreciating. And after all this theory a fine selection of special amplifiers is presented and discussed. You will notice in this book that the author not only writes about amplifier technique, but tells about the way the development of valve amplifiers can have an influence on your daily life; even the usefulness of patents is discussed. Summarizing: new theories and solutions for perfect audio with valve amplifiers. Not only the professional and the DIY-er but everyone who wants to understand valve amplifiers will read this book with much pleasure.
€ 34,95
Mitglieder: € 31,46
-
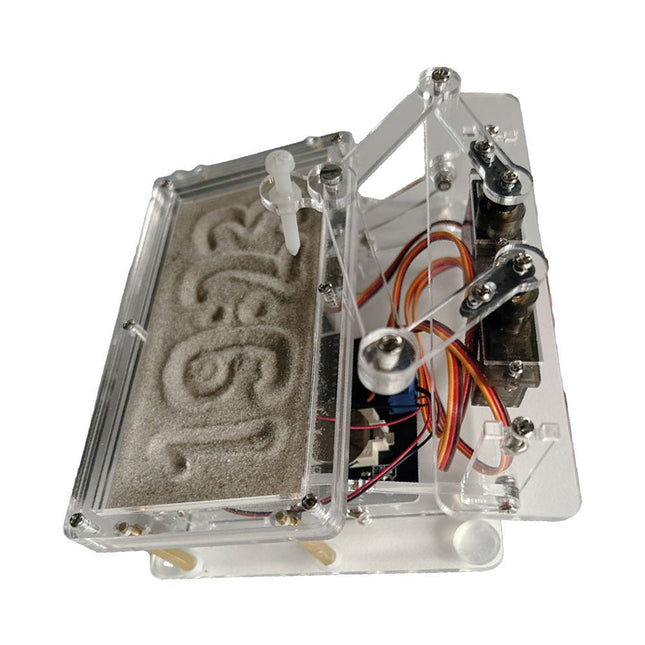
Elektor Labs Elektor Sanduhr für Raspberry Pi Pico
Raspberry Pi-basierter Eyecatcher Eine handelsübliche Sanduhr zeigt nur, wie die Zeit verrinnt. Dagegen zeigt diese Raspberry Pi Pico-gesteuerte Sanduhr die genaue Uhrzeit an, indem die vier Ziffern für Stunde und Minute in die Sandschicht „eingraviert“ werden. Nach einer einstellbaren Verzögerung wird der Sand durch zwei Vibrationsmotoren flachgedrückt und der Zyklus beginnt von vorne. Das Herzstück der Sanduhr sind zwei Servomotoren, die über einen Pantographenmechanismus einen Schreibstift antreiben. Ein dritter Servomotor hebt den Stift auf und ab. Der Sandbehälter ist mit zwei Vibrationsmotoren ausgestattet, um den Sand zu glätten. Der elektronische Teil der Sanduhr besteht aus einem Raspberry Pi Pico und einer RTC/Treiberplatine mit Echtzeituhr, plus Treiberschaltungen für die Servomotoren. Eine ausführliche Bauanleitung steht zum Download bereit. Features Abmessungen: 135 x 110 x 80 mm Bauzeit: ca. 1,5 bis 2 Stunden Lieferumfang 3x vorgeschnittene Acrylplatten mit allen mechanischen Teilen 3x Mini-Servomotoren 2x Vibrationsmotoren 1x Raspberry Pi Pico 1x RTC/Treiberplatine mit montierten Teilen Muttern, Bolzen, Abstandshalter und Drähte für die Baugruppe Feinkörniger weißer Sand
€ 49,95€ 39,95Bestpreis
-
Elektor Digital Practical Audio DSP Projects with the ESP32 (E-book)
Einfache und kostengünstige digitale Signalverarbeitung Ziel dieses Buches ist es, die Grundprinzipien der digitalen Signalverarbeitung (DSP) zu vermitteln und sie unter Verwendung eines Minimums an Mathematik aus praktischer Sicht einzuführen. Es wird nur das Grundniveau der Theorie zeitdiskreter Systeme vermittelt, das ausreicht, um DSP-Anwendungen in Echtzeit zu implementieren. Die praktischen Umsetzungen werden in Echtzeit mithilfe des beliebten Mikrocontroller-Entwicklungsboards ESP32 DevKitC beschrieben. Mit dem kostengünstigen und äußerst beliebten ESP32-Mikrocontroller sollten Sie in der Lage sein, grundlegende DSP-Projekte mit Abtastfrequenzen im Audiobereich zu entwerfen. Die gesamte Programmierung erfolgt mit der beliebten Arduino IDE in Verbindung mit dem C-Sprachcompiler. Nachdem das Buch eine solide Grundlage der DSP-Theorie und relevante Diskussionen über die wichtigsten DSP-Softwaretools auf dem Markt gelegt hat, werden die folgenden audiobasierten Sound- und DSP-Projekte vorgestellt: Verwendung eines I²S-basierten digitalen Mikrofons zur Audioaufnahme Verwendung eines I²S-basierten Klasse-D-Audioverstärkers und Lautsprechers Wiedergabe von auf einer SD-Karte gespeicherter MP3-Musik über einen I²S-basierten Verstärker und Lautsprecher Wiedergabe von im ESP32-Flash-Speicher gespeicherten MP3-Musikdateien über einen I²S-basierten Verstärker und Lautsprecher Mono- und Stereo-Internetradio mit I²S-basierten Verstärkern und Lautsprechern Text-zu-Sprache-Ausgabe mit einem I²S-basierten Verstärker und Lautsprecher Verwendung der Lautstärkeregelung in I²S-basierten Verstärker- und Lautsprechersystemen Ein sprechender Veranstaltungszähler mit einem I²S-basierten Verstärker und Lautsprecher Ein einstellbarer Sinusgenerator mit I²S-basiertem Verstärker und Lautsprecher Verwendung des schnellen 24-Bit-ADC/DAC-Moduls Pmod I²S2 Digitales Tiefpass- und Bandpass-Echtzeit-FIR-Filterdesign mit externer und interner A/D- und D/A-Wandlung Digitales Tiefpass- und Bandpass-Echtzeit-IIR-Filterdesign mit externer und interner A/D- und D/A-Wandlung Schnelle Fourier-Transformationen (FFT)
€ 32,95
Mitglieder: € 29,66
-

Elektor Digital Mastering the Arduino Uno R4 (E-book)
Programming and Projects for the Minima and WiFi Based on the low-cost 8-bit ATmega328P processor, the Arduino Uno R3 board is likely to score as the most popular Arduino family member, and this workhorse has been with us for many years. Eleven years later, the long-overdue successor, the Arduino Uno R4, was released. It is built around a 48 MHz, 32-bit Arm Cortex-M4 microcontroller and provides significantly expanded SRAM and Flash memory. Additionally, a higher-precision ADC and a new DAC are added to the design. The Uno R4 board also supports the CAN Bus with an interface. Two versions of the board are available: Uno R4 Minima, and Uno R4 WiFi. This book is about using these new boards to develop many different and interesting projects with just a handful of parts and external modules. All projects described in the book have been fully tested on the Uno R4 Minima or the Uno R4 WiFi board, as appropriate. The project topics include the reading, control, and driving of many components and modules in the kit as well as on the relevant Uno R4 board, including LEDs 7-segment displays (using timer interrupts) LCDs Sensors RFID Reader 4x4 Keypad Real-time clock (RTC) Joystick 8×8 LED matrix Motors DAC (Digital-to-analog converter) LED matrix WiFi connectivity Serial UART CAN bus Infrared controller and receiver Simulators … all in creative and educational ways with the project operation and associated software explained in great detail.
€ 34,95
Mitglieder: € 31,46
-

Elektor Bundles Arduino Uno R4 WiFi (Bundle)
Buch: Mastering the Arduino Uno R4 Das Arduino Uno R3 Board basiert auf dem kostengünstigen 8-Bit-Prozessor ATmega328P und dürfte sich als das beliebteste Mitglied der Arduino-Familie erweisen. Dieses zuverlässige Board begleitet uns seit vielen Jahren. Elf Jahre später erschien der lang erwartete Nachfolger, das Arduino Uno R4. Es basiert auf einem 48-MHz-32-Bit-Arm-Cortex-M4-Mikrocontroller und bietet deutlich erweiterten SRAM- und Flash-Speicher. Zusätzlich wurden ein hochpräziserer ADC und ein neuer DAC integriert. Das Uno R4 Board unterstützt außerdem den CAN-Bus mit einer entsprechenden Schnittstelle. Das Board ist in zwei Versionen erhältlich: Uno R4 Minima und Uno R4 WiFi. Dieses Buch zeigt, wie man mit diesen neuen Boards und nur wenigen Bauteilen und externen Modulen viele verschiedene und interessante Projekte realisieren kann. Alle im Buch beschriebenen Projekte wurden, je nach Modell, vollständig auf dem Uno R4 Minima oder dem Uno R4 WiFi-Board getestet. Die Projektthemen umfassen das Auslesen, Steuern und Ansteuern zahlreicher Komponenten und Module des Bausatzes sowie des jeweiligen Uno R4-Boards, einschließlich LEDs 7-Segment-Anzeigen (mit Timer-Interrupts) LCDs Sensoren RFID-Leser 4×4-Tastatur Echtzeituhr (RTC) Joystick 8×8 LED-Matrix Motoren DAC (Digital-Analog-Wandler) LED-Matrix WiFi-Konnektivität Serieller UART CAN-Bus Infrarot-Controller und -Empfänger Simulatoren … alles auf kreative und lehrreiche Weise, wobei die Funktionsweise des Projekts und die zugehörige Software sehr detailliert erklärt werden. Arduino Uno R4 WiFi Der Arduino Uno R4 wird vom Renesas RA4M1 32-Bit ARM Cortex-M4 Prozessor angetrieben und bietet dadurch eine deutliche Steigerung der Rechenleistung, des Speichers und der Funktionalität. Die WiFi-Version verfügt zusätzlich zum RA4M1 über ein ESP32-S3 WLAN-Modul und erweitert so die kreativen Möglichkeiten für Maker und Ingenieure. Der Arduino Uno R4 taktet mit 48 MHz und bietet damit eine dreifache Steigerung gegenüber dem beliebten Uno R3. Darüber hinaus wurde der SRAM von 2 kB auf 32 kB und der Flash-Speicher von 32 kB auf 256 kB erweitert, um komplexere Projekte zu unterstützen. Auf Wunsch der Community wurde der USB-Anschluss auf USB-C umgestellt und die maximale Versorgungsspannung dank eines verbesserten Wärmemanagements auf 24 V erhöht. Die Platine verfügt über einen CAN-Bus und einen SPI-Anschluss, wodurch Anwender den Verkabelungsaufwand reduzieren und durch den Anschluss mehrerer Shields parallele Aufgaben ausführen können. Ein 12-Bit-Analog-DAC ist ebenfalls auf der Platine vorhanden. Technische Daten Mikrocontroller Renesas RA4M1 (ARM Cortex-M4) USB USB-C Programmieranschluss Anschlüsse Digitale Ein-/Ausgangsanschlüsse 14 Anschlüsse Analoge Eingangsanschlüsse 6 DAC 1 RTC 1 PWM-Anschlüsse 6 Kommunikation UART 1x I²C 1x SPI 1x Qwiic I²C-Anschluss 1x CAN 1x CAN-Bus Stromversorgung Betriebsspannung 5 V Eingangsspannung (VIN) 6-24 V Gleichstrom pro I/O-Pin 8 mA Taktfrequenz Hauptkern 48 MHz Speicher RA4M1 256 kB Flash, 32 kB RAM LED-Matrix 12 x 8 (96 rote LEDs) Abmessungen 68,9 x 53,4 mm Downloads Datasheet Schematics Dieses Bundle enthält: Buch: Mastering the Arduino Uno R4 (Einzelpreis: 45 €) Arduino Uno R4 WiFi (Einzelpreis: 30 €)
€ 74,95€ 64,95Bestpreis
-
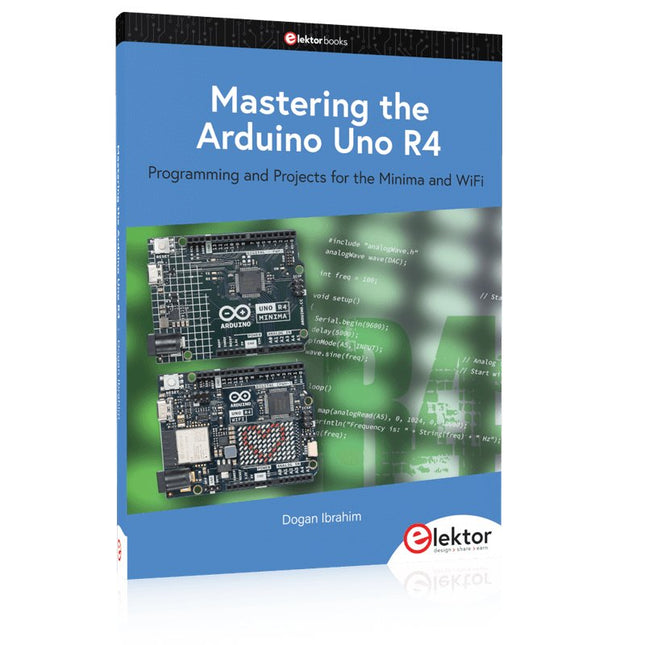
Elektor Publishing Mastering the Arduino Uno R4
Programming and Projects for the Minima and WiFi Based on the low-cost 8-bit ATmega328P processor, the Arduino Uno R3 board is likely to score as the most popular Arduino family member, and this workhorse has been with us for many years. Eleven years later, the long-overdue successor, the Arduino Uno R4, was released. It is built around a 48 MHz, 32-bit Arm Cortex-M4 microcontroller and provides significantly expanded SRAM and Flash memory. Additionally, a higher-precision ADC and a new DAC are added to the design. The Uno R4 board also supports the CAN Bus with an interface. Two versions of the board are available: Uno R4 Minima, and Uno R4 WiFi. This book is about using these new boards to develop many different and interesting projects with just a handful of parts and external modules. All projects described in the book have been fully tested on the Uno R4 Minima or the Uno R4 WiFi board, as appropriate. The project topics include the reading, control, and driving of many components and modules in the kit as well as on the relevant Uno R4 board, including LEDs 7-segment displays (using timer interrupts) LCDs Sensors RFID Reader 4x4 Keypad Real-time clock (RTC) Joystick 8×8 LED matrix Motors DAC (Digital-to-analog converter) LED matrix WiFi connectivity Serial UART CAN bus Infrared controller and receiver Simulators … all in creative and educational ways with the project operation and associated software explained in great detail.
€ 44,95
Mitglieder: € 40,46
-
Elektor Digital Getting Started With Java Using Eclipse (E-book)
Mastering the Language and the Development Platform Many people would like to learn Java but getting started is not easy since programming with Java requires at least two things: mastering the programming language and the development environment. With the help of many examples, this book shows how the language is structured. In addition, it employs the Eclipse development environment as an example of a powerful tool to teach developing Java programs. In Basics, the first part of the book, you acquire your Java and Eclipse basic knowledge. This part lays the programming foundations, gives you an overview of Java technology, and shows you what is special about object-oriented programming. In the second part called Java Language, everything revolves around the subtleties of the Java language and this is where the first small Java applications are created, aided by a fine blend of the knowledge part and practical exercises. Java Technology is both the name and the focus of the third part which also introduces you to the rules to observe when programming, what class libraries are and what advantages they have. In addition, you will learn how to test programs, what algorithms are, and how to program them. The fourth part, Java Projects, enables you to apply all the previous elements in an application with a graphical user interface. The project shows how to develop a larger application piece by piece with the Eclipse development environment. The Appendix concludes with a section on frequent errors that can occur when working with Eclipse, and a Glossary.
€ 34,95
Mitglieder: € 31,46
-
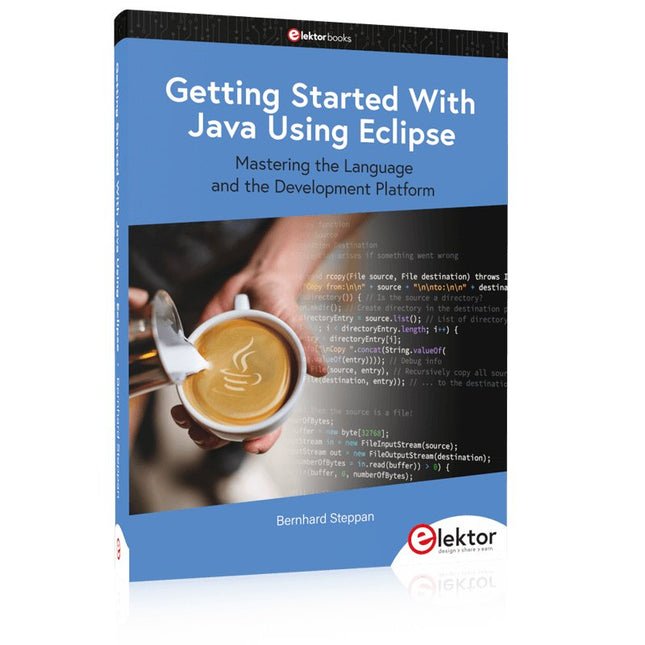
Elektor Publishing Getting Started With Java Using Eclipse
Mastering the Language and the Development Platform Many people would like to learn Java but getting started is not easy since programming with Java requires at least two things: mastering the programming language and the development environment. With the help of many examples, this book shows how the language is structured. In addition, it employs the Eclipse development environment as an example of a powerful tool to teach developing Java programs. In Basics, the first part of the book, you acquire your Java and Eclipse basic knowledge. This part lays the programming foundations, gives you an overview of Java technology, and shows you what is special about object-oriented programming. In the second part called Java Language, everything revolves around the subtleties of the Java language and this is where the first small Java applications are created, aided by a fine blend of the knowledge part and practical exercises. Java Technology is both the name and the focus of the third part which also introduces you to the rules to observe when programming, what class libraries are and what advantages they have. In addition, you will learn how to test programs, what algorithms are, and how to program them. The fourth part, Java Projects, enables you to apply all the previous elements in an application with a graphical user interface. The project shows how to develop a larger application piece by piece with the Eclipse development environment. The Appendix concludes with a section on frequent errors that can occur when working with Eclipse, and a Glossary.
€ 44,95
Mitglieder: € 40,46
-

Elektor Publishing FreeCAD for Electronics Applications
Practical Introduction to 3D Modeling from Enclosure to Front Panel Embedding a vintage component, creating a professional looking home for a circuit board, or even designing a complex apparatus complete with a chassis – these and many other challenges turn into a stimulating pleasure with FreeCAD. Once you have internalized the basic processes, there are virtually no limits to your imagination. Starting to use a new software is never straightforward – especially with a tool as versatile as FreeCAD. Manageable, but at the same time easily usable individual components provide the starting point in this book. Putting these components together later results in assemblies. In the FreeCAD universe, a workable trajectory is demonstrated. The described procedure is illustrative so the examples are easily applied to custom tasks. The devices were made by the author and illustrated with photos. Creating a 3D design is requiring some effort but the initial investment pays off soon. Besides the impressive spatial representation of the projects, the extracted drawings yield a solid base for documentation and production. Extended FreeCAD capabilities like the unfolding of sheet metal parts enormously add to efficiency and pushes models forward into practical assembly. Soon you will definitely not want to do without FreeCAD!
€ 44,95
Mitglieder: € 40,46
-

Elektor Digital FreeCAD for Electronic Applications (E-book)
Practical Introduction to 3D Modeling from Enclosure to Front Panel Embedding a vintage component, creating a professional looking home for a circuit board, or even designing a complex apparatus complete with a chassis – these and many other challenges turn into a stimulating pleasure with FreeCAD. Once you have internalized the basic processes, there are virtually no limits to your imagination. Starting to use a new software is never straightforward – especially with a tool as versatile as FreeCAD. Manageable, but at the same time easily usable individual components provide the starting point in this book. Putting these components together later results in assemblies. In the FreeCAD universe, a workable trajectory is demonstrated. The described procedure is illustrative so the examples are easily applied to custom tasks. The devices were made by the author and illustrated with photos. Creating a 3D design is requiring some effort but the initial investment pays off soon. Besides the impressive spatial representation of the projects, the extracted drawings yield a solid base for documentation and production. Extended FreeCAD capabilities like the unfolding of sheet metal parts enormously add to efficiency and pushes models forward into practical assembly. Soon you will definitely not want to do without FreeCAD!
€ 34,95
Mitglieder: € 31,46
-

Elektor Labs Elektor Super Servo Tester Kit
Der Elektor Super Servo Tester kann Servos steuern und Servosignale messen. Es können bis zu vier Servokanäle gleichzeitig getestet werden. Der Super Servo Tester wird als Bausatz geliefert. Alle zum Zusammenbau des Super Servo Testers erforderlichen Teile sind im Bausatz enthalten. Für den Zusammenbau des Bausatzes sind grundlegende Lötkenntnisse erforderlich. Der Mikrocontroller ist bereits programmiert. Der Super Servo Tester verfügt über zwei Betriebsmodi: Steuerung/Manuell und Messen/Eingänge. Im Control/Manual Modus generiert der Super Servo Tester an seinen Ausgängen Steuersignale für bis zu vier Servos oder für den Flugregler oder ESC. Die Signale werden über die vier Potentiometer gesteuert. Unter Measure/Inputs misst der Super Servo Tester die an seine Eingänge angeschlossenen Servosignale. Diese Signale können beispielsweise von einem Regler, einem Flugregler, dem Empfänger oder einem anderen Gerät stammen. Die Signale werden auch an die Ausgänge weitergeleitet, um die Servos oder den Flugregler bzw. ESC zu steuern. Die Ergebnisse werden auf dem Display angezeigt. Technische Daten Betriebsmodi Control/Manual & Measure/Inputs Kanäle 3 Servosignaleingänge 4 Servosignalausgänge 4 Alarm Summer & LED Anzeige 0,96' OLED (128 x 32 Pixel) Eingangsspannung an K5 7-12 VDC Eingangsspannung an K1 5-7,5 VDC Eingangsstrom 30 mA (9 VDC an K5, nichts an K1 und K2 angeschlossen) Abmessungen 113 x 66 x 25 mm Gewicht 60 g Lieferumfang Widerstände (0,25 W) R1, R3 1 kΩ, 5% R2, R4, R5, R6, R7, R9, R10 10 kΩ, 5% R8 22 Ω, 5% P1, P2, P3, P4 10 kΩ, lin/B, vertikales Potentiometer Kondensatoren C1 100 µF 16 V C2 10 µF 25 V C3, C4, C7 100 nF C5, C6 22 pF Halbleiter D1 1N5817 D2 LM385Z-2.5 D3 BZX79-C5V1 IC1 7805 IC2 ATmega328P-PU, programmiert LED1 LED, 3 mm, rot T1 2N7000 Außerdem BUZ1 Piezo-Summer mit Oszillator K1, K2 2-reihiger, 12-poliger Pinheader, 90° K5 Barrel jack K4 1-reihige, 4-polige Stiftbuchse K3 2-reihiger, 6-fach geschachtelter Pinheader S1 Slide Switch DPDT S2 Slide Switch SPDT X1 Crystal, 16 MHz 28-polige DIP-Buchse für IC2 Elektor Platine OLED-Display, 0,96', 128 x 32 Pixel, 4-pin I²C-Interface Links Elektor Magazine Elektor Labs
€ 59,95€ 49,95Bestpreis
-

Elektor Digital Electronics for Space (E-book)
Space, the final frontier, will become more and more popular. The space industry is continually growing and new products and services will be required. Innovation is needed for the development of this industry. Today it is no longer possible to follow all the events in field of space. The space market is growing and activities are increasing, especially the market for small-satellites. This book wants to help close the gap and encourage electronic engineers to enter into the fascinating field of space electronics. One of the main difficulties is finding people with knowledge of space electronics design. Nowadays companies have to invest a lot of time and resources to instruct electronic engineers with no experience of space. Only a brief and basic introduction of this topic is typically achieved at university in space engineering lectures. Professionals with practical experience and the necessary theoretical knowledge are scarce. Companies from the space sector are searching for staff with knowledge of space electronics. This book will bring space closer aspiring to the space electronic hobbyists.
€ 24,95
Mitglieder: € 22,46
-

Elektor Digital Microprocessor Design Using Verilog HDL (E-book)
If you have the right tools, designing a microprocessor shouldn’t be complicated. The Verilog hardware description language (HDL) is one such tool. It can enable you to depict, simulate, and synthesize an electronic design, and thus increase your productivity by reducing the overall workload associated with a given project.Monte Dalrymple’s Microprocessor Design Using Verilog HDL is a practical guide to processor design in the real world. It presents the Verilog HDL in a straightforward fashion and serves as a detailed introduction to reducing the computer architecture and as an instruction set to practice. You’re led through the microprocessor design process from start to finish, and essential topics ranging from writing in Verilog to debugging and testing are laid bare.The book details the following, and more: Verilog HDL Review: data types, bit widths/labeling, operations, statements, and design hierarchy Verilog Coding Style: files vs. modules, indentation, and design organization Design Work: instruction set architecture, external bus interface, and machine cycle Microarchitecture: design spreadsheet and essential worksheets (e.g., Operation, Instruction Code, and Next State) Writing in Verilog: choosing encoding, assigning states in a state machine, and files (e.g., defines.v, hierarchy.v, machine.v) Debugging, Verification, and Testing: debugging requirements, verification requirements, testing requirements, and the test bench Post Simulation: enhancements and reduction to practice Monte Dalrymple received a BSEE (with highest honors) and an MSEE from the University of California at Berkeley, where he was elected to Phi Beta Kappa. Monte started his career at Zilog, where he designed a number of successful products, including the Serial Communication Controller (SCC) family and the Universal Serial Controller (USC) family. He was also the architect and lead designer of the Z380 microprocessor. Monte started his own company, Systemyde International Corp., in 1995, and has been doing contract design work ever since. He designed all five generations of Rabbit microprocessors, a Z180 clone that is flying on the Juno mission to Jupiter, and a Z8000 clone that flies in a commercial avionics air data computer. Monte holds 16 patents as well as both amateur and commercial radio licenses. Monte wrote 10 articles for Circuit Cellar magazine between 1996 and 2010. He recently completed a side project to replace the CPU in an HP-41C calculator with a modern FPGA-based version.
€ 29,95
Mitglieder: € 26,96
-
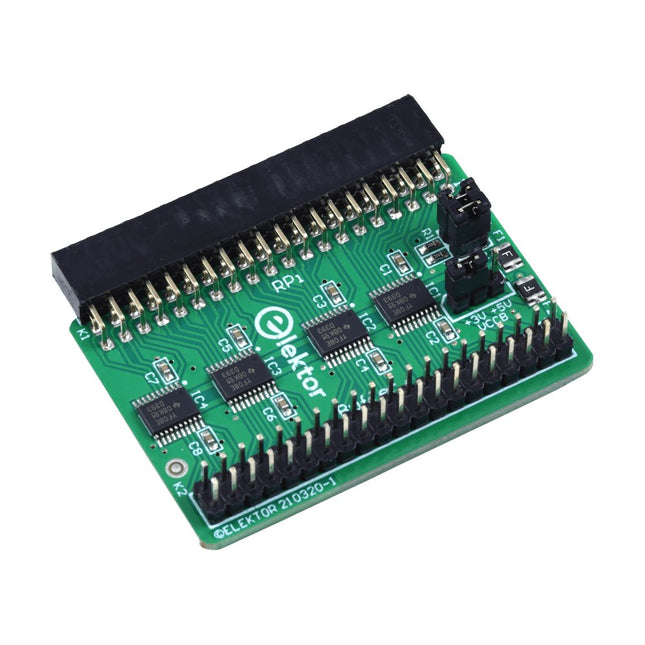
Elektor Labs Elektor Raspberry Pi Buffer Board
Wenn Sie regelmäßig mit dem Raspberry Pi experimentieren und eine Vielzahl von externer Hardware über die Stiftleiste an den GPIO-Port anschließen, haben Sie in der Vergangenheit vielleicht schon einige Schäden verursacht. Das Elektor Raspberry Pi Buffer Board ist dazu da, dies zu verhindern! Das Board ist kompatibel mit Raspberry Pi Zero, Zero 2 (W), 3, 4, 5, 400 und 500. Alle 26 GPIOs sind mit bidirektionalen Spannungswandlern gepuffert, um den Raspberry Pi beim Experimentieren mit neuen Schaltungen zu schützen. Die Platine ist dafür vorgesehen, auf der Rückseite des Raspberry Pi 400/500 eingesetzt zu werden. Der Stecker zum Anschluss an den Raspberry Pi ist eine rechtwinklige 40-polige Buchse (2x20). Die Platine ist nur ein wenig breiter. An die Pufferausgangsbuchse kann ein 40-poliges Flachbandkabel mit entsprechenden 2x20-Steckern angeschlossen werden, um z. B. mit einer Schaltung auf einem Breadboard oder einer Platine zu experimentieren. Die Schaltung verwendet 4x TXS0108E ICs von Texas Instruments. Die Platine lässt sich auch auf einem Raspberry Pi aufstellen. Downloads Schematics Layout
€ 34,95
Mitglieder: € 31,46
-

Elektor Classics The Complete Linear Audio Library (USB-Stick)
Jan Didden gründete im Jahr 2010 Linear Audio und veröffentlichte zwischen 2010 und 2017 14 Bände. Jeder 200-seitige Band enthält im Durchschnitt 10 Artikel von Experten aus dem Bereich Audio, Akustik und Instrumentierung. Egal, ob Sie an Röhrenverstärkern, Solid-State-Geräten, Lautsprecherdesign, Kondensator- und Widerstandsverzerrungen oder Verzerrungsmessungen interessiert sind, hier finden Sie hilfreiche Ratschläge und interessante Diskussionen. Von Anfänger- bis Fortgeschrittenen-Level, für den Audio-Professionellen oder den ernsthaften Hobbyisten, diese ExpertCollection wird Ihr Verständnis vertiefen und neue Perspektiven zu gängigen Problemen bieten. Bonusmaterial, das in dieser Sammlung enthalten ist, besteht aus einer 5-teiligen YouTube-Serie über negative Rückkopplung im Zusammenhang mit Audio, die vom renommierten Autor Jan Didden erstellt wurde, sowie neun weiteren wegweisenden Audio-Artikeln und -Präsentationen. Wenn Sie sich ernsthaft für Audio, Akustik und Instrumentierung interessieren, dürfen Sie das nicht verpassen! Das veröffentlichte Material ist indexiert und vollständig durchsuchbar und wird für viele Jahre eine fast grenzenlose Ressource darstellen. Sie können mehr über die Autoren von Linear Audio und das Inhaltsverzeichnis jedes Bandes auf linearaudio.net lesen.
€ 149,95€ 74,95Bestpreis
-
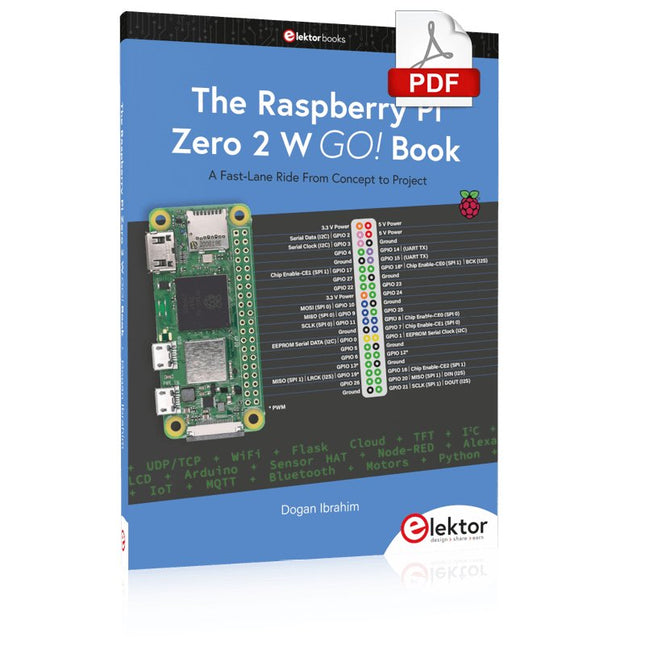
Elektor Digital The Raspberry Pi Zero 2 W GO! Book (PDF)
A Fast-Lane Ride From Concept to Project The core of the book explains the use of the Raspberry Pi Zero 2 W running the Python programming language, always in simple terms and backed by many tested and working example projects. On part of the reader, familiarity with the Python programming language and some experience with one of the Raspberry Pi computers will prove helpful. Although previous electronics experience is not required, some knowledge of basic electronics is beneficial, especially when venturing out to modify the projects for your own applications. Over 30 tested and working hardware-based projects are given in the book, covering the use of Wi-Fi, communication with smartphones and with a Raspberry Pi Pico W computer. Additionally, there are Bluetooth projects including elementary communication with smartphones and with the popular Arduino Uno. Both Wi-Fi and Bluetooth are key features of the Raspberry Pi Zero 2 W. Some of the topics covered in the book are: Raspberry Pi OS installation on an SD card Python program creation and execution on the Raspberry Pi Zero 2 W Software-only examples of Python running on the Raspberry Pi Zero 2 W Hardware-based projects including LCD and Sense HAT interfacing UDP and TCP Wi-Fi based projects for smartphone communication UDP-based project for Raspberry Pi Pico W communication Flask-based webserver project Cloud storage of captured temperature, humidity, and pressure data TFT projects Node-RED projects Interfacing to Alexa MQTT projects Bluetooth-based projects for smartphone and Arduino Uno communications
€ 32,95
Mitglieder: € 29,66
-
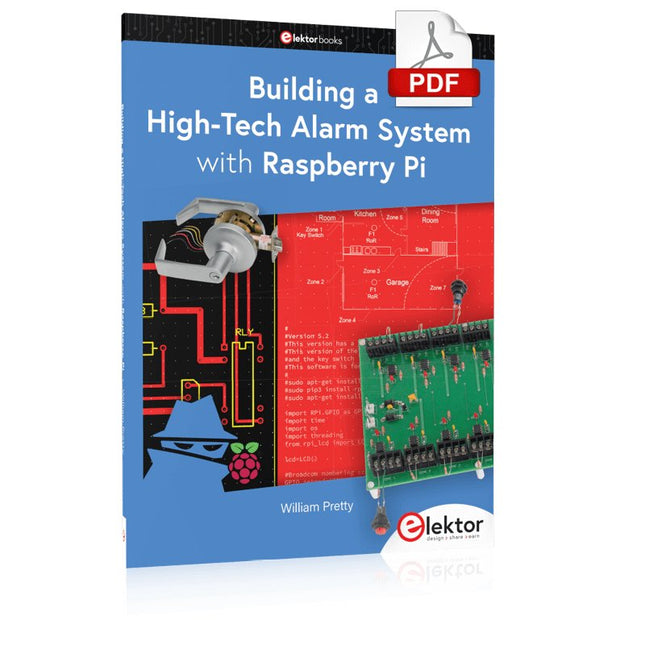
Elektor Digital Building a High-Tech Alarm System with Raspberry Pi (E-book)
This book discusses the basic components of any alarm system. All alarm systems have two basic functions. First, they monitor their environment looking for a change such as a door or window opening or someone moving about in the room. Second, they alert the legal owner or user to this change. The system described in this book uses a scanning type software to detect intruders. It behaves like a guard dog, pacing up and down the fence line on the lookout for either an intruder or a familiar person. If you have an alarm key, you can disarm the system and enter. With the scanning method, the software is easy to write and explain. It can scan eight alarm zones plus two special fire zones in about one second. You don’t have to be an electrical engineer to install an alarm system, just a decent carpenter, painter, and plasterer! Because this alarm system runs on 12 volts, you don’t have to be a licensed electrician either to install it. The alarm system presented here uses Python software on the Raspberry Pi combined with some elementary electronic circuits. The code described in the book, as well as CAD files and a bill of materials for the alarm panel, are available for free downloading. The book provides the reader with examples of typical configurations coming straight from the author‘s experience. After reviewing the hardware components typically used in common alarm systems, the author shows how to plan one yourself. To implement a modular alarm, no matter if it is for a single house or for a business or restaurant, the book shows how to skillfully combine a Raspberry Pi with small auxiliary electronic circuits. These are not installation instructions but food for thought that will enable readers to find a solution to their needs.
€ 24,95
Mitglieder: € 22,46
-

Elektor Digital The CAN Bus Companion (E-book)
Projects with Arduino Uno & Raspberry Pi with Examples for the MCP2515 CAN Bus Interface Module This book details the use of the Arduino Uno and the Raspberry Pi 4 in practical CAN bus based projects. Using either the Arduino Uno or the Raspberry Pi with off-the-shelf CAN bus interface modules considerably ease developing, debugging, and testing CAN bus based projects. This book is written for students, practicing engineers, enthusiasts, and for everyone else wanting to learn more about the CAN bus and its applications. The book assumes that the reader has some knowledge of basic electronics. Knowledge of the C and Python programming languages and programming the Arduino Uno using its IDE and Raspberry Pi will be useful, especially if the reader intends to develop microcontroller-based projects using the CAN bus. The book should be a useful source of reference material for anyone interested in finding answers to questions such as: What bus systems are available for the automotive industry? What are the principles of the CAN bus? How can I create a physical CAN bus? What types of frames (or data packets) are available in a CAN bus system? How can errors be detected in a CAN bus system and how dependable is a CAN bus system? What types of CAN bus controllers exist? How do I use the MCP2515 CAN bus controller? How do I create 2-node Arduino Uno-based CAN bus projects? How do I create 3-node Arduino Uno-based CAN bus projects? How do I set the acceptance masks and acceptance filters? How do I analyze data on the CAN bus? How do I create 2-node Raspberry Pi-based CAN bus projects? How do I create 3-node Raspberry Pi-based CAN bus projects?
€ 32,95
Mitglieder: € 29,66
-

Elektor Publishing The CAN Bus Companion
This book details the use of the Arduino Uno and the Raspberry Pi 4 in practical CAN bus based projects. Using either the Arduino Uno or the Raspberry Pi with off-the-shelf CAN bus interface modules considerably ease developing, debugging, and testing CAN bus based projects. This book is written for students, practicing engineers, enthusiasts, and for everyone else wanting to learn more about the CAN bus and its applications. The book assumes that the reader has some knowledge of basic electronics. Knowledge of the C and Python programming languages and programming the Arduino Uno using its IDE and Raspberry Pi will be useful, especially if the reader intends to develop microcontroller-based projects using the CAN bus. The book should be a useful source of reference material for anyone interested in finding answers to questions such as: What bus systems are available for the automotive industry? What are the principles of the CAN bus? How can I create a physical CAN bus? What types of frames (or data packets) are available in a CAN bus system? How can errors be detected in a CAN bus system and how dependable is a CAN bus system? What types of CAN bus controllers exist? How do I use the MCP2515 CAN bus controller? How do I create 2-node Arduino Uno-based CAN bus projects? How do I create 3-node Arduino Uno-based CAN bus projects? How do I set the acceptance masks and acceptance filters? How do I analyze data on the CAN bus? How do I create 2-node Raspberry Pi-based CAN bus projects? How do I create 3-node Raspberry Pi-based CAN bus projects?
€ 39,95
Mitglieder: € 35,96
-
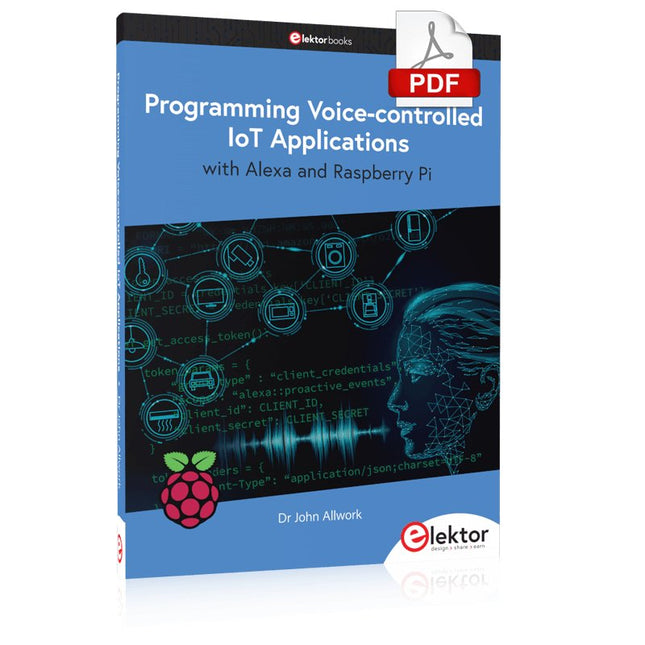
Elektor Digital Programming Voice-controlled IoT Applications with Alexa and Raspberry Pi (E-book)
Learn programming for Alexa devices, extend it to smart home devices and control the Raspberry Pi The book is split into two parts: the first part covers creating Alexa skills and the second part, designing Internet of Things and Smart Home devices using a Raspberry Pi. The first chapters describe the process of Alexa communication, opening an Amazon account and creating a skill for free. The operation of an Alexa skill and terminology such as utterances, intents, slots, and conversations are explained. Debugging your code, saving user data between sessions, S3 data storage and Dynamo DB database are discussed. In-skill purchasing, enabling users to buy items for your skill as well as certification and publication is outlined. Creating skills using AWS Lambda and ASK CLI is covered, along with the Visual Studio code editor and local debugging. Also covered is the process of designing skills for visual displays and interactive touch designs using Alexa Presentation Language. The second half of the book starts by creating a Raspberry Pi IoT 'thing' to control a robot from your Alexa device. This covers security issues and methods of sending and receiving MQTT messages between an Alexa device and the Raspberry Pi. Creating a smart home device is described including forming a security profile, linking with Amazon, and writing a Lambda function that gets triggered by an Alexa skill. Device discovery and on/off control is demonstrated. Next, readers discover how to control a smart home Raspberry Pi display from an Alexa skill using Simple Queue Service (SQS) messaging to switch the display on and off or change the color. A node-RED design is discussed from the basic user interface right up to configuring MQTT nodes. MQTT messages sent from a user are displayed on a Raspberry Pi. A chapter discusses sending a proactive notification such as a weather alert from a Raspberry Pi to an Alexa device. The book concludes by explaining how to create Raspberry Pi as a stand-alone Alexa device.
€ 32,95
Mitglieder: € 29,66


