A Practical Guide to AI, Python, and Hardware Projects
Welcome to your BeagleY-AI journey! This compact, powerful, and affordable single-board computer is perfect for developers and hobbyists. With its dedicated 4 TOPS AI co-processor and a 1.4 GHz Quad-core Cortex-A53 CPU, the BeagleY-AI is equipped to handle both AI applications and real-time I/O tasks. Powered by the Texas Instruments AM67A processor, it offers DSPs, a 3D graphics unit, and video accelerators.
Inside this handbook, you‘ll find over 50 hands-on projects that cover a wide range of topics—from basic circuits with LEDs and sensors to an AI-driven project. Each project is written in Python 3 and includes detailed explanations and full program listings to guide you. Whether you‘re a beginner or more advanced, you can follow these projects as they are or modify them to fit your own creative ideas.
Here’s a glimpse of some exciting projects included in this handbook:
Morse Code Exerciser with LED or BuzzerType a message and watch it come to life as an LED or buzzer translates your text into Morse code.
Ultrasonic Distance MeasurementUse an ultrasonic sensor to measure distances and display the result in real time.
Environmental Data Display & VisualizationCollect temperature, pressure, and humidity readings from the BME280 sensor, and display or plot them on a graphical interface.
SPI – Voltmeter with ADCLearn how to measure voltage using an external ADC and display the results on your BeagleY-AI.
GPS Coordinates DisplayTrack your location with a GPS module and view geographic coordinates on your screen.
BeagleY-AI and Raspberry Pi 4 CommunicationDiscover how to make your BeagleY-AI and Raspberry Pi communicate over a serial link and exchange data.
AI-Driven Object Detection with TensorFlow LiteSet up and run an object detection model using TensorFlow Lite on the BeagleY-AI platform, with complete hardware and software details provided.
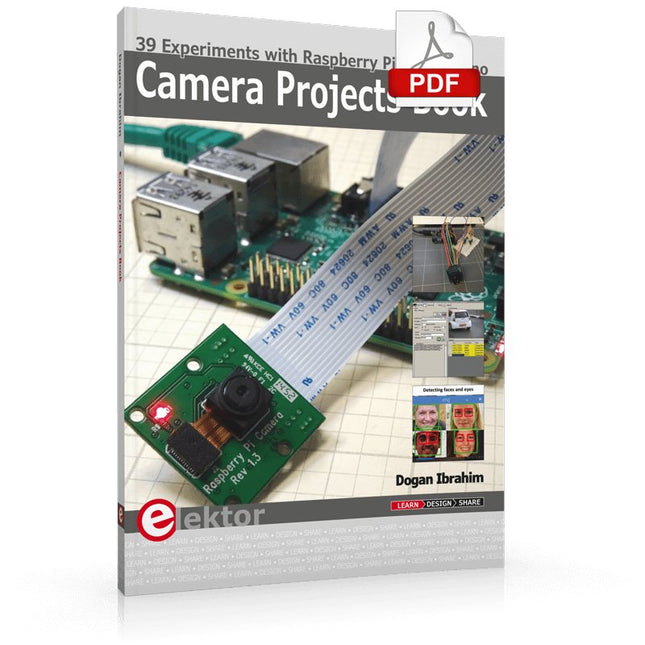
39 Experiments with Raspberry Pi and Arduino
This book is about Raspberry Pi 3 and Arduino camera projects.
The book explains in simple terms and with tested and working example projects, how to configure and use a Raspberry Pi camera and USB based webcam in camera-based projects using a Raspberry Pi.
Example projects are given to capture images, create timelapse photography, record video, use the camera and Raspberry Pi in security and surveillance applications, post images to Twitter, record wildlife, stream live video to YouTube, use a night camera, send pictures to smartphones, face and eye detection, colour and shape recognition, number plate recognition, barcode recognition and many more.
Installation and use of popular image processing libraries and software including OpenCV, SimpleCV, and OpenALPR are explained in detail using a Raspberry Pi. The book also explains in detail how to use a camera on an Arduino development board to capture images and then save them on a microSD card.
All projects given in this book have been fully tested and are working. Program listings for all Raspberry Pi and Arduino projects used in this book are available for download on the Elektor website.
Diese Ausgabe steht allen GOLD- und GREEN-Mitgliedern auf der ElektorMagazine-Website zum Download bereit!
Sie sind noch kein Mitglied? Hier klicken!
KI-Sicherheitssystem AlertAlfredMit einem Raspberry Pi 5 plus Hailo-8L-Modul
KI in der ElektronikentwicklungEin Update nach nur einem Jahr
Einführung in KI-AlgorithmenPrompt: Welche Algorithmen werden in KI-Tools verwendet?
Einplatinencomputer für KI-ProjekteÜberblick und Hintergründiges
Von Sensordaten zu Modellen des Machine LearningGestenerkennung mit einem Beschleunigungssensor und Edge Impulse
Bau eines undichten, integrierenden und Feuer spuckenden NeuronsKünstliche Intelligenz ohne Software
ChatGPT für den ElektronikentwurfMacht GPT-4o es besser?
KI at the Edge mit dem ESP32-P4
Sprachfunktionen auf dem Raspberry Pi ZeroWenn Übertaktung Sprachanwendungen ermöglicht
Die wachsende Rolle von Edge-KIEin Trend, der die Zukunft prägt
Die Macht der Edge-KI entfesselnEin Gespräch mit François de Rochebouët von STMicroelectronics
Eine VHDL-Uhr, entwickelt mit ChatGPT
Die wahren Auswirkungen der KISayash Kapoor über „KI-Schlangenöl“ und mehr
Das Neueste von BeagleBoardBeagleY-AI, BeagleV-Fire, BeagleMod, BeaglePlay und BeagleConnect Freedom
Moskito-Erkennung mit offenen Daten und Arduino Nicla Vision
KI heute und morgenEinblicke von Espressif, Arduino und SparkFun
Zeitleiste: Künstliche Intelligenz
BeagleY-AIDer neuste Einplatinencomputer für KI-Anwendungen
KI im FokusPerspektiven aus der Elektor-Community
Maschinelles Sehen mit OpenMVBau eines Limonadendosen-Detektors
Ein Gespräch mit dem digitalen VerstandChatGPT vs. Gemini
Skilling Me Softly with this Bot?Scheitert die KI-Revolution im elektronischen Bereich an mangelnder sozialer Präzision?
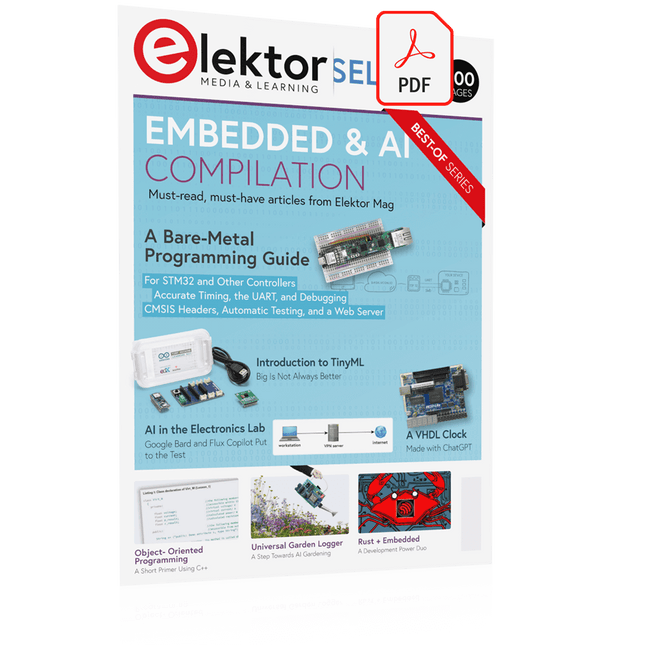
This collection features the best of Elektor Magazine's articles on embedded systems and artificial intelligence. From hands-on programming guides to innovative AI experiments, these pieces offer valuable insights and practical knowledge for engineers, developers, and enthusiasts exploring the evolving intersection of hardware design, software innovation, and intelligent technology.
Contents
Programming PICs from the Ground UpAssembler routine to output a sine wave
Object-Oriented ProgrammingA Short Primer Using C++
Programming an FPGA
Tracking Down Microcontroller Buffer Overflows with 0xDEADBEEF
Too Quick to Code and Too Slow to Test?
Understanding the Neurons in Neural NetworksEmbedded Neurons
MAUI Programming for PC, Tablet, and SmartphoneThe New Framework in Theory and Practice
USB Killer DetectorBetter Safe Than Sorry
Understanding the Neurons in Neural NetworksArtificial Neurons
A Bare-Metal Programming Guide
Part 1: For STM32 and Other Controllers
Part 2: Accurate Timing, the UART, and Debugging
Part 3: CMSIS Headers, Automatic Testing, and a Web Server
Introduction to TinyMLBig Is Not Always Better
Microprocessors for Embedded SystemsPeculiar Parts, the Series
FPGAs for BeginnersThe Path From MCU to FPGA Programming
AI in Electronics DevelopmentAn Update After Only One Year
AI in the Electronics LabGoogle Bard and Flux Copilot Put to the Test
ESP32 and ChatGPTOn the Way to a Self-Programming System…
Audio DSP FX Processor Board
Part 1: Features and Design
Part 2: Creating Applications
Rust + EmbeddedA Development Power Duo
A Smart Object CounterImage Recognition Made Easy with Edge Impulse
Universal Garden LoggerA Step Towards AI Gardening
A VHDL ClockMade with ChatGPT
TensorFlow Lite on Small MicrocontrollersA (Very) Beginner’s Point of View
Mosquito DetectionUsing Open Datasets and Arduino Nicla Vision
Artificial Intelligence Timeline
Intro to AI AlgorithmsPrompt: Which Algorithms Implement Each AI Tool?
Bringing AI to the Edgewith ESP32-P4
The Growing Role of Edge AIA Trend Shaping the Future
A Practical Guide to AI, Python, and Hardware Projects
Welcome to your BeagleY-AI journey! This compact, powerful, and affordable single-board computer is perfect for developers and hobbyists. With its dedicated 4 TOPS AI co-processor and a 1.4 GHz Quad-core Cortex-A53 CPU, the BeagleY-AI is equipped to handle both AI applications and real-time I/O tasks. Powered by the Texas Instruments AM67A processor, it offers DSPs, a 3D graphics unit, and video accelerators.
Inside this handbook, you‘ll find over 50 hands-on projects that cover a wide range of topics—from basic circuits with LEDs and sensors to an AI-driven project. Each project is written in Python 3 and includes detailed explanations and full program listings to guide you. Whether you‘re a beginner or more advanced, you can follow these projects as they are or modify them to fit your own creative ideas.
Here’s a glimpse of some exciting projects included in this handbook:
Morse Code Exerciser with LED or BuzzerType a message and watch it come to life as an LED or buzzer translates your text into Morse code.
Ultrasonic Distance MeasurementUse an ultrasonic sensor to measure distances and display the result in real time.
Environmental Data Display & VisualizationCollect temperature, pressure, and humidity readings from the BME280 sensor, and display or plot them on a graphical interface.
SPI – Voltmeter with ADCLearn how to measure voltage using an external ADC and display the results on your BeagleY-AI.
GPS Coordinates DisplayTrack your location with a GPS module and view geographic coordinates on your screen.
BeagleY-AI and Raspberry Pi 4 CommunicationDiscover how to make your BeagleY-AI and Raspberry Pi communicate over a serial link and exchange data.
AI-Driven Object Detection with TensorFlow LiteSet up and run an object detection model using TensorFlow Lite on the BeagleY-AI platform, with complete hardware and software details provided.
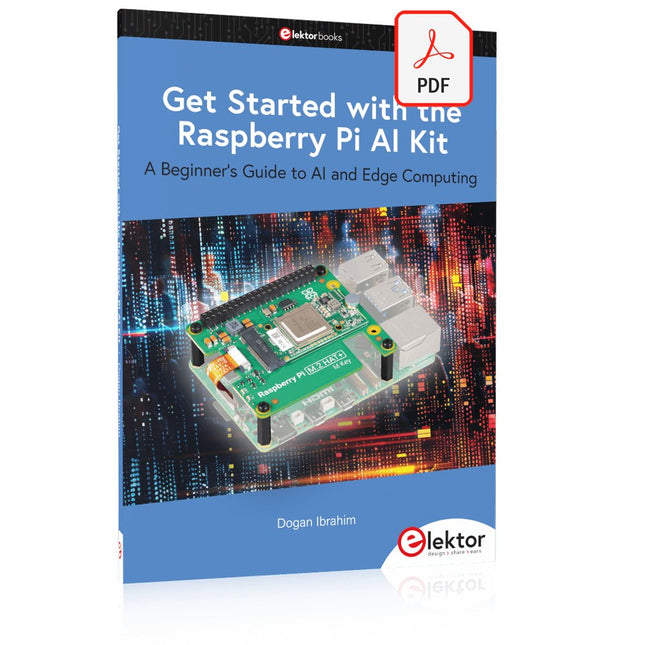
A Beginner's Guide to AI and Edge Computing
Artificial Intelligence (AI) is now part of our daily lives. With companies developing low-cost AI-powered hardware into their products, it is now becoming a reality to purchase AI accelerator hardware at comparatively very low costs. One such hardware accelerator is the Hailo module which is fully compatible with the Raspberry Pi 5. The Raspberry Pi AI Kit is a cleverly designed hardware as it bundles an M.2-based Hailo-8L accelerator with the Raspberry Pi M.2 HAT+ to offer high speed inferencing on the Raspberry Pi 5. Using the Raspberry Pi AI Kit, you can build complex AI-based vision applications, running in real-time, such as object detection, pose estimation, instance segmentation, home automation, security, robotics, and many more neural network-based applications.
This book is an introduction to the Raspberry Pi AI Kit, and it is aimed to provide some help to readers who are new to the kit and wanting to run some simple AI-based visual models on their Raspberry Pi 5 computers. The book is not meant to cover the detailed process of model creation and compilation, which is done on an Ubuntu computer with massive disk space and 32 GB memory. Examples of pre-trained and custom object detection are given in the book.
Two fully tested and working projects are given in the book. The first project explains how a person can be detected and how an LED can be activated after the detection, and how the detection can be acknowledged by pressing an external button. The second project illustrates how a person can be detected, and how this information can be passed to a smart phone over a Wi-Fi link, as well as how the detection can be acknowledged by sending a message from the smartphone to your Raspberry Pi 5.
Dieses Kameramodul verwendet einen SmartSens SC3336-Sensorchip mit 3 MP-Auflösung. Es zeichnet sich durch hohe Empfindlichkeit, hohes SNR und Leistung bei schwachem Licht aus und ermöglicht einen feineren und lebendigeren Nachtsicht-Bildeffekt und kann sich besser an Änderungen des Umgebungslichts anpassen. Außerdem ist es mit Platinen der Luckfox Pico-Serie kompatibel.
Spezifikationen
Sensor
Sensor: SC3336
CMOS-Größe: 1/2,8"
Pixel: 3 MP
Statische Auflösung: 2304x1296
Maximale Videobildrate: 30fps
Verschluss: Rollladen
Linse
Brennweite: 3,95 mm
Blende: F2.0
Sichtfeld: 98,3° (diagonal)
Verzerrung: <33 %
Fokussierung: Manueller Fokus
Downloads
Wiki
Der reComputer J3010 ist ein kompaktes und leistungsstarkes Edge-KI-Gerät, das auf dem NVIDIA Jetson Orin Nano basiert und eine beeindruckende KI-Leistung von 20 TOPS liefert – bis zu 40 mal schneller als der Jetson Nano. Es ist mit Jetpack 5.1.1 vorinstalliert und verfügt über eine 128-GB-SSD, 4x USB 3.2-Anschlüsse, HDMI, Gigabit-Ethernet und ein vielseitiges Trägerboard mit M.2 Key E für WLAN, M.2 Key M für SSD, RTC, CAN und ein 40-Pin GPIO Header.
Anwendungen
KI-Videoanalyse
Machine Vision
Robotik
Technische Daten
Jetson Orin Nano System-on-Module
KI-Leistung
reComputer J3010, Orin Nano 4 GB (20 TOPS)
GPU
GPU mit NVIDIA-Ampere-Architektur und 512 Kernen und 16 Tensor-Kernen (Orin Nano 4 GB)
CPU
Arm Cortex-A78AE v8.2 64-Bit-CPU mit 6 Kernen, 1,5 MB L2 + 4 MB L3
Speicher
4 GB 64-Bit LPDDR5 34 GB/s (Orin Nano 4 GB)
Video-Encoder
1080p30 wird von 1–2 CPU-Kernen unterstützt
Video-Decoder
1x 4K60 (H.265) | 2x 4K30 (H.265) | 5x 1080p60 (H.265) | 11x 1080p30 (H.265)
Carrier Board
Speicher
M.2 Key M PCIe (M.2 NVMe 2280 SSD 128 GB enthalten)
Netzwerk
Ethernet
1x RJ-45 Gigabit Ethernet (10/100/1000M)
M.2 Key E
1x M.2 Key E (vorinstalliertes 1x Wi-Fi/Bluetooth-Kombimodul)
I/O
USB
4x USB 3.2 Typ-A (10 Gbit/s)1x USB 2.0 Typ-C (Gerätemodus)
CSI-Kamera
2x CSI (2-spurig, 15-polig)
Display
1x HDMI 2.1
Lüfter
1x 4-poliger Lüfteranschluss (5 V PWM)
CAN
1x CAN
Multifunktionsanschluss
1x 40-Pin-Erweiterungs-Header
1x 12-Pin-Steuerung und UART-Header
RTC
RTC 2-polig, unterstützt CR1220 (nicht im Lieferumfang enthalten)
Stromversorgung
9-19 V DC
Mechanisch
Abmessungen
130 x 120 x 58,5 mm (mit Gehäuse)
Installation
Desktop, Wandmontage
Betriebstemperatur
−10°C~60°C
Lieferumfang
1x reComputer J3010 (System installiert)
1x Netzteil (12 V / 5 A)
Downloads
reComputer J301x Datasheet
NVIDIA Jetson Devices and carrier boards comparisions
reComputer J401 schematic design file
reComputer J3010 3D file
Der Raspberry Pi 5 verfügt über zwei vierspurige MIPI-Anschlüsse, von denen jeder entweder eine Kamera oder ein Display unterstützen kann. Diese Anschlüsse verwenden dasselbe 22-polige "Mini"-FPC-Format mit 0,5 mm Raster wie das Compute Module Development Kit und erfordern Adapterkabel für den Anschluss an die 15-poligen "Standard"-Anschlüsse mit 1 mm Raster an aktuellen Raspberry Pi Kamera- und Display-Produkten.
Diese Mini-zu-Standard-Adapterkabel für Kameras und Displays (beachten Sie, dass ein Kamerakabel nicht mit einem Display verwendet werden sollte und umgekehrt) sind in den Längen 200 mm, 300 mm und 500 mm erhältlich.
,
von Harry Baggen
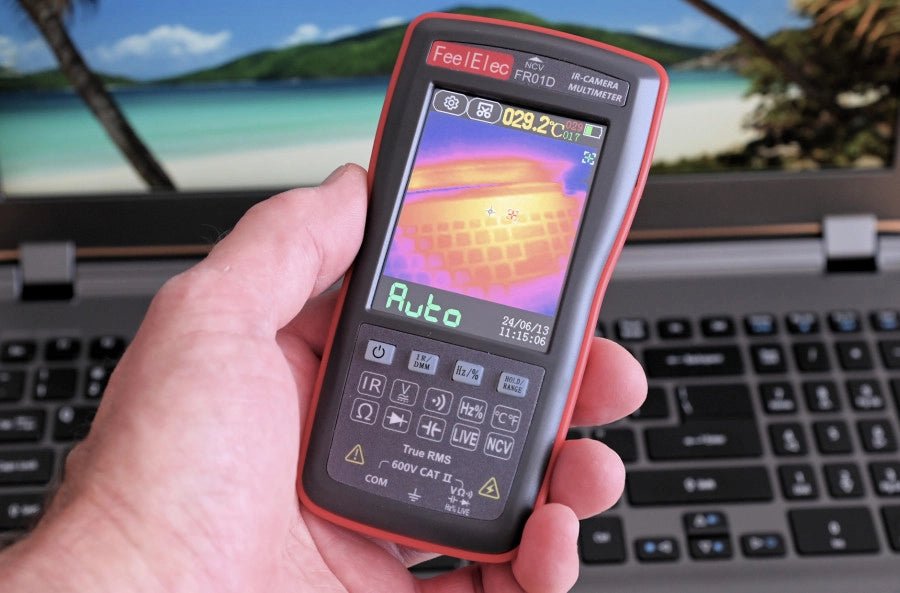
FeelElec FR01D Multimeter mit Wärmebildkamera (Review)
Chinesische Hersteller von Messgeräten überraschen uns immer wieder mit erschwinglichen Messkombinationen, die wir vor einigen Jahren noch nicht für möglich gehalten hätten. In meinem vorherigen...