RTL-SDR ist ein erschwinglicher Dongle, der als computergestützter Radioscanner verwendet werden kann, um Live-Radiosignale in Ihrer Umgebung zu empfangen. Dieser spezielle Dongle enthält einen R820T2-Tuner, einen temperaturkompensierten Oszillator (TCXO) mit 1 PPM und einen SMA-F-Anschluss. Er besitzt ein Aluminiumgehäuse mit passiver Kühlung über ein Wärmeleitpad. Außerdem gibt es eine per Software schaltbare Bias-Tee-Schaltung, einen zusätzlichen ESD-Schutz, ein geringeres Gesamtrauschen und eine eingebaute Direktabtastung für den HF-Empfang. Das Gerät kann Frequenzen von 500 kHz bis 1,7 GHz empfangen und hat eine momentane Bandbreite von bis zu 3,2 MHz (2,4 MHz stabil).
Hinweis: RTL-SDR Dongles sind nur RX.
Sie können dieses Set entweder für den terrestrischen oder den Satellitenempfang verwenden, indem Sie einfach die Ausrichtung der Antenne ändern. Dank der mitgelieferten Halterungen und Verlängerungskabel ist es möglich, die Antenne vorübergehend im Freien aufzustellen, um einen besseren Empfang zu gewährleisten. Andere mögliche Anwendungen sind allgemeines Funkscanning, Flugsicherung, öffentlicher Sicherheitsfunk, ADSB, ACARS, Bündelfunk, P25 Digital Voice, POCSAG, Wetterballone, APRS, NOAA APT Wettersatelliten, Radioastronomie, Meteoritenstreuung usw.
Lieferumfang
RTL-SDR V3 Dongle (R820T2 RTL2832U 1PPM TCXO SMA)
2x 23 cm bis 1 m Teleskopantenne
2x 5-cm- bis 13-cm-Teleskopantenne
Dipolantennenfuß mit 60 cm RG174-Verlängerungskabel
3 m RG174-Verlängerungskabel
Flexible Stativhalterung
Saugnapfhalterung
Downloads
Datasheet
Quick Start Guide
SDR# User Guide
Dipole Antenna Kit Guide
Programming the Finite State Machine with 8-Bit PICs in Assembly and C
Andrew Pratt provides a detailed introduction to programming PIC microcontrollers, as well as a thorough overview of the Finite State Machine (FSM) approach to programming. Most of the book uses assembly programming, but do not be deterred. The FSM gives a structure to a program, making it easy to plan, write, and modify. The last two chapters introduce programming in C, so you can make a direct comparison between the two techniques. The book references the relevant parts of the Microchip datasheet as familiarity with it is the best way to discover detailed information.
This book is aimed at Microsoft Windows and Linux users. To keep your costs to a minimum and to simplify the toolchain, specific applications are provided as a free download to enable you to use an FTDI serial lead as the programmer. The assembler used is the open-source "gpasm". All programming can be done in a text editor. There are detailed instructions on how to perform the necessary installations on Windows, Linux Debian, and derivatives such as Ubuntu and Fedora. For programming in C, Microchip's XC8 compiler is used from the command line. In addition to the programming applications, two serial read and serial write applications can be used for communicating with the PICs from a computer.
A voltmeter project including practical instructions on building a circuit board from scratch is included. All theory is covered beforehand, including how to do integer arithmetic in assembly.
Two PICs are covered: the PIC12F1822 and the PIC16F1823. Both can run at 32 MHz with an internal oscillator. You do not need to buy a factory-made development board and programmer. With relatively inexpensive parts including a serial lead, microcontroller, a few resistors, and LEDs, you can get started exploring embedded programming.
Links
Updated Programmer
Plot, Cut, Drill, Mill and Laser with the Z99
This book covers the construction, hardware, software, and operation of the Z99 – CNC machine. This is a multifunctional 4-axis machine for home construction.
The capabilities of the Z99 machine include:
large-format schematic plotting
PCB plotting with etch-resist pens
schematic plotting with conductive-ink pens
letter cutting out of vinyl
paper cutting
PCB/substrate drilling
PCB/substrate milling
text milling
laser engraving
laser cutting of solder paste masks
By making the support software available as freeware, readers of the book are challenged and encouraged to develop new applications for the Z99.
The machine would not be of much use if the user has no option to create suitable files for the designs in mind. A large part of this book is dedicated to creating source files in a variety of freeware software packages, including Inkscape, DesignSpark PCB, KiCad, and FlatCAM.
The book is also useful for readers keen to comprehend and then master the basic structure of HPGL, Gerber, Drill, and G-code files, as well as to have a go at deciphering them using software.
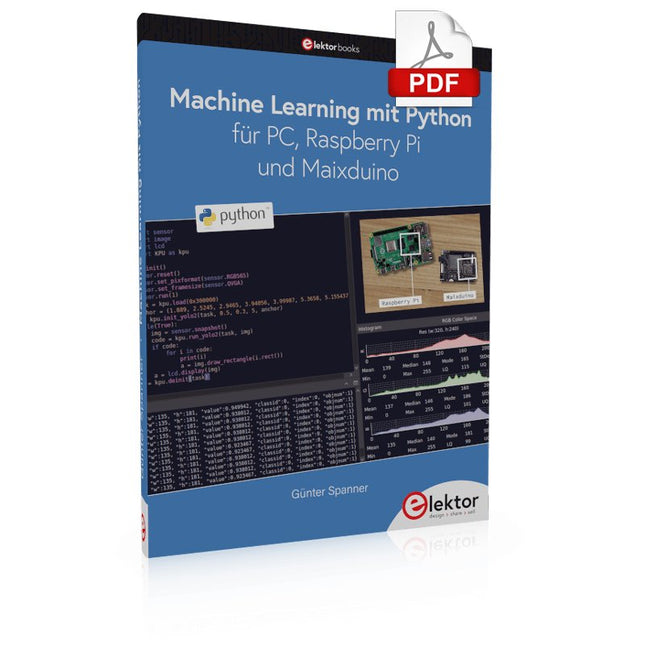
Nahezu alle Menschen werden zunehmend mit den Anwendungen der „Künstlichen Intelligenz“ (KI oder AI für engl. Artificial Intelligence) konfrontiert. Musik- oder Videoempfehlungen, Navigationssysteme, Einkaufsvorschläge etc. basieren auf Verfahren, die diesem Bereich zugeordnet werden können.
Der Begriff „Künstliche Intelligenz“ wurde 1956 auf einer internationalen Konferenz, dem Dartmouth Summer Research Project geprägt. Eine grundlegende Idee war dabei, die Funktionsweise des menschlichen Gehirns zu modellieren und darauf basierend fortschrittliche Computersysteme zu konstruieren. Bald sollte klar sein, wie der menschliche Verstand funktioniert. Die Übertragung auf eine Maschine wurde nur noch als ein kleiner Schritt angesehen. Diese Vorstellung erwies sich als etwas zu optimistisch. Dennoch sind die Fortschritte der modernen KI, beziehungsweise ihrem Teilgebiet dem sogenannten „Machine Learning“, nicht mehr zu übersehen.
Um die Methoden des Machine Learnings näher kennenzulernen, sollen in diesem Buch mehrere verschiedene Systeme zum Einsatz kommen. Neben dem PC werden sowohl der Raspberry Pi als auch der „Maixduino“ in den einzelnen Projekten ihre Fähigkeiten beweisen. Zusätzlich zu Anwendungen wie Objekt- und Gesichtserkennung entstehen dabei auch praktisch einsetzbare Systeme wie etwa Flaschendetektoren, Personenzähler oder ein „Sprechendes Auge“.
Letzteres ist in der Lage, automatisch erkannte Objekte oder Gesichter akustisch zu beschreiben. Befindet sich beispielsweise ein Fahrzeug im Sichtfeld der angeschlossenen Kamera, so wird die Information „I see a car!“ über elektronisch erzeugte Sprache ausgegeben. Derartige Geräte sind hochinteressante Beispiele dafür, wie etwa auch blinde oder stark sehbehinderte Menschen von KI-Systemen profitieren können.
Kick off with the MAX1000 and VHDPlus
Ready to Master FPGA Programming? In this guide, we’re diving into the world of Field Programmable Gate Arrays (FPGAs) – a configurable integrated circuit that can be programmed after manufacturing. Imagine bringing your ideas to life, from simple projects to complete microcontroller systems!
Meet the MAX1000: a compact and budget-friendly FPGA development board packed with features like memory, user LEDs, push-buttons, and flexible I/O ports. It’s the ideal starting point for anyone wanting to learn about FPGAs and Hardware Description Languages (HDLs).
In this book, you’ll get hands-on with the VHDPlus programming language – a simpler version of VHDL. We’ll work on practical projects using the MAX1000, helping you gain the skills and confidence to unleash your creativity.
Get ready for an exciting journey! You’ll explore a variety of projects that highlight the true power of FPGAs. Let’s turn your ideas into reality and embark on your FPGA adventure – your journey starts now!
Exciting Projects You’ll Find in This Book
Arduino-Driven BCD to 7-Segment Display Decoder
Use an Arduino Uno R4 to supply BCD data to the decoder, counting from 0 to 9 with a one-second delay
Multiplexed 4-Digit Event Counter
Create an event counter that displays the total count on a 4-digit display, incrementing with each button press
PWM Waveform with Fixed Duty Cycle
Generate a PWM waveform at 1 kHz with a fixed duty cycle of 50%
Ultrasonic Distance Measurement
Measure distances using an ultrasonic sensor, displaying the results on a 4-digit 7-segment LED
Electronic Lock
Build a simple electronic lock using combinational logic gates with push buttons and an LED output
Temperature Sensor
Monitor ambient temperature with a TMP36 sensor and display the readings on a 7-segment LED
Downloads
Software
Getting started with the world’s best open-source PCB tool
The latest iteration of KiCad, the world’s best free-to-use Printed Circuit Board tool, is packed with features usually found only in expensive commercial CAD tools. This modern, cross-platform application suite built around schematic and design editors, with auxiliary applications is a stable and mature PCB tool. KiCad 8 is a perfect fit for electronic engineers and makers.
Here are the most significant improvements and features in KiCad 8, both over and under the hood:
Modern user interface, completely redesigned from earlier versions
Improved and customizable electrical and design rule checkers
Theme editor allowing you to customize KiCad on your screen
Ability to import projects from Eagle, CADSTART, and more
Python scripting API
Improved integrated SPICE circuit simulator
Multi-sheet schematics
Filters define selectable elements
Enhanced interactive router helps you draw single tracks and differential pairs with precision
New or enhanced tools to draw tracks, measure distances, tune track lengths, etc.
Advanced interactive router
Built-in bill of materials generator
Realistic ray-tracing capable 3D viewer
Customizable teardrops
Plug-in manager for quick installation of themes, libraries and functionalities such as autorouters and BOM generators
This book will teach you to use KiCad through a practical approach. It will help you become productive quickly and start designing your own boards. Example projects illustrate the basic features of KiCad, even if you have no prior knowledge of PCB design.
The author describes the entire workflow from schematic entry to the intricacies of finalizing the files for PCB production and offers sound guidance on the process. Further full-fledged projects, of incremental difficulty, will be presented in a second book, together with a variety of advanced recipes.
Principles, Systems, and Electronics
This handbook provides a detailed study of the sensors and actuators at the heart of modern vehicle electronics. It begins with basic electrical and electronic concepts, introducing the principles and terminology essential for understanding automotive systems.
The book explores sensors and actuators on a system-by-system basis, including:
Fundamentals of electrical engineering, electromagnetic phenomena, and motor principles
Passive and active electronic components, integrated circuits, protection devices, and automotive-grade electronics
Sensor characteristics, signal conditioning, ADCs, PWM and frequency outputs, and interface adaptation
Automotive communication links and protocols, including LIN and SENT
Engine sensors: air mass, pressure, temperature, speed, position, exhaust and emissions-related sensors
Transmission sensors for manual and automatic systems
Steering and suspension sensors for conventional and active systems
Vehicle body and electrical system sensors for comfort, climate, access, and monitoring functions
Engine actuators such as throttle bodies, injectors, turbo actuators, EGR systems, ignition components, and pumps
Transmission, brake, steering, suspension, and body actuators
Identification and coding of electronic components and packages commonly used in automotive applications
The structure and operating principles of each component are explained, with relevant electronic circuitry illustrated. Its system-oriented organization and practical focus make it a valuable reference for understanding, testing, and troubleshooting automotive electronic systems.
Kick off with the MAX1000 and VHDPlus
Ready to Master FPGA Programming? In this guide, we’re diving into the world of Field Programmable Gate Arrays (FPGAs) – a configurable integrated circuit that can be programmed after manufacturing. Imagine bringing your ideas to life, from simple projects to complete microcontroller systems!
Meet the MAX1000: a compact and budget-friendly FPGA development board packed with features like memory, user LEDs, push-buttons, and flexible I/O ports. It’s the ideal starting point for anyone wanting to learn about FPGAs and Hardware Description Languages (HDLs).
In this book, you’ll get hands-on with the VHDPlus programming language – a simpler version of VHDL. We’ll work on practical projects using the MAX1000, helping you gain the skills and confidence to unleash your creativity.
Get ready for an exciting journey! You’ll explore a variety of projects that highlight the true power of FPGAs. Let’s turn your ideas into reality and embark on your FPGA adventure – your journey starts now!
Exciting Projects You’ll Find in This Book
Arduino-Driven BCD to 7-Segment Display Decoder
Use an Arduino Uno R4 to supply BCD data to the decoder, counting from 0 to 9 with a one-second delay
Multiplexed 4-Digit Event Counter
Create an event counter that displays the total count on a 4-digit display, incrementing with each button press
PWM Waveform with Fixed Duty Cycle
Generate a PWM waveform at 1 kHz with a fixed duty cycle of 50%
Ultrasonic Distance Measurement
Measure distances using an ultrasonic sensor, displaying the results on a 4-digit 7-segment LED
Electronic Lock
Build a simple electronic lock using combinational logic gates with push buttons and an LED output
Temperature Sensor
Monitor ambient temperature with a TMP36 sensor and display the readings on a 7-segment LED
Downloads
Software
This is the second edition of a book aimed at engineers, scientists, and hobbyists who want to interface PCs with hardware projects using graphical user interfaces. Desktop and web-based applications are covered.
The programming language used is Python 3, which is one of the most popular languages around: speed of programming being a key feature. The book has been revised and updated with an emphasis on getting the user to produce practical designs with ease – a text editor is all that is required to produce Python programs.
Hardware interfacing is achieved using an Arduino Uno as a remote slave. A full description and source code of the communication interface is given in the book. The slave provides digital and analog input and outputs. Multiple Unos can be included in one project with all control code written in Python and running on a PC One project involves a PIC microcontroller with the code provided that can be loaded into the PIC using the Uno.
The web applications and server are all implemented in Python, allowing you to access your electronic hardware over the Internet. The Raspberry Pi computer can be used as your web server. An introductory chapter is provided to get you started with using Linux.
The book is written for use with Debian or variations including Mint or Ubuntu. All of the programs in the book are freely available, ready to use and experiment with by way of a download from Elektor.
Recently, the development of a tiny chip called the ESP8266 has made it possible to interface any type of microcontroller to a Wi-Fi AP. The ESP8266 is a low-cost tiny Wi-Fi chip having fully built-in TCP/IP stack and a 32-bit microcontroller unit. This chip, produced by Shanghai based Chinese manufacturer Espressif System, is IEEE 802.11 b/g/n Wi-Fi compatible with on-chip program and data memory, and general purpose input-output ports. Several manufacturers have incorporated the ESP8266 chip in their hardware products (e.g. ESP-xx, NodeMCU etc) and offer these products as a means of connecting a microcontroller system such as the Android, PIC microcontroller or others to a Wi-Fi. The ESP8266 is a low-power chip and costs only a few Dollars.
ESP8266 and MicroPython – Coding Cool Stuff is an introduction to the ESP8266 chip and describes the features of this chip and shows how various firmware and programming languages such as the MicroPython can be uploaded to the chip. The main aim of the book is to teach the readers how to use the MicroPython programming language on ESP8266 based hardware, especially on the NodeMCU.
Several interesting and useful projects are given in the e-book (pdf) to show how to use the MicroPython in NodeMCU type ESP8266 hardware:
Project “What shall I wear today?”: You will be developing a weather information system using a NodeMCU development board together with a Text-to-Speech processor module.
Project “The Temperature and Humidity on the Cloud”: You will be developing a system that will get the ambient temperature and humidity using a sensor and then store this data on the cloud so that it can be accessed from anywhere.
Project “Remote Web Based Control”: You will be developing a system that will remotely control two LEDs connected to a NodeMCU development board using an HTTP Web Server application.
,
von Burkhard Kainka
RTL-SDR Blog V4 - Besser als V3? (Review)
RTL-SDR-Blogsticks gibt es schon seit einiger Zeit. Hiermit können HF-Signale bis zu 1 GHz oder höher empfangen werden. Der RTL-SDR Blog V4 ist nun schon...
,
von Clemens Valens
Review: Die Desktop-CNC- und Graviermaschine Anet 4540
Wie 3D-Drucker und Lasergraviermaschinen haben auch CNC-Maschinen sich inzwischen etabliert. Während sie früher Tausende von Euro gekostet haben, sind heute CNC-Maschinen der Einstiegsklasse wie die...