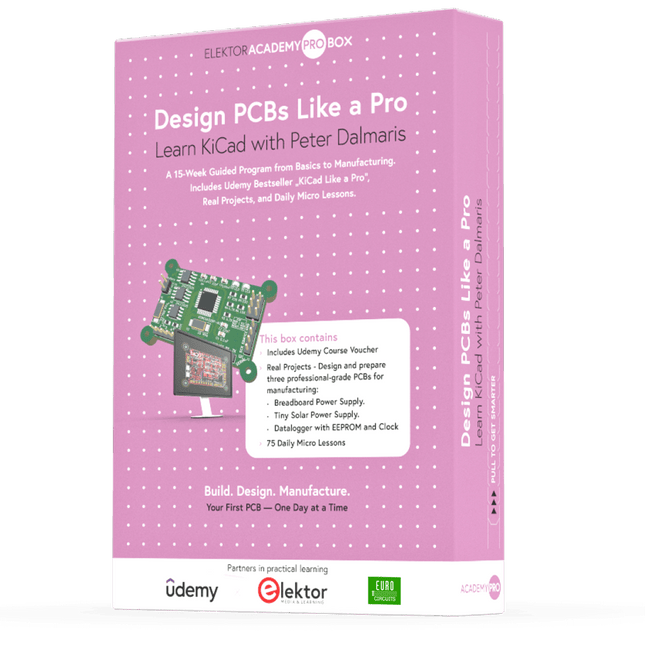
KiCad lernen mit Peter Dalmaris
Die Academy Pro Box "Design PCBs like a Pro" bietet ein umfassendes, strukturiertes Schulungsprogramm im PCB-Design, das Online-Lernen mit praktischer Anwendung kombiniert. Das 15-wöchige Programm basiert auf Peter Dalmaris’ KiCad-Kurs und integriert Videolektionen, gedruckte Materialien (2 Bücher) und praktische Projekte. So stellen die Teilnehmer sicher, dass sie nicht nur die Theorie verstehen, sondern auch die Fähigkeiten entwickeln, diese in der Praxis anzuwenden.
Im Gegensatz zu Standardkursen bietet die Academy Pro Box einen geführten Lernpfad mit wöchentlichen Meilensteinen und physischen Komponenten zum Entwerfen, Testen und Produzieren funktionsfähiger PCBs. Dieser Ansatz fördert ein intensiveres Lernerlebnis und eine bessere Wissensspeicherung.
Die Box ist ideal für Ingenieure, Studierende und Fachleute, die praktische PCB-Design-Kenntnisse mit Open-Source-Tools erwerben möchten. Mit der zusätzlichen Option, ihr Abschlussprojekt fertigstellen zu lassen, schließen die Teilnehmer das Programm mit echten Ergebnissen ab – bereit zum Einsatz, Testen oder zur Weiterentwicklung.
Learn by doing
Fähigkeiten aufbauen. Echte Leiterplatten entwerfen. Gerber-Dateien erstellen. Ihre erste Bestellung aufgeben. Dies ist nicht nur ein Kurs – es ist ein komplettes Projekt von der Idee bis zum Produkt.
Was Sie lernen/erhalten
Grundkenntnisse der KiCad-Tools
Sicherheit beim Entwurf eigener Leiterplatten
Eine vollständig herstellbare Leiterplatte – von Ihnen selbst erstellt
Was ist in der Box (Kurs)?
Beide Bände von „KiCad Like a Pro“ (im Wert von 105 €)
Vol 1: Fundamentals and Projects
Vol 2: Advanced Projects and Recipes
Gutscheincode für den erfolgreichen KiCad 9-Onlinekurs von Peter Dalmaris auf Udemy mit über 20 Stunden Videotraining. Sie erstellen drei komplette Designprojekte:
Breadboard-Stromversorgung
Winzige Solarstromversorgung
Datenlogger mit EEPROM und Uhr
Gutschein von Eurocircuits für die Herstellung von Leiterplatten (im Wert von 85 € exkl. MwSt.)
Lernmaterial (dieser Box)
15-wöchiges Lernprogramm
▶ Klicken Sie hier zum Öffnen
Week 1: Setup, Fundamentals, and First Steps in PCB Design
Week 2: Starting Your First PCB Project – Schematic Capture
Week 3: PCB Layout – From Netlist to Board Design
Week 4: Design Principles, Libraries, and Workflow
Week 5: Your First Real-World PCB Project
Week 6: Custom Libraries – Symbols, Footprints, and Workflow
Week 7: Advanced Tools – Net Classes, Rules, Zones, Routing
Week 8: Manufacturing Files, BOMs, and PCB Ordering
Week 9: Advanced Finishing Techniques – Graphics, Refinement, and Production Quality
Week 10: Tiny Solar Power Supply – From Schematic to Layout
Week 11: Tiny Solar Power Supply – PCB Layout and Production Prep
Week 12: ESP32 Clone Project – Schematic Design and Layout Prep
Week 13: ESP32 Clone – PCB Layout and Manufacturing Prep
Week 14: Final Improvements and Advanced Features
Week 15: Productivity Tools, Simulation, and Automation
KiCad-Kurs mit 18 Lektionen auf Udemy (von Peter Dalmaris)
▶ Klicken Sie hier zum Öffnen
Introduction
Getting started with PCB design
Getting started with KiCad
Project: A hands-on tour of KiCad (Schematic Design)
Project: A hands-on tour of KiCad (Layout)
Design principles and PCB terms
Design workflow and considerations
Fundamental KiCad how-to: Symbols and Eeschema
Fundamental KiCad how-to: Footprints and Pcbnew
Project: Design a simple breadboard power supply PCB
Project: Tiny Solar Power Supply
Project: MCU datalogger with build-in 512K EEPROM and clock
Recipes
KiCad 9 new features and improvements
Legacy (from previous versions of KiCad)
KiCad 7 update (Legacy)
(Legacy) Gettings started with KiCad
Bonus lecture
Über den Autor
Dr. Peter Dalmaris, PhD, ist Pädagoge, Elektroingenieur und Maker. Er erstellt Online-Videokurse zum Thema DIY-Elektronik und ist Autor mehrerer Fachbücher. Seit 2013 ist er Chief Tech Explorer bei Tech Explorations, dem von ihm in Sydney (Australien) gegründeten Unternehmen. Seine Mission ist es, Technologie zu erforschen und die Welt zu bilden.
Was ist Elektor Academy Pro?
Elektor Academy Pro bietet maßgeschneiderte Lernlösungen für Fachkräfte, Ingenieurteams und technische Experten in der Elektronik- und Embedded-Systems-Branche. Sie unterstützt Einzelpersonen und Organisationen dabei, ihr praktisches Know-how zu vertiefen, ihre Skills gezielt auszubauen und dank hochwertiger Inhalte und praxisnaher Tools stets einen Schritt voraus zu sein.
Von realen Projekten und spezialisierten Kursen bis hin zu fundierten technischen Insights – Elektor versetzt Ingenieure in die Lage, aktuelle Herausforderungen der Branche erfolgreich zu meistern. Unser Bildungsportfolio umfasst Academy-Bücher, Pro-Boxen, Webinare, Konferenzen und B2B-Fachmagazine – alles mit Blick auf praxisnahe Weiterbildung und berufliches Wachstum.
Ob Ingenieur, F&E-Spezialist oder technischer Entscheider: Elektor Academy Pro schlägt die Brücke zwischen Theorie und Praxis – und hilft Ihnen, neue Technologien zu beherrschen und Innovationen in Ihrem Unternehmen gezielt voranzutreiben.
Dieser verstellbare Platinenhalter ist ideal zum Klemmen von Platinen zum Löten, Entlöten oder Nacharbeiten.
Fetaures
2 verstellbare Griffe auf einem einziehbaren Ständer für verschiedene Boardgrößen.
Die verstellbaren Klemmen ermöglichen es der Leiterplatte, sich um 360 Grad zu drehen und in jeder Position zu bleiben.
Die Grundplatte dieses starren Metallständers verfügt über vier Gummifüße, um Stabilität zu gewährleisten.
Technische Daten
Produktgröße
30 x 16,5 x 12,5 cm
Max. Größe der Halterung
20 x 14 cm
Gewicht
450 g
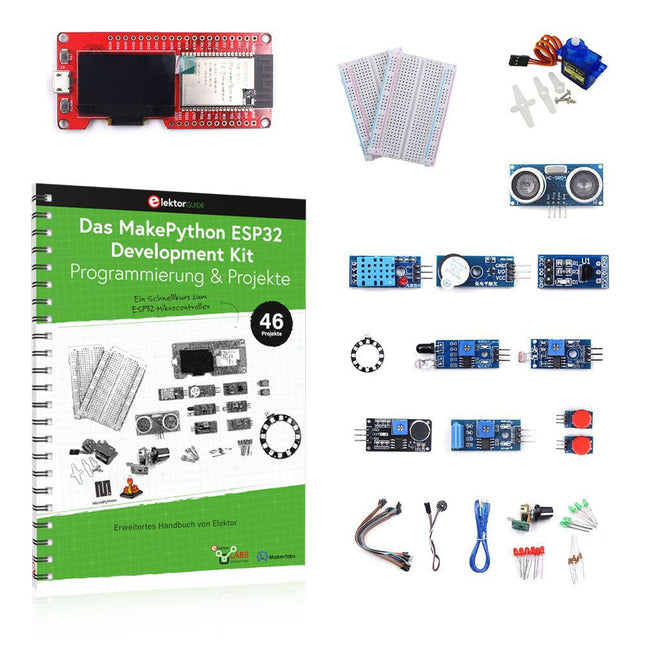
Lernen Sie, wie Sie den ESP32-Mikrocontroller und die MicroPython-Programmierung in Ihren zukünftigen Projekten einsetzen können!
Das Projektbuch – geschrieben von Dogan Ibrahim – enthält viele Software- und Hardware-basierte Projekte, die speziell für das MakePython ESP32 Development Kit entwickelt wurden. Das Kit wird mit verschiedenen LEDs, Sensoren und Aktoren geliefert. Ziel des Kits ist es, grundlegende Kenntnisse für die Erstellung von IoT-Projekten zu erwerben.
Die in diesem Buch vorgestellten Projekte sind umfassend getestet und funktionsfähig und verwenden alle mitgelieferten Komponenten. Für jedes Projekt gibt es im Buch ein Blockdiagramm, einen Schaltplan, ein vollständiges Programmlisting und eine komplette Programmbeschreibung.
Lieferumfang des Kits
1x MakePython ESP32-Entwicklungsboard mit LCD
1x Ultraschall-Entfernungsmodul
1x Temperatur- und Feuchtigkeitssensor
1x Buzzer-Modul
1x DS18B20-Modul
1x Infrarotmodul
1x Potentiometer
1x WS2812-Modul
1x Schallsensor
1x Vibrationssensor
1x Lichtempfindliches Widerstandsmodul
1x Pulssensor
1x Servomotor
1x USB-Kabel
2x Taste
2x Steckplatine
45x Schaltdraht
10x Widerstand 330R
10x LED (Rot)
10x LED (Grün)
1x Projektbuch (Deutsch, 213 Seiten)
46 Projekte im Buch
LED-Projekte
Blinkende LED
Blinkendes SOS
Blinkende LED – mit einem Timer
Abwechselnd blinkende LEDs
Tastersteuerung
Ändern der LED-Blinkrate durch Taster-Interrupts
Laufschrift-LEDs
Binär zählende LEDs
Weihnachtsbeleuchtung (zufällig blinkende 8 LEDs)
Elektronischer Würfel
Glücklicher Tag der Woche
Pulsweitenmodulation (PWM) Projekte
Erzeugt eine 1000-Hz-PWM-Wellenform mit 50% Tastverhältnis
Steuerung der LED-Helligkeit
Messung der Frequenz und des Tastverhältnisses einer PWM-Wellenform
Melodie-Macher
Einfache elektronische Orgel
Steuerung eines Servomotors
Servomotor DS18B20 Thermometer
Analog-Digital-Wandler (ADC) Projekte
Spannungsmesser
Aufzeichnung der analogen Eingangsspannung
ESP32 interner Temperatursensor
Ohmmeter
Lichtempfindliches Widerstandsmodul
Digital-Analog-Wandler (DAC) Projekte
Erzeugung von Festspannungen
Erzeugen eines Sägezahnsignals
Erzeugen eines Dreieckssignals
Arbiträre periodische Wellenform
Generierung eines Sinussignals
Erzeugung eines genauen Sinussignals mit Hilfe von Timer-Interrupts
Verwendung des OLED-Displays
Sekundenzähler
Ereigniszähler
DS18B20 OLED-basiertes Digitalthermometer
ON-OFF Temperaturregler
Messung der Temperatur und Luftfeuchtigkeit
Ultraschall-Entfernungsmessung
Höhe einer Person (Stadiometer)
Messung der Herzfrequenz (Puls)
Andere mit dem Kit gelieferte Sensoren
Alarm bei Diebstahl
Tonaktiviertes Licht
Infrarot-Hindernisvermeidung mit Summton
WS2812 RGB-LED-Ring
Zeitstempel für Temperatur- und Luftfeuchtigkeitswerte
Netzwerk-Programmierung
WLAN-Scanner
Fernsteuerung über den Internetbrowser (mit einem Smartphone oder PC) – Webserver
Speichern von Temperatur- und Luftfeuchtigkeitsdaten in der Cloud
Low-Power-Betrieb
Aufwecken des Prozessors mit einem Timer
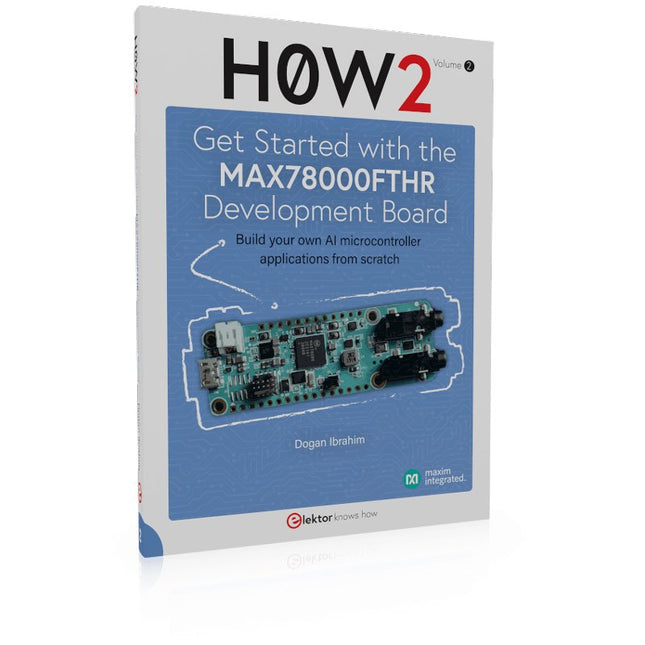
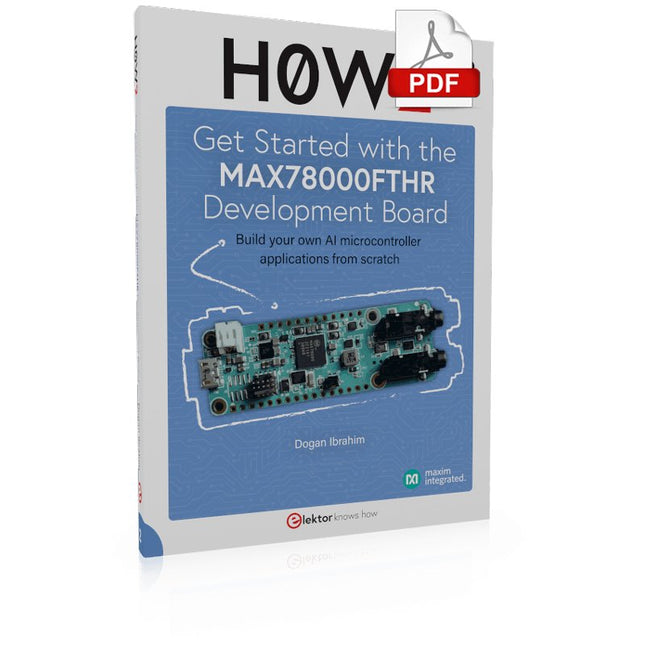
Build your own AI microcontroller applications from scratch
The MAX78000FTHR from Maxim Integrated is a small development board based on the MAX78000 MCU. The main usage of this board is in artificial intelligence applications (AI) which generally require large amounts of processing power and memory. It marries an Arm Cortex-M4 processor with a floating-point unit (FPU), convolutional neural network (CNN) accelerator, and RISC-V core into a single device. It is designed for ultra-low power consumption, making it ideal for many portable AI-based applications.
This book is project-based and aims to teach the basic features of the MAX78000FTHR. It demonstrates how it can be used in various classical and AI-based projects. Each project is described in detail and complete program listings are provided. Readers should be able to use the projects as they are, or modify them to suit their applications. This book covers the following features of the MAX78000FTHR microcontroller development board:
Onboard LEDs and buttons
External LEDs and buttons
Using analog-to-digital converters
I²C projects
SPI projects
UART projects
External interrupts and timer interrupts
Using the onboard microphone
Using the onboard camera
Convolutional Neural Network
History and Future in the Internet of Things
This book thoroughly reviews the history of the development of embedded Operating Systems, covers the technical characteristics, historic facts, as well as background business stories of mainstream embedded Operating Systems, and analyzes the technical evolution, market development, and new opportunities of embedded Operating Systems in the age of the Internet of Things.
From the perspective of time, the book examines the evolution of critical technical aspects, including real-time and Power Management of embedded Operating Systems and Linux, Internet of Things security, communication, and cloud computing.
The book looks into applications of embedded Operating Systems with important markets of mobile phones, communication equipment, automobile, and wearable devices, and also discusses business model and the issue of intellectual property of embedded Operating Systems.
In addition, the book walks through the status quo, technical features, product evaluation and background of the Internet of Things Operating Systems in the second half of the book.
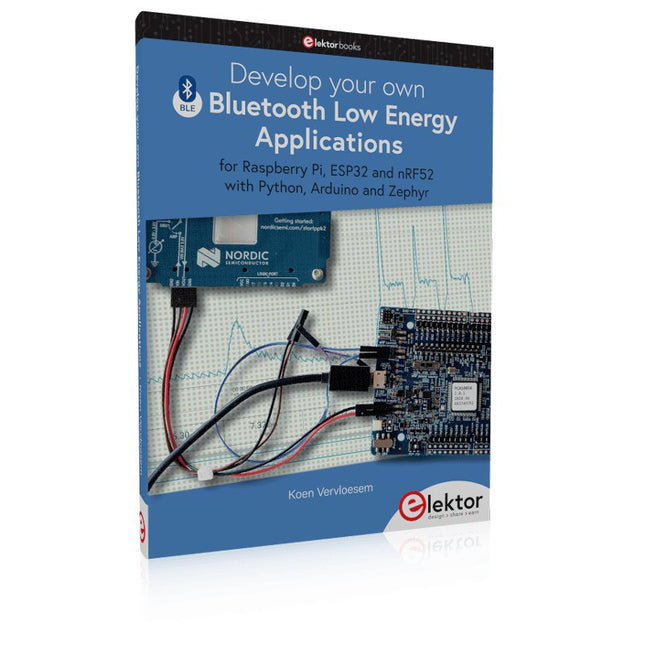
For Raspberry Pi, ESP32 and nRF52 with Python, Arduino and Zephyr
Bluetooth Low Energy (BLE) radio chips are ubiquitous from Raspberry Pi to light bulbs. BLE is an elaborate technology with a comprehensive specification, but the basics are quite accessible.
A progressive and systematic approach will lead you far in mastering this wireless communication technique, which is essential for working in low power scenarios.
In this book, you’ll learn how to:
Discover BLE devices in the neighborhood by listening to their advertisements.
Create your own BLE devices advertising data.
Connect to BLE devices such as heart rate monitors and proximity reporters.
Create secure connections to BLE devices with encryption and authentication.
Understand BLE service and profile specifications and implement them.
Reverse engineer a BLE device with a proprietary implementation and control it with your own software.
Make your BLE devices use as little power as possible.
This book shows you the ropes of BLE programming with Python and the Bleak library on a Raspberry Pi or PC, with C++ and NimBLE-Arduino on Espressif’s ESP32 development boards, and with C on one of the development boards supported by the Zephyr real-time operating system, such as Nordic Semiconductor's nRF52 boards.
Starting with a very little amount of theory, you’ll develop code right from the beginning. After you’ve completed this book, you’ll know enough to create your own BLE applications.
Field Programmable Gate Arrays (FPGAs) sind Standard-ICs, die dem Anwender die Konfiguration von Hardwarestrukturen ermöglichen. Mit FPGAs ist die Umsetzung digitaler Systeme ab Stückzahl eins machbar. Durch die Verfügbarkeit kostenloser Lizenzen und preiswerter Entwicklungsboards ist die finanzielle Einstiegsschwelle in diese Technik niedrig. Bei der Überwindung der fachlichen Schwelle hilft dieser Kurs.Die ersten beiden Kursteile bieten eine Einführung in die Digitaltechnik. Wer sich damit bereits gut auskennt, lässt den ersten Teil weg und wird im zweiten Teil VHDL als Sprache zur Beschreibung digitaler Grundfunktionen (z. B. Gatter und Flip-Flops) kennenlernen.Der dritte Kursteil beschäftigt sich mit höheren Funktionen Digitaler Systeme sowie deren Modellierung in VHDL. Im vierten Kursteil wird der Umgang mit einem VHDL-Simulator geübt und die Entwicklungsmethodik mit VHDL weiter verfeinert.Den Höhepunkt bildet der fünfte Teil. Hier wird am Beispiel eines einfachen Prozessors Schritt für Schritt die Entwicklung eines komplexeren digitalen Systems behandelt. Am Ende des fünften Teiles kann man sich dann FPGA-Entwickler nennen.Der sechste Teil behandelt abschließend den Hardwareaufbau von FPGA-Bausteinen.Der Kurs ist durchgehend mit praktischen Übungen angereichert und liefert sehr schnell erste Erfolgserlebnisse. Er eignet sich insbesondere für• Studierende der MINT-Fächer mit Interesse an Elektronik• Schüler an technischen Gymnasien und berufsbildenden Schulen• Ingenieure und Informatiker, die sich fachlich weiterentwickeln wollen
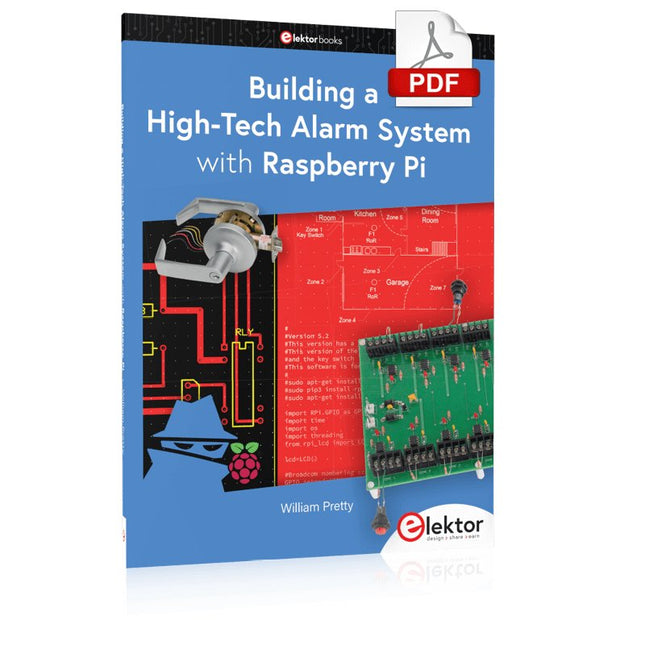
This book discusses the basic components of any alarm system.
All alarm systems have two basic functions. First, they monitor their environment looking for a change such as a door or window opening or someone moving about in the room. Second, they alert the legal owner or user to this change. The system described in this book uses a scanning type software to detect intruders. It behaves like a guard dog, pacing up and down the fence line on the lookout for either an intruder or a familiar person. If you have an alarm key, you can disarm the system and enter.
With the scanning method, the software is easy to write and explain. It can scan eight alarm zones plus two special fire zones in about one second.
You don’t have to be an electrical engineer to install an alarm system, just a decent carpenter, painter, and plasterer! Because this alarm system runs on 12 volts, you don’t have to be a licensed electrician either to install it. The alarm system presented here uses Python software on the Raspberry Pi combined with some elementary electronic circuits. The code described in the book, as well as CAD files and a bill of materials for the alarm panel, are available for free downloading. The book provides the reader with examples of typical configurations coming straight from the author‘s experience. After reviewing the hardware components typically used in common alarm systems, the author shows how to plan one yourself.
To implement a modular alarm, no matter if it is for a single house or for a business or restaurant, the book shows how to skillfully combine a Raspberry Pi with small auxiliary electronic circuits. These are not installation instructions but food for thought that will enable readers to find a solution to their needs.
For Raspberry Pi, ESP32 and nRF52 with Python, Arduino and Zephyr
Bluetooth Low Energy (BLE) radio chips are ubiquitous from Raspberry Pi to light bulbs. BLE is an elaborate technology with a comprehensive specification, but the basics are quite accessible.
A progressive and systematic approach will lead you far in mastering this wireless communication technique, which is essential for working in low power scenarios.
In this book, you’ll learn how to:
Discover BLE devices in the neighborhood by listening to their advertisements.
Create your own BLE devices advertising data.
Connect to BLE devices such as heart rate monitors and proximity reporters.
Create secure connections to BLE devices with encryption and authentication.
Understand BLE service and profile specifications and implement them.
Reverse engineer a BLE device with a proprietary implementation and control it with your own software.
Make your BLE devices use as little power as possible.
This book shows you the ropes of BLE programming with Python and the Bleak library on a Raspberry Pi or PC, with C++ and NimBLE-Arduino on Espressif’s ESP32 development boards, and with C on one of the development boards supported by the Zephyr real-time operating system, such as Nordic Semiconductor's nRF52 boards.
Starting with a very little amount of theory, you’ll develop code right from the beginning. After you’ve completed this book, you’ll know enough to create your own BLE applications.
Nur für kurze Zeit gibt es das Joy-Pi Advanced im vorteilhaften Bundle mit einem Raspberry Pi 4 (8 GB)!
Der Joy-Pi Advanced ist ein kompaktes und leistungsstarkes Gerät, welches Ihnen ermöglicht, Ihre Projekte schnell und einfach zu realisieren. Egal, ob Sie bereits viel Erfahrung haben, oder noch so gut wie gar keine – mit dem Joy-Pi Advanced können Sie Ihrer Kreativität freien Lauf lassen. Dank der Kompatibilität mit einer Vielzahl von Plattformen, einschließlich Raspberry Pi, Raspberry Pi Pico, Arduino Nano, BBC micro:bit und NodeMCU ESP32, können Sie einfach und schnell auf Ihre bevorzugte Plattform zugreifen.
Darüber hinaus bietet der Joy-Pi Advanced mehr als 30 Stationen, Lektionen und Module, die Ihnen eine unbegrenzte Vielzahl an Möglichkeiten bieten, um Ihre Projekte zu realisieren. Mit der eigenentwickelten Lernzentrale, können Sie nicht nur Ihre Fähigkeiten verbessern, sondern auch neue Projekte erstellen. Die Lernzentrale bietet eine Fülle an Informationen und Tutorials, die Sie Schritt für Schritt durch Ihre Projekte führen.
Joy-Pi Advanced zeichnet sich insbesondere durch seine intelligenten Schaltereinheiten aus, die eine erweiterte Nutzung der verfügbaren Pins erlauben. Dabei sind insgesamt drei Schaltereinheiten integriert, jede mit 12 einzelnen Schaltern ausgestattet, die für eine präzise Steuerung der verbundenen Sensoren und Module sorgen. Dieses System löst das bekannte Problem der begrenzten Pin-Anzahl, das bei herkömmlichen Mikrocontrollern auftritt. Die Schaltereinheiten ermöglichen es Ihnen, eine Vielzahl von Sensoren und Modulen parallel zu betreiben, indem sie einzeln ein- und ausgeschaltet werden können. Dadurch wird eine Mehrfachbelegung der Pins simuliert, die es Ihnen ermöglicht, die volle Leistungsfähigkeit Ihrer Projekte auszuschöpfen, ohne Kompromisse bei der Funktionalität eingehen zu müssen.
Durch der Kombination von innovativen Adapterplatinen und dem micro:bit-Slot erreicht man eine nahtlose Kompatibilität mit einer Vielzahl von Mikrocontrollern wie Raspberry Pi Pico, NodeMCU ESP32, micro:bit und Arduino Nano. Die speziell entwickelten Adapterplatinen sind so konzipiert, dass sie perfekt auf den jeweiligen Mikrocontroller abgestimmt sind. Durch das Aufstecken des Mikrocontrollers auf die passende Adapterplatine und das anschließende Einstecken in den micro:bit-Slot wird der Joy-Pi Advanced schnell und unkompliziert mit den unterschiedlichen Mikrocontrollern kompatibel. Dies ermöglicht eine nahtlose Integration Ihrer bevorzugten Plattform und die Möglichkeit, die Stärken der verschiedenen Mikrocontroller in Ihren Projekten zu kombinieren. Auf diese Weise können Sie sich voll und ganz auf Ihre kreativen Projekte konzentrieren, ohne sich Gedanken über die Kompatibilität verschiedener Mikrocontroller machen zu müssen. Der Joy-Pi Advanced vereinfacht den Entwicklungsprozess und gibt Ihnen die Möglichkeit, Ihre Projekte flexibel und individuell zu gestalten.
Features
Hochintegrierte Entwicklungsplattform & Lernzentrale
Schnelles, einfaches & kabelloses Kombinieren von verschiedensten Sensoren & Aktoren
Einbaumöglichkeit für Raspberry Pi 4
Kompatibel mit verschiedensten Mikrocontrollern
Eigenentwickelte, didaktische Lernplattform für Raspberry Pi & Windows
Technische Daten
Kompatibel mit
Raspberry Pi 4, Arduino Nano, NodeMCU ESP32, BBC micro:bit, Raspberry Pi Pico
Verbaute Sensoren, Aktoren & Komponenten
39
Lernplattform
Über 40 Einträge in der Wissensdatenbank, 10 Projekte, 10 Lernaufgaben, 14 Visionen
Displays
7-Segment Display, 16x2 Display, 1,8“ TFT Display, 0,96“ OLED Display, 8x8 RGB Matrix
Sensoren
DS18B20, Schock-Sensor, Hall-Sensor, Barometer, Sound-Sensor, Gyroskop, PIR-Sensor, Lichtschranke, NTC, Lichtsensor, 6x Touchsensor, Farb-Sensor, Ultraschall-Abstandssensor, DHT11 Temperatur- & Feuchtigkeitssensor
Steuerung
Joystick, 5x Schalter, Potentiometer, Drehencoder, 4x4 Button-Matrix, Relais, PWM-Lüfter
Motoren
Servo-Schnittstelle, Schrittmotor-Schnittstelle, Vibrationsmotor
Mess- und Wandelmodule
Analog-Digital Converter, Pegelwandler, Voltmeter, Variable Spannungsversorgung
Sonstige Komponenten
RTC Echtzeituhr, Buzzer, EEPROM-Speicher, Infrarot-Empfänger, Breadboard, RFID-Lesegerät
Adapterboards
Adapter für NodeMCU ESP32, Arduino Nano & Raspberry Pi Pico, Boardconnectoren für Raspberry Pi & Externe Boards
Elektronische Komponenten
Infrarot-Fernbedienung, RFID-Chip, RFID-Karte, 6x Krokodilklemmen, microSD-Karten-Lesegerät, Servomotor, Schrittmotor, 32 GB microSD-Karte
Bauteile
40x Widerstände, 3x grüne LEDs, 3x gelbe LEDs, 3x rote LEDs, 1x Transistor, 5x Buttons, 1x Potentiometer, 2x Kondensatoren
Weiteres Zubehör
Schraubensortiment, Schraubendreher, Zubehör-Aufbewahrungstasche, Netzgerät & Netzkabel, Servohalterung
Stromversorgung
Verbautes Netzgerät: 36 W, 12 V, 3 A Gehäuseanschluss: Kleingeräte-Stecker C8
Spannungsausgänge
12 V, 5 V, 3,3 V, Variabler Spannungsausgang (2-11 V)
Ausgeführte Datenbusse & Signalausgänge
I²C, SPI, Analog-Digital-Wandler
Batterie (RTC)
CR2032
Abmessungen
327 x 200 x 52 mm
Inbegriffen
Raspberry Pi 4 (8 GB RAM)
Downloads
Joy-Pi Website
Datenblatt
Anleitung
,
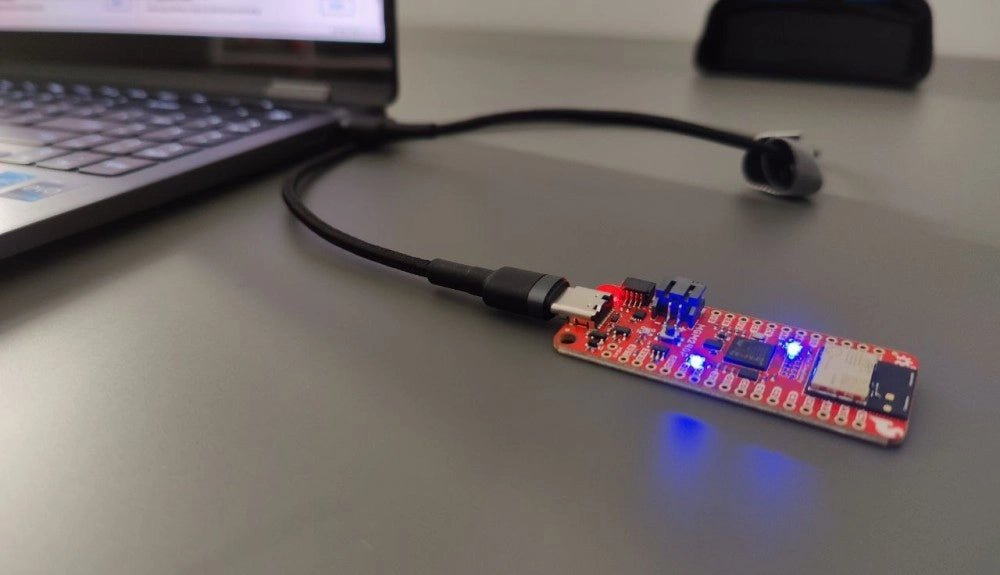
von Saad Imtiaz
SparkFun Thing Plus Matter (MGM240P): Ein vielseitiges IoT-Entwicklungsboard basierend auf Matter (Testbericht)
Das SparkFun Thing Plus Matter - MGM240P ist ein vielseitiges und funktionsreiches Entwicklungsboard für die Erstellung von Matter-basierten IoT-Geräten. Matter, früher bekannt als Project CHIP...