Lancé en mars 2012, plus les 30 millions d'exemples nanométriques du Raspberry Pi exposés. Il s’agit d’une contribution à la révolution des technologies de l’information et d’un grand stimulant pour le développement du monde de l’électronique. Le succès de la « tarte à la framboise » (traduction littérale de Raspberry Pie) est le résultat de l'industrie micro-électronique de transformation des produits.
Eben Upton, son créateur, âme à l'origine, les acheteurs étaient presque tous des makers , adultes en général. Cependant la plupart d'entre eux étaient également des ingénieurs professionnels. Rapidité, les gens sont responsables de leurs activités personnelles lors de l'utilisation du Raspberry Pi avec une plateforme informatique stable, et ils sont également adoptés pour leur métier.
La Fondation Raspberry Pi édite un magazine édité par la communauté Raspberry Pi : le MagPi (en anglais). Le magazine aborde les passions selon la nature du numérique nano-ordonné et global. Il contient des bancs d'essai de nouveaux produits, de nombreux tutoriels et un grand nombre de projets. Les membres de la communauté Raspberry Pi participent à leur expérience.
La maison d'édition Elektor s'associe à la Fondation Raspberry Pi pour la publication dans le magazine français MagPi. Il est conçu pour assembler 84 projets publics du MagPi en développant l'utilisation du Raspberry Pi et son inspiration.
Grâce à la taille fine et aux possibilités du Raspberry Pi, les créateurs du monde sont fiers des idées des plus folles.
Partez en voyage dans un monde où est faisable !
Le Raspberry Pi à toutes les sauces pour ?
s'inspirateur des projets réalisés par les membres de la communauté
dénicher des utilisations inouïes
découvrir des accessoires et technologies diverses
entrer dans une communauté intégrée et active de Raspberry Pi
This book is for people who want to understand how AC drives (also known as inverter drives) work and how they are used in industry by showing mainly the practical design and application of drives.
The key principles of power electronics are described and presented in a simple way, as are the basics of both DC and AC motors. The different parts of an AC drive are explained, together with the theoretical background and the practical design issues such as cooling and protection.
An important part of the book gives details of the features and functions often found in AC drives and gives practical advice on how and where to use these. Also described is future drive technology, including a matrix inverter.
The mathematics is kept to an essential minimum. Some basic understanding of mechanical and electrical theory is presumed, and a basic knowledge of single andthree phase AC systems would be useful.
Anyone who uses or installs drives, or is just interested in how these powerful electronic products operate and control modern industry, will find this book fascinating and informative.
This book is all about building your own DIY home control system. It presents two innovative ways to assemble such a system: By recycling old PC hardware – possibly extending the life of an old PC, or by using Raspberry Pi. In both cases, the main system outlined in this book will consist of a computer platform, a wireless mains outlet, a controller and a USB webcam – All linked together by Linux.
By using the Raspberry Pi in conjunction with Arduino (used as an advanced I/O system board), it is possible to construct a small, compact, embedded control system offering enhanced capacity for USB integration, webcams, thermal monitoring and communication with the outside world.
The experience required to undertake the projects within this book are minimal exposure to PC hardware and software, the ability to surf the internet, burn a CD-ROM and assemble a small PCB.
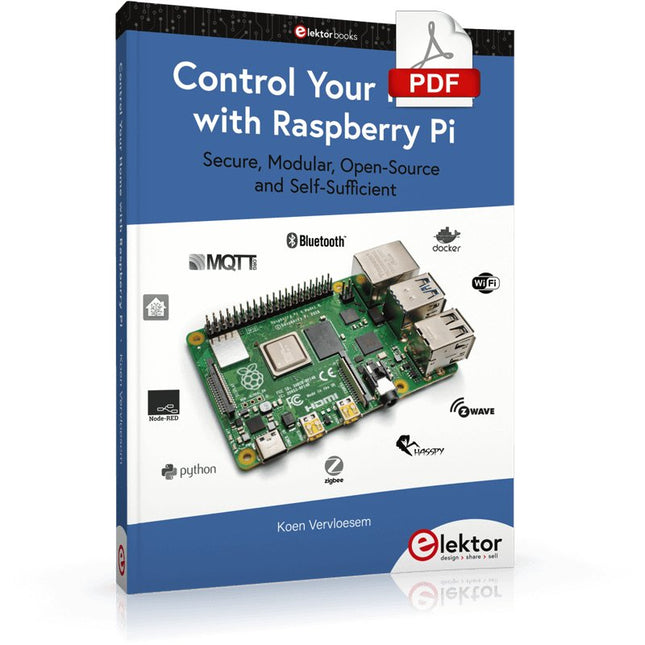
Secure, Modular, Open-Source and Self-Sufficient
Ever since the Raspberry Pi was introduced, it has been used by enthusiasts to automate their homes. The Raspberry Pi is a powerful computer in a small package, with lots of interfacing options to control various devices. This book shows you how you can automate your home with a Raspberry Pi. You’ll learn how to use various wireless protocols for home automation, such as Bluetooth, 433.92 MHz radio waves, Z-Wave, and Zigbee. Soon you’ll automate your home with Python, Node-RED, and Home Assistant, and you’ll even be able to speak to your home automation system. All this is done securely, with a modular system, completely open-source, without relying on third-party services. You’re in control of your home, and no one else.
At the end of this book, you can install and configure your Raspberry Pi as a highly flexible home automation gateway for protocols of your choice, and link various services with MQTT to make it your own system. This DIY (do it yourself) approach is a bit more laborious than just installing an off-the-shelf home automation system, but in the process, you can learn a lot, and in the end, you know exactly what’s running your house and how to tweak it. This is why you were interested in the Raspberry Pi in the first place, right?
Turn your Raspberry Pi into a reliable gateway for various home automation protocols.
Make your home automation setup reproducible with Docker Compose.
Secure all your network communication with TLS.
Create a video surveillance system for your home.
Automate your home with Python, Node-RED, Home Assistant and AppDaemon.
Securely access your home automation dashboard from remote locations.
Use fully offline voice commands in your own language.
Download the software and view the errata for the book on GitHub.
Practical Introduction to 3D Modeling from Enclosure to Front Panel
Embedding a vintage component, creating a professional looking home for a circuit board, or even designing a complex apparatus complete with a chassis – these and many other challenges turn into a stimulating pleasure with FreeCAD. Once you have internalized the basic processes, there are virtually no limits to your imagination.
Starting to use a new software is never straightforward – especially with a tool as versatile as FreeCAD. Manageable, but at the same time easily usable individual components provide the starting point in this book. Putting these components together later results in assemblies.
In the FreeCAD universe, a workable trajectory is demonstrated. The described procedure is illustrative so the examples are easily applied to custom tasks. The devices were made by the author and illustrated with photos.
Creating a 3D design is requiring some effort but the initial investment pays off soon. Besides the impressive spatial representation of the projects, the extracted drawings yield a solid base for documentation and production. Extended FreeCAD capabilities like the unfolding of sheet metal parts enormously add to efficiency and pushes models forward into practical assembly.
Soon you will definitely not want to do without FreeCAD!
Build your textbook weather station or conduct environmental research together with the whole world. With many practical projects for Arduino, Raspberry Pi, NodeMCU, ESP32, and other development boards.
Weather stations have enjoyed great popularity for decades. Every current and even every long discontinued electronics magazine has regularly featured articles on building your own weather station. Over the years, they have become increasingly sophisticated and can now be fully integrated into an automated home — although this often requires loyalty to an (expensive) brand manufacturer across all components.
With your own weather and environmental data, you can keep up and measure things that no commercial station can. It’s also fun: expand your knowledge of electronics, current microcontroller development boards and programming languages in a fun and meaningful way. For less than 10 euros you can get started and record your first environmental data — with time and growing interest, you will continue to expand your system.
In this Edition
Which Microcontroller Fits My Project?
The Right Development Environment
Tracking Wind and Weather
Weather Display with OpenWeatherMap and Vacuum Fluorescent Display
Volatile Organic Compounds in the Air We Breathe
Working with MQ Sensors: Measuring Carbon Monoxide — Odorless but Toxic
CO2 Traffic Light with ThingSpeak IoT Connection
An Automatic Plant Watering System
Good Indoor Climate: Temperature and Humidity are Important criteria
Classy Thermometer with Vintage Tube Technology
Nostalgic Weather House for the Whole Family
Measuring Air Pressure and Temperature Accurately
Sunburn Warning Device
DIY Sensor for Sunshine Duration
Simple Smartphone Says: Fog or Clear View?
Identifying Earthquakes
Liquid Level Measurement for Vessels and Reservoirs
Water pH Value Measurement
Detecting Radioactive Radiation
GPS: Sensor Location Service Across the Globe
Saving and Timestamping Log Files on SD Cards
LoRaWAN, The Things Network, and ThingSpeak
Operating a LoRaWAN Gateway for TTN
Defying "Wind and Weather"
Mega Display with Weather Forecasz
Elektor GREEN and GOLD members can download their digital edition here.
Not a member yet? Click here.
A Current Source for Testing (Z-)DiodesChecking Z-Diodes from 1 to 54 V @ 1 to 50 mA
ESD Strap TesterA Bench Tool with Pass, Borderline, and Fail Indication
Power Supply Transient Response TesterA Repeatable Step-Load Generator for Bench Power Supplies
Euclidean Sequencer Without a MicrocontrollerTrigger Patterns and CV Sequences with Simple CMOS Logic
LED Flashing Light for Gates and More with an Audible Alert
Need PCBs? The Elektor PCB Service Has You Covered.
Toothbrush TimerUsing a Tiny PIC
A Contactless Magnetic Combination LockWith the AS5600 Rotary Position Sensor
Low-Noise Battery-Powered PreamplifierFor Dynamic Microphones
The Arduino Nano TestLabMeasurement, Control, and Regulation
Rhythmic Bass LightEmphasize the Rhythm of Your Music
Low-Cut FilterNo Risk of Audio Feedback on Your System
Precise 1 Hz Square Wave Generator for BreadboardsA Reliable CMOS-Based Clock Source
555 Upside DownDuty Cycles Down to Zero
From Halfgeleidergids to Circuit Specials65 Years of Electronics Innovation
Electrical IsolationCAN Interface with Digital Isolator and Power Module
SpongillatorA Sponge-Based Oscillator
True Random Number GeneratorWith Integrated Chi-Square Test
3D Viewer for HTML pagesSimple, and Almost Without Code
Programming with TLScriptA Scripting Language for Measurement, Testing, and Control
Circuit Design: Tips from Experts
FeedbackWhat Is It and Why Is It Important?
One Board, Endless Ideas: Arduino UNO QFrom Retro Gaming to Real-Time Environmental Monitoring
How to Fix a Donut Antenna
Standby KillerA Real On/Off Switch for Your TV
Battery TestingMeasuring Batteries with the Arduino Nano
Power Supply for Audio Power AmplifiersA Good Power Supply Without Mains Hum
Prototyping Boards for RFFast Setups with DIY Prototyping Boards
T3 Surge ProtectionA Type 3 Spike Suppressor for Your Sensitive Equipment
IoT Room Thermostat BoardWith ESP32-C3/S3-Based Xiao MCU module
From Rigid to SmartFlexible and Printed Electronics — Between Vision and Industrial Reality
Home Information SystemUsing Windows on a Raspberry Pi
Starting with Node-REDAn open-source visual block-based programming tool
Elektor Summer GiveAway
Simple Function Generator: With Reverse-Order Signal Creation
GreatScott! Builds a LoRa Alarm System
Review: Joy-iT RD6006 Benchtop Power Supply Kit
Review: The GreatFET One Interface Board
Small Circuits Revival – XXLEscaped from the Suggestions Box
Poorest Man's External 2.4 GHz Wi-Fi Antenna
Simple On-Off Temperature Controller with Raspberry Pi HAT
How to Take (Successful) Photos of ElectronicsShowing your projects in their best light
Review: The I2CDriver Tool
Review: JOY-iT Joy-View Portable Touchscreen
LED Booster for MicrocontrollersWith just one component
Experimental Ultrasonic Clothes Washer
Review: The Joy-iT JDS2915 Signal GeneratorA 2-Channel Signal Generator and Frequency Counter
Traffic Lights Programmed in PIC Assembly Code
E-E-E-ternal Blinker
Experimental Hall Sensor
Tracing Shorts with the Milli-Ohm or ESR Meter
Review: Elektor SDR Hands-on Kit
Elektor Labs Pipeline
Elektor KickstarterWell, you get the idea.
Do You Really Need All That Stuff???This is where I spend many hours working on electronics projects
Homelab Tours: The Kinetic Clock MakerStargate jigsawed!
Hello, World! We’re Elektor, and We’re Social
M4 + 2x A7 + GPU: An Unbalanced Dream TeamLatest STM32MP1-SoCs can tackle demanding applications
Test Rig for 16F18877 & Similar Big PICs
Inter-Microcontroller Traffic with the SPI Bus and ATmega328p
Six Shades of LF/AF OSC (and the Miller’s Tale)
BBC micro:bit Absolute Minimalist Oscilloscope with LED Display
‘Knight Rider’ LED Chaser with the ESP32
LW/MW AM Signal Generator with ATtiny13
Absolute Minimalist Dip Meter
Photovoltaic Regulator UpdateNew function for measuring battery temperature
Wireless SignallingTransmitting switching signals over LPR
Ultrasonic Reverse Parking Aid with Arduino Uno
Distortion Pedal with Op Amp and Space Charge Tubes
Electronics Workspace Essentials
Hexadoku
Artificial Intelligence for Beginners (2)Neural networks with Linux and Python
Diese Ausgabe steht allen GOLD- und GREEN-Mitgliedern auf der ElektorMagazine-Website zum Download bereit!
Sie sind noch kein Mitglied? Hier klicken!
Was genau ist eigentlich Edge-KI?Intelligenz direkt im Gerät
Wir stellen vor: Edge Impulse StudioKI-Modelle für Edge-Geräte einfach erstellen und bereitstellen
Keyword Spotting mit Edge ImpulseErfassen, Trainieren und Implementieren
Intelligente Gerätesteuerung per Sprachbefehl mit Nordic Thingy:53
Edge-KISchlüsselbegriffe zum Verständnis von Edge-KI und Machine Learning
Crashkurs: Einstieg in Edge ImpulseWie Sie mit dem Arduino Nano 33 BLE Sense ein ML-Modell erfassen, trainieren und bereitstellen
Ein neues Kapitel für ArduinoVom Hobby-Board zur Edge-Computing-Plattform
Erste Schritte mit Objekterkennung auf Edge-Geräten
Fehlererkennung auf LeiterplattenComputer Vision mit dem Raspberry Pi
KI-Skalierung für kleinste Geräte
Optimierung der Energieeffizienz bei batteriebetriebenen Edge-KI-Geräten
KI-ToasterWenn Edge-KI das Frühstück rettet
Thundercomm Rubik Pi 3Raspberry Pi trifft Edge-KI
Unternehmensführung, Embedded ML und die Edge-Revolution
Vision-Language-Modelle für Edge-GeräteKaskadierte Modelle für höhere Zuverlässigkeit
Lernen Sie Edge Impulse kennenFragen aus der Elektor-Community
Projekt-Update #5: Energiemessgerät mit ESP32Haushaltsgeräte mit Edge-KI erkennen
Bewegungserkennung mit Anomalie-ErkennungEin End-to-End-Tutorial
Intelligentes Belüftungssystem: Verbindung von Schall- und UmweltdatenEin Dual-MCU-Ansatz mit Machine Learning für die automatische Steuerung von Fenstern und Jalousien
Sprachsteuerung für Ohrhörer und Headsets
Edge-KI: Intelligente Geräte auf dem Vormarsch
Der Elektor Zenerdioden-Tester ist im Wesentlichen eine Konstantstromquelle, die in Stufen von 1 bis 50 mA geschaltet werden kann. Er kann verwendet werden, um Z-Dioden bis zu maximal 54 V zu testen. Dank eines 60-V-Step-up-Wandlers kann das Gerät mit den üblichen 5 bis 12 V versorgt werden.
Das Prinzip dieses Testers ist einfach. Eine Z-Diode oder ein anderes DUT (device under test, also ein Prüfling, wie z. B. eine LED) wird über eine einstellbare Stromquelle vorgespannt. Die Spannung über dem DUT kann mit einem Multimeter gemessen werden. Die Spannung der meisten (kleinen) Z-Dioden ist bei einem Strom von 5 mA spezifiziert. Je nach Anwendung kann auch die Spannung bei anderen Strömen interessant sein. Deshalb stehen sechs Stromeinstellungen zur Verfügung: 1, 2, 5, 10, 20 und 50 mA. LEDs sind häufig bei einem Strom von 20 mA spezifiziert.
Getestet werden kann:
Ob eine Z-Diode defekt ist (Kurzschluss oder hochohmig).
Ob eine Z-Diode die korrekte Z-Spannung aufweist.
Wie sich eine Z-Spannung bei unterschiedlichen Strömen verändert.
Welche exakte Spannung an einer integrierten Spannungsreferenz anliegt.
Ob sich LEDs in einer Reihenschaltung in ihrer Helligkeit unterscheiden (daher der Strom von 20 mA).
Wie hoch die Stromverstärkung bei unterschiedlichen Basisströmen in (Leistungs-)Transistoren ist.
Das Kit enthält alle in der Stückliste aufgeführten Teile, einschließlich Platine und Gehäuse.
Technische Daten
Versorgungsspannung
5…12 V/2 A (USB-C)
Versorgungsstrom (Itest = 50 mA)
1,1 A bei 5 V / 412 mA bei 12 V
Wählbare Ströme
1, 2, 5, 10, 20 und 50 mA
Max. Prüfspannung
>54 V bei Itest ≥1 mA
Max. Ausgangsspannung
60 V bei Itest = 0 mA
Spannungsbegrenzung bei 5 V
4,5 V bei Itest = 1 mA / 5,18 V bei Itest = 50 mA
Gehäuseabmessungen
110 x 82 x 44 mm
Platinengröße
105,4 x 67,3 mm
Anschlüsse
4-mm-Bananenbuchsen für Multimeter
2-mm-Bananenbuchsen für Prüfklemmen
USB-C-Buchse für die Spannungsversorgung
Lieferumfang
Widerstände
R1 = 3.3 kΩ, 600 mW, 1%
R2 = 0.15 Ω, 1 W, 5%, LS 12.7 mm, ø 3.5 mm
R3, R8 = 180 Ω, 600 mW, 1%
R4, R6, R16 = 1 kΩ, 600 mW, 1%
R5, R19 = 47 kΩ, 600 mW, 1%
R7 = 3.9 kΩ, 1 W, 5%, LS 12.7 mm, ø 3.5 mm
R9, R10, R12 = 10 kΩ, 600 mW, 1%
R11, R13 = 100 Ω, 600 mW 1%
R14 = 249 Ω, 600 mW, 1%
R15 = 499 Ω, 600 mW, 1%
R17 = 2.49 kΩ, 250 mW, 1%
R18 = 4.99 kΩ, 250 mW, 1%
Kondensatoren
C1 = 470 uF / 35 V, 20%, Ir = 1.86 A, ø 12.5 mm, LS 5 mm, ESR = 0.038 Ω (Panasonic EEUTP1V471)
C2 = 1 uF / 100 V, 10%, X7R, LS 5 mm
C3 = 2.2 nF / 50 V, 10%, X7R, LS 5 mm
C4, C7 = 100 nF / 100 V, 10%, X7R, LS 5 mm
C5 = 100 uF / 100 V, 20%, ø 14 mm max., LS 5 mm
C6 = 1 nF / 100 V, 10%, X7R, LS 5 mm
Induktor
L1 = 100 uH, Irms = 2.4 A, Isat = 3.5 A, 0.09 Ω, radial, pitch 2.5/5/10 mm, ø 14 mm max. (Kemet SBC8-101-242)
Halbleiter
D1 = MUR120G, DO-41
D2, D4 = STPS3150RL, DO-201AD
D3 = Z-diode, 18 V, 1.3 W (BZX85C18)
D5 = Z-diode, 5.1 V, 0.5 W (1N5231B)
LED1 = LED in pushbutton S1
LED2 = LED, green, 3 mm
IC1 = MC34063, DIP-8
IC2 = LM4040BIZ-5.0/NOPB, TO-92 (TO-226AA-3)
IC3 = TL051CP, DIP-8
T1 = BC327.25, TO-92
T2 = STP40NF10L, TO-220
T3 = IRF9510PBF, TO-220
T4 = 2N7000, TO-92
Sonstiges
K1, K2, S1, S3 = 2-way screw terminal block, LS 3.5 mm, max. 1.5 mm²
connected to K1 = USB-C socket, 30 V/3 A, chassis mounted, wired, 9 x 16 mm
connected to K2 = Banana Connector, 2 mm, Socket, 60 VDC, Panel Mount, red (Multicomp 24.102.1)
connected to K2 = Banana Connector, 2 mm, Socket, 60 VDC, Panel Mount, black (Multicomp 24.102.2)
Test clip, red, 30 VAC/60 VDC (Hirschmann 931467101)
Test clip, black, 30 VAC/60 VDC (Hirschmann 931467100)
S1 = Pushbutton, panel mount, SPST-NO, 30 DC/100 mA, with red LED
S2 = Rotary Switch, 6 position, 2 pole, 30°, 250 V/150 mA
S3 = Toggle switch, panel mount, SPDT, solder lugs, 28 VDC
T2, T3 = Heat sink, 15°C/W, FK 214 SA-CB
Enclosure Hammond 1591XXSSBK, ABS, 110 x 82 x 44 mm
Knob for S2, round shaft 6 mm, ø 21 mm, with indicator line (Multicomp CP-LB21-6-6D)
4 x Self-tapping screw #4-1/4", carbon steel, pan head
Banana plug, red, 2 mm, 60 VDC (Multicomp 25.205.1)
Banana plug, black, 2 mm, 60 VDC (Multicomp 25.205.2)
Banana socket, black 4 mm, panel mount
Banana socket, red 4 mm, panel mount
for LED1, LED2 = Pin header, 1 x 2, vertical, pitch 2.54 mm
for LED1, LED2 = Pin socket, 1 x 2, vertical, pitch 2.54 mm
for T2, T3 = M3 screw, 10 mm, steel, pan head
2 x M3 washer, plain, steel
4 x M3 nut
for IC1, IC3 = DIP-8 socket
Wire, black, 0.25 mm² (24 AWG), stranded 14 x 0.15 mm, 1 m
Wire, red, 0.25 mm² (24 AWG), stranded 14 x 0.15 mm, 1 m
PCB 250772-1 v1.1
Links
Artikel
Elektor Labs
Elektor GREEN and GOLD members can download their digital edition here.
Not a member yet? Click here.
What to expect
This Elektor edition guest-edited by Edge Impulse explores the edge AI workflow, from data collection and model training to deployment and optimization:
End-to-End Edge AIA hands-on object detection series that walks through the complete machine learning pipeline on embedded hardware.
High-Resolution, High-Speed Object Counting (Nvidia Jetson Nano, TensorRT)Pushing inference speed and precision for visual counting applications.
PCB Defect Detection with Computer Vision (Raspberry Pi)Smarter manufacturing through embedded vision.
Smart Building Ventilation with Sensor FusionAI-powered environmental optimization for energy efficiency.
Analog Meter Reading (Arduino Nicla Vision)A TinyML approach to automating analog infrastructure.
Smart Appliance Control Using Voice Commands (Nordic Thingy:53)Speech recognition at the edge.
Liquid Classification with TinyML (Seeed Wio Terminal + TDS Sensor)Combining IoT sensing and embedded ML for fluid analysis.
Surgery Inventory Object DetectionApplying real-time vision to healthcare logistics.
Plus, the magazine includes exclusive interviews with: Edge Impulse co-founders Zach Shelby and Jan Jongboom; Qualcomm Technologies VP of product management Manny Singh; and EDGE AI FOUNDATION CEO Pete Bernard. Also included are a Tech the Future essay titled "AI at the Edge: Powering the Next Generation of Devices," an Industry Case Study on GlobalSense, and more.
Contents
What the Heck Is Edge AI Anyway?Bringing Intelligence to the Device
Meet Edge Impulse StudioEasily Build and Deploy Edge AI Models
Keyword Spotting with Edge ImpulseCollect, Train, and Deploy
Smart Appliance Control Using Voice Commands with the Nordic Thingy:53
Key Terms for Understanding Edge AI and Machine Learning
Crash Course: Getting Started with Edge ImpulseLearn to Collect, Train, and Deploy an ML Model with the Arduino Nano 33 BLE Sense
A New Chapter for ArduinoFrom Hobby Board to Edge Computing Powerhouse
Getting Started with Object Detection on Edge Devices
PCB Defect DetectionComputer Vision with Raspberry Pi
Scaling AI to the Smallest Devices
Optimizing Power Efficiency in Battery-Driven Edge AI Devices
AI ToasterWhen Edge AI Meets Breakfast
Thundercomm Rubik Pi 3Raspberry Pi Familiarity Meets Edge AI
Leadership, Embedded ML, and the Edge Revolution
Vision Language Models for the EdgeCascading Models for Better Reliability
Get to Know Edge ImpulseQuestions from the Elektor Community
Project Update #5: ESP32-Based Energy MeterUsing Edge AI to Recognize Household Loads
Motion Recognition with Anomaly DetectionAn End-to-End Tutorial
Smart Ventilation System: Fusing Sound and Environmental DataA Dual-MCU Machine Learning Approach for Automated Window and Louver Control
Bringing Voice Control to Earbuds and Headsets
AI at the Edge: Powering the Next Generation of Devices