
Suchergebnisse für "sparkfun OR redboard OR artemis OR nano"
-
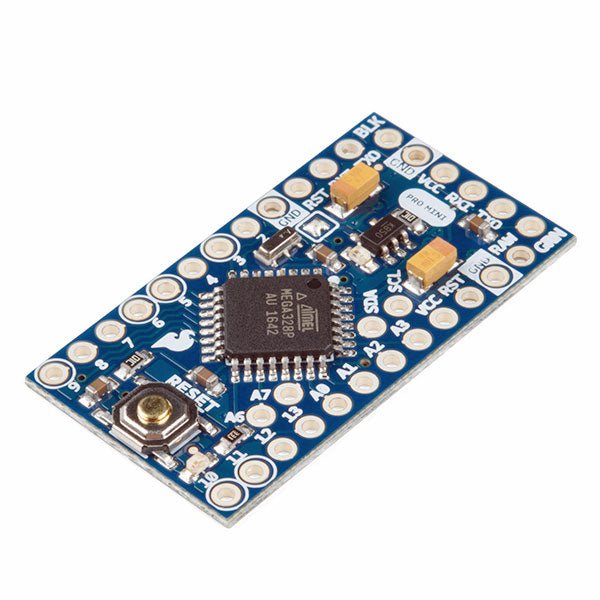
SparkFun SparkFun Arduino Pro Mini 328 (5 V, 16 MHz)
Der Arduino Pro Mini ist ein Mikrocontroller-Board auf Basis des ATmega328P. Es hat 14 digitale Eingangs-/Ausgangs-Pins (von denen 6 als PWM-Ausgänge verwendet werden können), 6 analoge Eingänge, einen On-Board-Resonator, eine Reset-Taste und Löcher für die Montage von Stiftleisten. Eine sechspolige Stiftleiste kann mit einem FTDI-Kabel oder einem SparkFun-Breakout-Board verbunden werden, um die Platine über USB mit Strom zu versorgen und mit ihr zu kommunizieren. Der Arduino Pro Mini ist für die semi-permanente Installation in Objekten oder Ausstellungen gedacht. Die Platine wird ohne vormontierte Stiftleisten geliefert, was die Verwendung verschiedener Arten von Steckern oder das direkte Anlöten von Drähten ermöglicht. Das Pin-Layout ist mit dem Arduino Mini kompatibel. Technische Daten Microcontroller ATmega328P Board Stromversorgung 5-12 V Schaltung Betriebsspannung 5 V Digitale E/A-Pins 14 PWM Pins 6 UART 1 SPI 1 I²C 1 Analogeingangs-Pins 6 Externe Interrupts 2 DC-Strom pro I/O-Pin 40 mA Flash Memory 32 KB, davon 2 KB vom Bootloader verwendet SRAM 2 KB EEPROM 1 KB Taktgeschwindigkeit 16 MHz Abmessungen 18 x 33.3 mm Downloads Eagle files Schematics
€ 14,95€ 7,95Bestpreis
-

Elecrow Elecrow AI Starter Kit für Jetson Orin Nano
All-in-One-Plattform für KI-Lernen und -Entwicklung im Bereich Edge Intelligence Dieses auf dem NVIDIA Jetson Orin Nano basierende KI-Starter-Kit ist eine vielseitige Plattform für Lernen, Entwicklung und praktische Experimente im Bereich Edge AI. Das für den Einsatz mit dem NVIDIA Jetson Orin Nano konzipierte Kit kombiniert ein 11,6-Zoll-IPS-Display, eine schwenk- und neigbare 8-Megapixel-Kamera sowie ein KI-gestütztes Sprachinteraktionssystem. Es umfasst 30 Funktionsmodule und 38 sorgfältig ausgearbeitete Python-Kurse, die vom Anfänger- bis zum Fortgeschrittenenniveau reichen. Die Kursinhalte decken Python-Grundlagen, Sensortechnologie, KI-basierte Bildverarbeitung (AI Vision) und Objekterkennung ab. Dank praktischer Schritt-für-Schritt-Übungen – von der grundlegenden Programmierung bis hin zu praxisnahen Computer-Vision-Anwendungen – bietet dieses Kit eine ideale Plattform für Schüler, Maker, Entwickler und alle, die sich mit künstlicher Intelligenz und Edge Computing beschäftigen möchten. Hinweis: Der NVIDIA Jetson Orin Nano ist nicht im Lieferumfang enthalten. Features Entwickelt für den NVIDIA Jetson Orin Nano KI-Sprachinteraktionsmodul 8-MP-Kamera mit Schwenk-Neige-Steuerung Unterstützt Objekt- und Gesichtserkennung (Tracking) Kein Löten oder aufwendige Verkabelung erforderlich Integriertes 11,6-Zoll-IPS-Display 30 Funktionsmodule 38 Schritt-für-Schritt-Python-Lektionen Erweiterungsschnittstellen für I²C, UART und GPIO Tragetasche im Lieferumfang enthalten Technische Daten Hauptprozessor Jetson Orin Nano Anzahl der Sensoren 30 Design des Sensor-Boards Integriertes Sensor-Board; kein Löten oder aufwendige Verkabelung erforderlich Bildschirm 11,6-Zoll-IPS-Bildschirm Bildschirmauflösung 1366 x 768 Kamera IMX219 8 MP Erweiterungsschnittstellen 2x I²C, 1x UART, 1x IO D13, 1x IO D12 Programmierumgebung Python-basiert Anzahl der Tutorials 38 kreative Tutorials Zielgruppe Schüler, Lehrkräfte, Hardware-Enthusiasten Anwendungsszenarien Ideal zum Erlernen der KI-Programmierung und der Grundlagen des Jetson Orin Nano Abmessungen 300 x 200 x 100 mm Modulliste Modul Anzahl Temperatur- und Feuchtigkeitssensor 1 Stk. Taster 4 Stk. Ultraschall-Abstandssensor 1 Stk. Lichtsensor 1 Stk. Linear-Potentiometer 1 Stk. Summer 1 Stk. LCD 1 Stk. Infrarot-Fernbedienung 1 Stk. Relais 1 Stk. NFC 1 Stk. PIR-Bewegungssensor 1 Stk. Joystick 1 Stk. 4-stelliges Display 1 Stk. LED 1 Stk. Mikrofon 1 Stk. Lautsprecher 1 Paar Vibrationsmotor 1 Stk. Berührungssensor 1 Stk. 8x8-RGB-Matrix 1 Stk. Luftdrucksensor 1 Stk. Neigungsschalter 1 Stk. Schrittmotor 1 Stk. Beschleunigungs- und Gyroskopsensor 1 Stk. Gassensor (MQ2) 1 Stk. Hall-Sensor 1 Stk. Drehgeber (Rotary Encoder) 1 Stk. Gabellichtschranke 1 Stk. NTC 1 Stk. Servo 2 Stk. Monokulare Kamera 1 Stk. Lieferumfang 1x Elecrow AI Starter Kit für Jetson Orin Nano 1x IR-Fernbedienung 1x NFC-Karte 1x 128 GB SD-Karte 1x 40-Pin-GPIO-Kabel 2x 22-Pin-FPC-Kabel 2x 24-Pin-FPC-Kabel 1x Jetson-DP- und USB-Adapterplatine Nicht enthalten NVIDIA Jetson Orin Nano Downloads Manual Wiki OpenClaw Install and Config Guide
€ 249,00
Mitglieder: € 224,10
-

Elektor Labs Elektor Arduino Nano MCCAB Trainingsboard
Das Elektor Arduino Nano MCCAB Trainingsboard enthält alle Bauteile (inkl. Arduino Nano), die für die Übungen des "Mikrocontroller-Praxiskurs für Arduino-Einsteiger" benötigt werden wie Leuchtdioden, Schalter, Taster, akustische Signalgeber usw. Auch externe Sensoren, Motoren oder Baugruppen können mit diesem Mikrocontroller-Übungssystem abgefragt oder gesteuert werden. Technische Daten (Arduino Nano Trainingsboard MCCAB) Stromversorgung Über die USB-Verbindung des zur Erstellung der Programme sowieso angeschlossenen PCs oder ein externes Netzteil (nicht im Lieferumfang enthalten) Betriebsspannung +5 Vcc Eingangsspannung Alle Eingänge 0 V bis +5 V VX1 und VX2 +8 V bis +12 V (nur bei Verwendung eines externen Netzteils) Mikrocontrollermodul Arduino Nano Hardwareperipherie LCD 2x16 Zeichen Potenziometer P1 & P2 JP3: Auswahl der Betriebsspannung von P1 & P2 Verteiler SV4: Verteiler für die BetriebsspannungenSV5, SV6: Verteiler für die Ein-/Ausgänge des Mikrocontrollers Schalter und Taster RESET-Taster auf dem Arduino Nano-Modul6x Tastschalter K1 … K66x Schiebeschalter S1 … S6JP2: Verbindung der Schalter mit den Eingängen des Mikrocontrollers Summer Piezo-Summer Buzzer1 mit Steckbrücke auf JP6 Leuchtanzeigen LED L auf dem Arduino Nano-Modul, verbunden mit GPIO D1311x LED: Zustandsanzeige für die Ein-/AusgängeJP6: Verbindung der LEDs LD10 … LD20 mit den GPIOs D2 … D12 Serielle SchnittstellenSPI & I²C JP4: Auswahl des Signals an Pin X der SPI-Steckerleiste SV12SV9 bis SV12: SPI-Interface (3,3 V/5 V) bzw. I²C-Interface Schaltausgang für externe Geräte SV1, SV7: Schaltausgang (maximal +24 V/160 mA, extern zugeführt)SV2: 2x13 Pins zum Anschluss externer Module 3x3 LED-Matrix (9 rote LEDs) SV3: Spalten der 3x3 LED-Matrix (Ausgänge D6 … D8)JP1: Verbindung der Reihen mit den GPIOs D3 … D5 Software Library MCCABLib Steuerung der Hardware-Komponenten (Schalter, Taster, Leuchtdioden, 3x3 LED-Matrix, Summer) auf dem MCCAB Trainingsboard Betriebstemperatur bis +40 °C Abmessungen 100 x 100 x 20 mm Technische Daten (Arduino Nano) Mikrocontroller ATmega328P Architektur AVR Betriebsspannung 5 V Flashspeicher 32 KB, davon 2 KB vom Bootloader belegt SRAM 2 KB Taktfrequenz 16 MHz Analoge IN-Pins 8 EEPROM 1 KB DC-Strom pro I/O-Pin 40 mA an einem I/O-Pin, insgesamt maximal 200 mA an allen Pins gemeinsam Eingangsspannung 7-12 V Digitale I/O-Pins 22 (6 davon sind PWM-fähig) PWM-Ausgänge 6 Stromverbrauch 19 mA Abmessungen 18 x 45 mm Gewicht 7 g Lieferumfang 1x Elektor Arduino Nano Trainingsboard (MCCAB) 1x Arduino Nano
€ 79,95€ 69,95Bestpreis
-

Elektor Bundles Microcontrollers Hands-on Course for Arduino Starters (Bundle)
Realize your own projects with the Elektor Arduino Nano MCCAB Training Board The microcontroller is probably the most fascinating subfield of electronics. Due to the multitude of functions, it combines on its chip, it is a universal multi-tool for developers to realize their projects. Practically every device of daily use today is controlled by a microcontroller. However, for an electronic layman, realizing his own ideas with a microcontroller has so far remained a pipe dream due to its complexity. The Arduino concept has largely simplified the use of microcontrollers, so that now even laymen can realize their own electronics ideas with a microcontroller. Book & Hardware in the Bundle: 'Learning by Doing' This book, which is included in the bundle, shows how you can realize your own projects with a microcontroller even without much experience in electronics and programming languages. It is a microcontrollers hands-on course for starters, because after an overview of the internals of the microcontroller and an introduction to the programming language C, the focus of the course is on the practical exercises. The reader acquires the necessary knowledge by 'learning by doing': in the extensive practical section with 12 projects and 46 exercises, what is learned in the front part of the book is underpinned with many examples. The exercises are structured in such a way that the user is given a task to solve using the knowledge built up in the theoretical part of the book. Each exercise is followed by a sample solution that is explained and commented on in detail, which helps the user to solve problems and compare it with his own solution. Arduino IDE The Arduino IDE is a software development environment that can be downloaded for free to your own PC and that contains the entire software package needed for your own microcontroller projects. You write your programs ('apps') with the IDE’s editor in the C programming language. You translate them into the bits and bytes that the microcontroller understands using the Arduino IDE's built-in compiler, and then load them into the microcontroller's memory on the Elektor Arduino MCCAB Nano Training Board via a USB cable. Query or control external sensors, motors or assemblies In addition to an Arduino Nano microcontroller module, the Elektor Arduino Nano MCCAB Training Board contains all the components required for the exercises, such as light-emitting diodes, switches, pushbuttons, acoustic signal transmitters, etc. External sensors, motors or assemblies can also be queried or controlled with this microcontroller training system. Specifications (Arduino Nano MCCAB Training Board) Power Supply Via the USB connection of the connected PC or an external power supply unit (not included) Operating Voltage +5 Vcc Input Voltage All inputs 0 V to +5 V VX1 and VX2 +8 V to +12 V (only when using an external power supply) Hardware periphery LCD 2x16 characters Potentiometer P1 & P2 JP3: selection of operating voltage of P1 & P2 Distributor SV4: Distributor for the operating voltagesSV5, SV6: Distributor for the inputs/outputs of the microcontroller Switches and buttons RESET button on the Arduino Nano module 6x pushbutton switches K1 ... K6 6x slide switches S1 ... S6 JP2: Connection of the switches with the inputs of the microcontroller Buzzer Piezo buzzer Buzzer1 with jumper on JP6 Indicator lights 11 x LED: Status indicator for the inputs/outputs LED L on the Arduino Nano module, connected to GPIO D13 JP6: Connection of LEDs LD10 ... LD20 with GPIOs D2 ... D12 Serial interfacesSPI & I²C JP4: Selection of the signal at pin X of the SPI connector SV12 SV9 to SV12: SPI interface (3.3 V/5 V) or I²C interface Switching output for external devices SV1, SV7: Switching output (maximum +24 V/160 mA, externally supplied) SV2: 2x13 pins for connection of external modules 3x3 LED matrix(9 red LEDs) SV3: Columns of the 3x3 LED matrix (outputs D6 ... D8) JP1: Connection of the rows with the GPIOs D3 ... D5 Software Library MCCABLib Control of hardware components (switches, buttons, LEDs, 3x3 LED matrix, buzzer) on the MCCAB Training Board Operating Temperature Up to +40 °C Dimensions 100 x 100 x 20 mm Specifications (Arduino Nano) Microcontroller ATmega328P Architecture AVR Operating Voltage 5 V Flash Memory 32 KB, of which 2 KB used by bootloader SRAM 2 KB Clock Speed 16 MHz Analog IN Pins 8 EEPROM 1 KB DC Current per I/O Pins 40 mA on one I/O pin, total maximum 200 mA on all pins together Input Voltage 7-12 V Digital I/O Pins 22 (6 of which are PWM) PWM Output 6 Power Consumption 19 mA Dimensions 18 x 45 mm Weight 7 g Included Elektor Arduino Nano MCCAB Training Board Arduino Nano Book: Microcontrollers Hands-on Course for Arduino Starters
€ 139,95€ 119,95Bestpreis
-

Elektor Digital Kickstart to Arduino Nano (E-book)
Get Cracking with the Arduino Nano V3, Nano Every, and Nano 33 IoT The seven chapters in this book serve as the first step for novices and microcontroller enthusiasts wishing to make a head start in Arduino programming. The first chapter introduces the Arduino platform, ecosystem, and existing varieties of Arduino Nano boards. It also teaches how to install various tools needed to get started with Arduino Programming. The second chapter kicks off with electronic circuit building and programming around your Arduino. The third chapter explores various buses and analog inputs. In the fourth chapter, you get acquainted with the concept of pulse width modulation (PWM) and working with unipolar stepper motors. In the fifth chapter, you are sure to learn about creating beautiful graphics and basic but useful animation with the aid of an external display. The sixth chapter introduces the readers to the concept of I/O devices such as sensors and the piezo buzzer, exploring their methods of interfacing and programming with the Arduino Nano. The last chapter explores another member of Arduino Nano family, Arduino Nano 33 IoT with its highly interesting capabilities. This chapter employs and deepens many concepts learned from previous chapters to create interesting applications for the vast world of the Internet of Things. The entire book follows a step-by-step approach to explain concepts and the operation of things. Each concept is invariably followed by a to-the-point circuit diagram and code examples. Next come detailed explanations of the syntax and the logic used. By closely following the concepts, you will become comfortable with circuit building, Arduino programming, the workings of the code examples, and the circuit diagrams presented. The book also has plenty of references to external resources wherever needed. An archive file (.zip) comprising the software examples and Fritzing-style circuit diagrams discussed in the book may be downloaded free of charge below.
€ 29,95
Mitglieder: € 26,96
-

JOY-iT Joy-Pi Advanced Entwicklungsplattform (inkl. Raspberry Pi 4, 8 GB)
Der Joy-Pi Advanced ist ein kompaktes und leistungsstarkes Gerät, welches Ihnen ermöglicht, Ihre Projekte schnell und einfach zu realisieren. Egal, ob Sie bereits viel Erfahrung haben, oder noch so gut wie gar keine – mit dem Joy-Pi Advanced können Sie Ihrer Kreativität freien Lauf lassen. Dank der Kompatibilität mit einer Vielzahl von Plattformen, einschließlich Raspberry Pi, Raspberry Pi Pico, Arduino Nano, BBC micro:bit und NodeMCU ESP32, können Sie einfach und schnell auf Ihre bevorzugte Plattform zugreifen. Darüber hinaus bietet der Joy-Pi Advanced mehr als 30 Stationen, Lektionen und Module, die Ihnen eine unbegrenzte Vielzahl an Möglichkeiten bieten, um Ihre Projekte zu realisieren. Mit der eigenentwickelten Lernzentrale, können Sie nicht nur Ihre Fähigkeiten verbessern, sondern auch neue Projekte erstellen. Die Lernzentrale bietet eine Fülle an Informationen und Tutorials, die Sie Schritt für Schritt durch Ihre Projekte führen. Joy-Pi Advanced zeichnet sich insbesondere durch seine intelligenten Schaltereinheiten aus, die eine erweiterte Nutzung der verfügbaren Pins erlauben. Dabei sind insgesamt drei Schaltereinheiten integriert, jede mit 12 einzelnen Schaltern ausgestattet, die für eine präzise Steuerung der verbundenen Sensoren und Module sorgen. Dieses System löst das bekannte Problem der begrenzten Pin-Anzahl, das bei herkömmlichen Mikrocontrollern auftritt. Die Schaltereinheiten ermöglichen es Ihnen, eine Vielzahl von Sensoren und Modulen parallel zu betreiben, indem sie einzeln ein- und ausgeschaltet werden können. Dadurch wird eine Mehrfachbelegung der Pins simuliert, die es Ihnen ermöglicht, die volle Leistungsfähigkeit Ihrer Projekte auszuschöpfen, ohne Kompromisse bei der Funktionalität eingehen zu müssen. Durch der Kombination von innovativen Adapterplatinen und dem micro:bit-Slot erreicht man eine nahtlose Kompatibilität mit einer Vielzahl von Mikrocontrollern wie Raspberry Pi Pico, NodeMCU ESP32, micro:bit und Arduino Nano. Die speziell entwickelten Adapterplatinen sind so konzipiert, dass sie perfekt auf den jeweiligen Mikrocontroller abgestimmt sind. Durch das Aufstecken des Mikrocontrollers auf die passende Adapterplatine und das anschließende Einstecken in den micro:bit-Slot wird der Joy-Pi Advanced schnell und unkompliziert mit den unterschiedlichen Mikrocontrollern kompatibel. Dies ermöglicht eine nahtlose Integration Ihrer bevorzugten Plattform und die Möglichkeit, die Stärken der verschiedenen Mikrocontroller in Ihren Projekten zu kombinieren. Auf diese Weise können Sie sich voll und ganz auf Ihre kreativen Projekte konzentrieren, ohne sich Gedanken über die Kompatibilität verschiedener Mikrocontroller machen zu müssen. Der Joy-Pi Advanced vereinfacht den Entwicklungsprozess und gibt Ihnen die Möglichkeit, Ihre Projekte flexibel und individuell zu gestalten. Features Hochintegrierte Entwicklungsplattform & Lernzentrale Schnelles, einfaches & kabelloses Kombinieren von verschiedensten Sensoren & Aktoren Einbaumöglichkeit für Raspberry Pi 4 Kompatibel mit verschiedensten Mikrocontrollern Eigenentwickelte, didaktische Lernplattform für Raspberry Pi & Windows Technische Daten Kompatibel mit Raspberry Pi 4, Arduino Nano, NodeMCU ESP32, BBC micro:bit, Raspberry Pi Pico Verbaute Sensoren, Aktoren & Komponenten 39 Lernplattform Über 40 Einträge in der Wissensdatenbank, 10 Projekte, 10 Lernaufgaben, 14 Visionen Displays 7-Segment Display, 16x2 Display, 1,8“ TFT Display, 0,96“ OLED Display, 8x8 RGB Matrix Sensoren DS18B20, Schock-Sensor, Hall-Sensor, Barometer, Sound-Sensor, Gyroskop, PIR-Sensor, Lichtschranke, NTC, Lichtsensor, 6x Touchsensor, Farb-Sensor, Ultraschall-Abstandssensor, DHT11 Temperatur- & Feuchtigkeitssensor Steuerung Joystick, 5x Schalter, Potentiometer, Drehencoder, 4x4 Button-Matrix, Relais, PWM-Lüfter Motoren Servo-Schnittstelle, Schrittmotor-Schnittstelle, Vibrationsmotor Mess- und Wandelmodule Analog-Digital Converter, Pegelwandler, Voltmeter, Variable Spannungsversorgung Sonstige Komponenten RTC Echtzeituhr, Buzzer, EEPROM-Speicher, Infrarot-Empfänger, Breadboard, RFID-Lesegerät Adapterboards Adapter für NodeMCU ESP32, Arduino Nano & Raspberry Pi Pico, Boardconnectoren für Raspberry Pi & Externe Boards Elektronische Komponenten Infrarot-Fernbedienung, RFID-Chip, RFID-Karte, 6x Krokodilklemmen, microSD-Karten-Lesegerät, Servomotor, Schrittmotor, 32 GB microSD-Karte Bauteile 40x Widerstände, 3x grüne LEDs, 3x gelbe LEDs, 3x rote LEDs, 1x Transistor, 5x Buttons, 1x Potentiometer, 2x Kondensatoren Weiteres Zubehör Schraubensortiment, Schraubendreher, Zubehör-Aufbewahrungstasche, Netzgerät & Netzkabel, Servohalterung Stromversorgung Verbautes Netzgerät: 36 W, 12 V, 3 A Gehäuseanschluss: Kleingeräte-Stecker C8 Spannungsausgänge 12 V, 5 V, 3,3 V, Variabler Spannungsausgang (2-11 V) Ausgeführte Datenbusse & Signalausgänge I²C, SPI, Analog-Digital-Wandler Batterie (RTC) CR2032 Abmessungen 327 x 200 x 52 mm Inbegriffen Raspberry Pi 4 (8 GB RAM) Downloads Joy-Pi Website Datenblatt Anleitung
€ 529,00€ 469,00Bestpreis
-
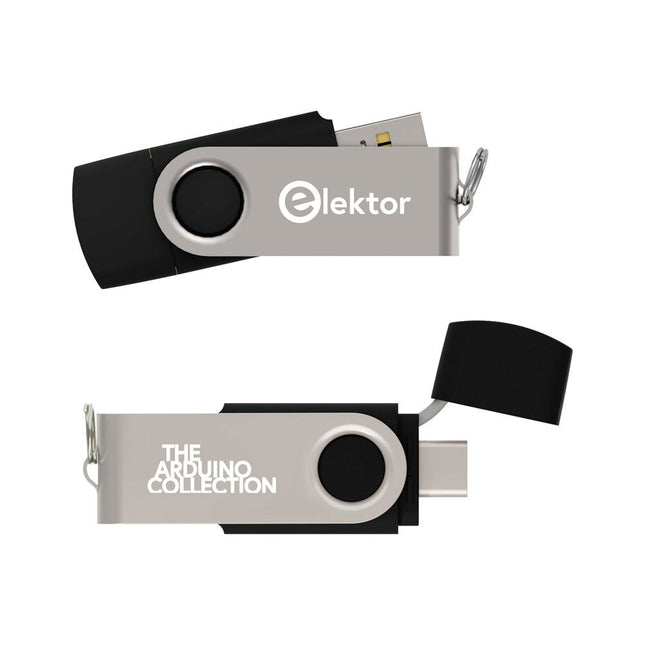
Elektor Classics The Elektor Arduino Collection (USB-Stick)
Dieser USB-Stick enthält eine Auswahl von über 300 Arduino-bezogenen Artikeln, die im Elektor-Magazin veröffentlicht wurden. Der Inhalt umfasst sowohl Hintergrundartikel als auch Projekte zu folgenden Themen: Software- und Hardware-Entwicklung: Tutorials zur Arduino-Softwareentwicklung mit der Arduino IDE, Atmel Studio, verschiedenen Shields und grundlegenden Programmierkonzepten. Lernen: Das Mikrocontroller-Bootcamp bietet einen strukturierten Einstieg in die Programmierung eingebetteter Systeme. Datenerfassung und -messung: Projekte wie ein 16-Bit-Datenlogger, ein Drehbank-Tachometer und ein AC-Netzanalyzer ermöglichen die Erfassung und Analyse von Echtzeitsignalen. Drahtlose Kommunikation: Erfahren Sie, wie man drahtlose Netzwerke implementiert, eine Android-Schnittstelle erstellt und effektiv mit Mikrocontrollern kommuniziert. Robotik und Automatisierung: Lernen Sie den Arduino Nano Robot Controller, unterstützende Automatisierungs-Boards sowie diverse Arduino-Shields zur Funktionserweiterung kennen. Selbstbauprojekte: Einzigartige DIY-Projekte wie Laserprojektion, eine Numitron-Uhr mit Thermometer, ein ELF-Empfänger, Theremino-Module und Touch-LED-Schnittstellen zeigen kreative Einsatzmöglichkeiten auf. Egal, ob Sie Einsteiger oder erfahrener Maker sind – diese Sammlung ist eine wertvolle Ressource zum Lernen, Experimentieren und Erweitern der Möglichkeiten mit Arduino.
€ 49,95€ 34,95Bestpreis
-

Elektor Digital Elektor Juli/Augustus 2023 PDF (NL)
Elektor GREEN en GOLD leden kunnen deze uitgave hier downloaden.Nog geen lid? Klik hier om een lidmaatschap af te sluiten. Kiesschijftelefoon als afstandsbedieningvoor licht kies 1; voor koffie kies 2 GPS-gebaseerde snelheidsmeternooit meer bekeuringen RGB-stroboscoop met Arduinokleurige toepassing van een nuttig instrument Draadloze nooddrukknopmeer veiligheid met LoRa Alle begin......volgt de emitter Vrij te kiezen onafhankelijke hystereseniveaus voor comparatorenmet simulaties, spreadsheets en algebra Impedantie-analyzer op basis van een ESP32simpel, weinig onderdelen en goedkoop! Oost West Lab Bestzelfbouw moet gestimuleerd! Het MCCAB Arduino Nano Training Boardalle hardware voor de “Microcontrollers Hands-On Course” Uit het leven gegrepenmodern luddisme Sensor-ABC: de DS18B20 temperatuursensoraansluiting op de 1-Wire bus Gaan Matter en Thread het Smart Home redden?nieuwe standaarden om het slimme huis te vereenvoudigen Een kwestie van samenwerkingontwikkelen met het Thing Plus Matter Board en Simplicity Studio Elektor IIIIinfographicIoT en sensoren Matter, ExpressLink, Rainmaker – waar hebben we het over?vraaggesprek met Amey Inamdar van Espressif De juiste keuze van microcontroller-ontwikkelkitsvoor IoT- en IIoT-toepassingen Condensatoren gedragen zich niet altijd capacitief! Een NTP-klok met CircuitPythonwaarom zou je deze programmeertaal gebruiken? Bouw een cool IoT-display'met de Phambili Newt De doppler-bewegingssensor HB100theorie en praktijk Een gids voor puristisch programmeren (deel 1)voor STM32 en andere controllers Siglent SDM3045X-multimeter Microprocessoren voor embedded systemenvreemde onderdelen Microcontroller-documentatie verklaarddeel 3: blokschema’s en meer Low-power LoRa-weerstationbouw zelf een weerstation met een groot bereik Transverter voor de 70cm-band Klimaat aan ingenieurssnelheid is geboden! Hexadoku
€ 9,95
-

Elektor Digital Elektor March/April 2021 (PDF) EN
The Vision and Engineering Behind SparkFun Getting Started with MicroMod Leveling Up Your SparkFun JetBotHow I Expanded the Functionality of My JetBot, Powered by the NVIDIA Jetson Nano Programming an FPGA How to Build a DIY GNSS Reference Station The ClockClock Project Under the Hood: SparkFun Inventor's Kit SparkFun’s Glenn Samala on Product Development and New Ventures Creating Custom Circuit Boards with SparkFun À La Carte Designing with the SparkFun Artemis Getting Started with the Qwiic Ecosystem for Rapid Prototyping Poster - Qwiic Under the Hood: The GreatScott! / Elektor DIY LiPo Supercharger Kit Memorable Electronics from SparkFun Past Perfect Parking with LiDAR Buried Pad PCB Fixing Design to Sale: the SparkFun RTK Surveyor Hello World from the Raspberry Pi Pico and RP2040A Look at Raspberry Pi’s First Microcontroller and Microcontroller Chip DIY Quadrupedal Robots Poster - Micromod RISC-V IoT Development in AWS Using FreeRTOS Libraries Yep, Electronics = Fun!A Conversation Among Electronics Enthusiasts Sparkfun Product Catalog HexadokuThe Original Elektorized Sudoku
€ 7,50
-

Elektor Digital Elektor November/December 2021 (PDF)
IMAGE PROCESSING WITH THE NVIDIA JETSON NANO (PART 2)Image Recognition Using Edge Impulse ELEKTOR JUMPSTARTER NEWSUpcoming Campaigns AN OPEN-SOURCE GPS TRACKING PLATFORMTraccar Maps Vehicle Tracking Without the Need for a Third-Party Cloud Server JOY-IT LCR-T7 MULTI-FUNCTION TESTERTesting Passives, Discrete Semiconductors and IR Remote Controls NOISE SYNTHESIZERFrom Noise to Music with the PRBSynth1 STARTING OUT IN ELECTRONICSEasier than Imagined! ... Continuing with the Coil UNDERSTANDING THE NEURONS IN NEURAL NETWORKS (PART 2)Logical Neurons ISSUES WITH SECURITY? FIGHT FIRE WITH FIRE!Flashbulb-Protected Analogue Memory Add-on For the Tamper-Evident Box LCR METER POSTER BLUETOOTH BEACONS IN PRACTICEBeacons Light the Way Ahead C PROGRAMMING ON RASPBERRY PICommunicating over Wi-Fi (Sample Chapter) EMC PRE-COMPLIANCE TEST FOR YOUR DC-POWERED PROJECT (PART 2)The Hardware and How to Use It HANDS ON THE PARALLAX PROPELLER 2 (PART 5)Inside the Smart Pin MODBUS OVER WLAN (PART 1)Hardware and Programming HOMELAB TOURSWhere the Junior Computer Is Brought to Life Again BUILD YOUR OWN HIGH-PRECISION CALIBRATOR-10 V to +10 V, 0 to 40 mA, 0.001% ARDUINO NANO RP2040 CONNECTRaspberry Pi RP2040 + Wi-Fi + Bluetooth THE PHYSICAL BODY OF ARTIFICIAL INTELLIGENCE ERR-LECTRONICSCorrections, Updates and Readers’ Letters CREATE GUIS WITH PYTHONIntroducing guizero CO2 METER KIT FOR THE CLASSROOMAn ESP8266-Based Device from the University of Applied Sciences Aachen NOSTALGIC MK484 MW/LW RADIO...Always Fun to Build! ELEKTOR @ 60Let There Be Light! HEXADOKUThe Original Elektorized Sudoku
€ 7,50


-
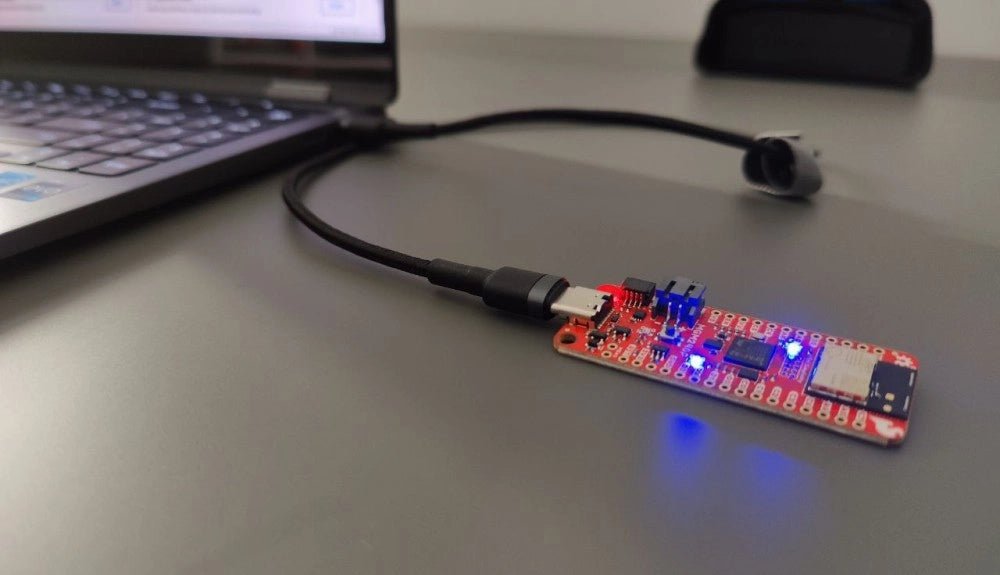
, von Saad Imtiaz SparkFun Thing Plus Matter (MGM240P): Ein vielseitiges IoT-Entwicklungsboard basierend auf Matter (Testbericht)
Das SparkFun Thing Plus Matter - MGM240P ist ein vielseitiges und funktionsreiches Entwicklungsboard für die Erstellung von Matter-basierten IoT-Geräten. Matter, früher bekannt als Project CHIP...
-

, von Clemens Valens Arduino Alvik, ein Wendepunkt in der STE(A)M-Ausbildung? (Review)
Eine Möglichkeit, die Ingenieure von morgen zu finden und hervorzubringen, besteht darin, unter unseren Kindern zu suchen. Die Idee besteht darin, ihnen unterhaltsame und einfach...
