Open-Source-Code mit Arduino IDE und PlatformIO
Autonomes Fahren: GPS, Accelerometer, Gyroskop
PS3-Controller
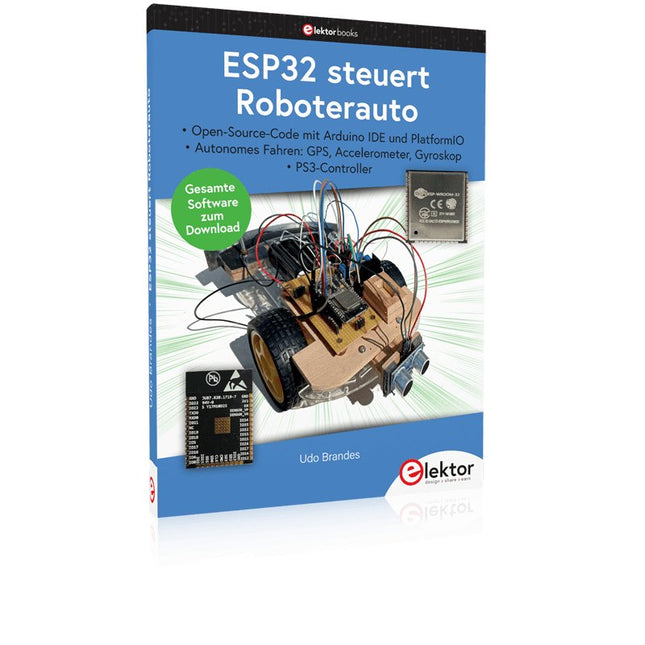
Mikrocontroller wie der Arduino und Einplatinenrechner wie der Raspberry Pi haben sich zu beliebten Komponenten entwickelt. Dritter im Bunde ist der ESP32 der Firma Espressif. Mikrocontroller dieser Baureihe zeichnen sich durch eine Vielzahl implementierter Funktionen aus, die bei einem Arduino konventioneller Prägung mit einem Atmel-AVR-Mikrocontroller erst mit weiterer Hardware möglich sind. Prominentes Beispiel sind hier die WiFi- und Bluetooth-Funktionalitäten. Gegenüber einem Raspberry Pi zeichnen sie sich durch einen deutlich geringeren Preis aus.
Allgemeine Informationen für die Realisierung eines Roboterauto-Projekts mit dem ESP32 sind leicht zu finden. Dabei handelt es sich aber oft nur um Ausführungen zu einem Teilaspekt, ohne inhaltliche oder funktionale Abstimmung. So ist nicht nur die Beschaffung der benötigten Informationen mühselig und zeitaufwändig, sie kann auch außerordentlich fehlerträchtig sein.
Ansatzpunkt dieses Buches ist, diese Lücke zu schließen. Es geht auf verschiedene Möglichkeiten eines Chassis ein, vermittelt nötige Kenntnisse und führt schrittweise von einer einfachen Motorsteuerung zu einem komplexen sensor- und sprachgesteuerten Roboterauto. Hacks rund um GPS und eine PlayStation 3 runden die Sache ab.
Inhalt
Bei der Reihenfolge der Kapitel wurde versucht – beginnend bei der Darstellung von grundlegenden Informationen – über die Lösung einfacher Aufgaben zu etwas anspruchsvolleren Techniken zu führen.
Der Mikrocontroller ESP32
Die Software erstellen
Die Stromversorgung
Rund um die Hardware
Das Chassis
Der Gleichstrommotor
Kabellose Steuerung über WiFi
Mit Sensoren Hindernisse erkennen
Eine eigene Roboterauto-App
Servo und Lichtsensor
GPS
Accelerometer / Gyroskop
PS3-Controller
Roboterauto-App
Hinweis zur Software
Die Dateien haben das Suffix (.cpp). Grund ist die Entwicklung mit PlatformIO. Mit Copy & Paste sollten sie auch in der Arduino-IDE verwendet werden können.
KOCHSHOW À LA ELEKTOR LORA MIT DEM RASPBERRY PI PICOViel Spaß mit MicroPython! WAS IST RISC-V?Warum die Industrie einen neuen Prozessorkern so spannend findet 60 JAHRE ELEKTORSommer-Projekte VIELSEITIGE SPANNUNGSVERSORGUNG FÜR BREADBOARDSPositive und negative 5-V-Ausgangsspannungen von USB RASPBERRY PI PICO ESSENTIALSEin Beispiel-Kapitel: WLAN mit dem Raspberry Pi Pico MAGNETISCHE LEVITATION AUF DIE EINFACHE ART PARALLAX PROPELLER 2Teil 3: Smart Pins und serielle Daten (UART) NUCLEO-BOARDS PROGRAMMIEREN MIT DER STM32CUBE-IDEEin Beispiel-Kapitel: FreeRTOS für die STM32 MCU VON ENTWICKLERN FÜR ENTWICKLERTipps & Tricks, Best Practice und andere nützliche Infos DIGITALE PINZETTE MINIWARE DT71 WEARABLE-WLAN GADGETESPHome wieder im Einsatz! ALLER ANFANG …muss nicht schwer sein! EINFACHE SKETCHES MIT DEM QWIIC-ÖKOSYSTEM JAVA AUF DEM RASPBERRY PITeil 2: Steuerung von GPIOs mit einem Spring-REST-Service RASPBERRY PI COMPUTE MODULE 4Ein Raspberry Pi für die Industrie PORTABLES AUTONOMES FEINSTAUBMESSGERÄT FÜR 2,5-ΜM-PARTIKELBehalten Sie Ihre Gesundheit im Auge AUS DER LEBEN GEGRIFFENDie Zukunft war in der Vergangenheit besser MICROPYTHON FÜR DEN ESP32 UND CO.Teil 1: Installation und erste Programme LADUNGSGEKOPPELTE BAUTEILE IN OSZILLOSKOPENBemerkenswerte Bauteile ESD – DER UNSICHTBARE BLITZZerfetzt Halbleiter wie ein Blitz einen Baum SOLARANLAGE FÜR MÄHROBOTERÖkologisch - preiswert - einfach! EUROPAS BEMÜHUNGEN, BIG TECH ZU ZÄHMEN HEXADOKUThe Original Elektorized Sudoku
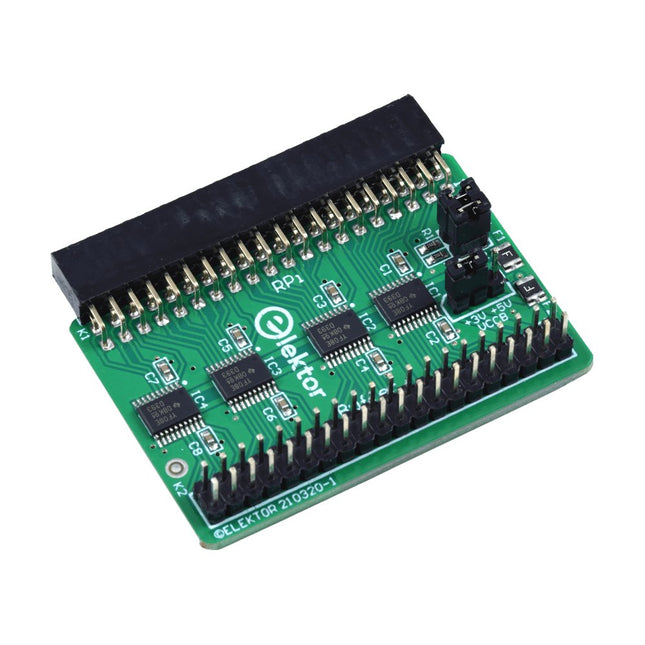
Wenn Sie regelmäßig mit dem Raspberry Pi experimentieren und eine Vielzahl von externer Hardware über die Stiftleiste an den GPIO-Port anschließen, haben Sie in der Vergangenheit vielleicht schon einige Schäden verursacht. Das Elektor Raspberry Pi Buffer Board ist dazu da, dies zu verhindern! Das Board ist kompatibel mit Raspberry Pi Zero, Zero 2 (W), 3, 4, 5, 400 und 500.
Alle 26 GPIOs sind mit bidirektionalen Spannungswandlern gepuffert, um den Raspberry Pi beim Experimentieren mit neuen Schaltungen zu schützen. Die Platine ist dafür vorgesehen, auf der Rückseite des Raspberry Pi 400/500 eingesetzt zu werden. Der Stecker zum Anschluss an den Raspberry Pi ist eine rechtwinklige 40-polige Buchse (2x20). Die Platine ist nur ein wenig breiter. An die Pufferausgangsbuchse kann ein 40-poliges Flachbandkabel mit entsprechenden 2x20-Steckern angeschlossen werden, um z. B. mit einer Schaltung auf einem Breadboard oder einer Platine zu experimentieren.
Die Schaltung verwendet 4x TXS0108E ICs von Texas Instruments. Die Platine lässt sich auch auf einem Raspberry Pi aufstellen.
Downloads
Schematics
Layout
En moins de 100 lignes de code par projet avec les cartes Feather Sense et Clue Express d'Adafruit
Le langage de programmation Python est apprécié par les pédagogues parce que sa syntaxe le rend facile à comprendre. Il s'est également imposé chez les informaticiens expérimentés. La société Adafruit a développé une version spéciale de Python pour l'embarquer sur les microcontrôleurs à 32 bits : CircuitPython.
Ce livre permettra au lecteur de s'initier à la programmation en CircuitPython sur deux cartes : Feather BlueFruit Sense (également appelée Feather nRF52840 Sense) et CLUE nRF52840 Express. Chacune est animée par le SoC nRF52840 de NORDIC avec une architecture à 32 bits.
Pour ce voyage dans le monde de la programmation embarquée, l'auteur sort du chemin classique, à savoir un cours complet sur la programmation orientée objet appliquée à ce langage. Il préfère emmener le lecteur directement sur le terrain avec des projets qui mettent en oeuvre les cartes et différents périphériques. Plus d'une quarantaine d'exemples et de montages permettent de découvrir la richesse de CircuitPython. Toutefois l'auteur s'est imposé une limite pour ne pas décourager les novices : le code de chaque projet ne dépasse jamais la centaine de lignes. Pour ce qui est du matériel, là aussi la simplicité domine : aucun programmateur, un simple PC suffit ; aucun soudage grâce au câblage sur platine d'essai. Les cartes d'extension FeatherWing à enficher sur la Feather nRF52840 Sense permettent de démultiplier ses fonctions : matrice de LED, enregistreur de données, écran à encre électronique, écran OLED, écran TFT, commande de moteurs, audio, relais…
Toutes les étapes (assemblage des différents composants, installation des bibliothèques requises, programmation, tests…) sont expliquées en détail. Le code des différents exemples et projets est disponible sur Github. Le résultat de chaque projet est même présenté sur de courtes vidéos disponibles sur YouTube.
À la fin de sa lecture, le nouveau Pythonien pourra facilement approfondir les notions abordées et donner vie à ses propres projets grâce aux outils qu'il aura essayés.
Ce livre s'adresse aux lycéens et étudiants ainsi qu'à toute la communauté des makers.
Chaîne YouTube de l'auteur :
YouTube (Michaël Bottin)
Learning circuit design the fun way
Welcome to the world of electronics!
Getting started in electronics is not as difficult as you may think. Using this book, you will explore and learn the most important electrical and electronics engineering concepts in a fun way by doing various experiments and by simulating circuits. It will teach you electronics practically without getting into complex technical jargon and long calculations. As a result, you will be creating your own projects soon.
No prior knowledge of electronics is required, only some basic algebra is used in a few simple calculations. Many tested and working projects and simulations are presented to familiarise yourself with the construction of electronic circuits. Circuit simulation is introduced at an early stage to enable you to experiment with circuits easily without breaking anything.
You will learn:
The concepts of voltage, current, and power
AC and DC
Basic lamp circuits with switches
Passive components: resistors, capacitors & inductors
RC & RCL circuits
Electromagnetism
Loudspeakers, relays, buzzers, and transformers
Active components: diodes & LEDs, bipolar transistors & MOSFETs
Transistor-based switching circuits
Optocoupler circuits
Astable & monostable multivibrators
Using the 555 timer IC
The operational amplifier
Digital logic
Advanced examples: amplifiers, oscillators, filters, and sensors
Test and measurement tools
Microcontrollers: Arduino UNO, ESP32, Raspberry Pi Pico, and Raspberry Pi
Reading datasheets and best practices for selecting components
EMC & EMI and norms & regulations
STmicroelectronics’ wireless IoT & wearable sensor development kit
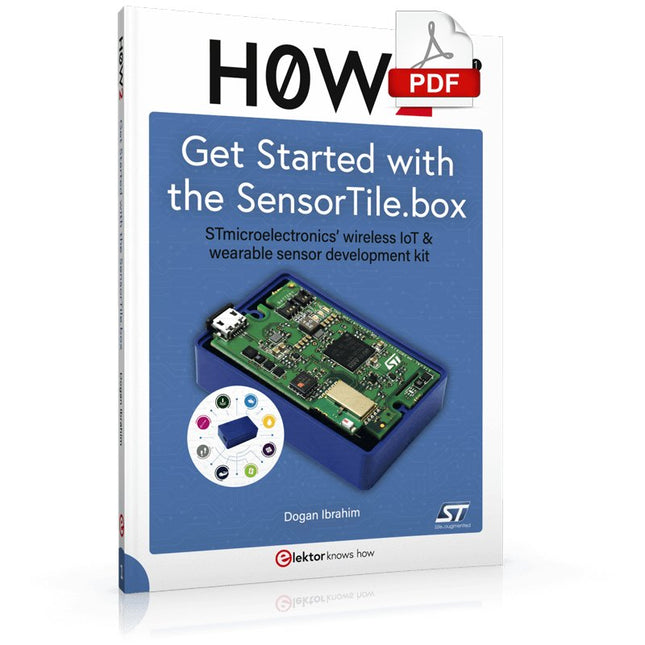
‘SensorTile.box’ is a portable multi-sensor circuit board housed in a plastic box and developed by STMicroelectronics. It is equipped with a high-performance 32-bit ARM Cortex-M4 processor with DSP and FPU, and various sensor modules, such as accelerometer, gyroscope, temperature sensor, humidity sensor, atmospheric pressure sensor, microphone, and so on. SensorTile.box is ready to use with wireless IoT and Bluetooth connectivity that can easily be used with an iOS or Android compatible smartphone, regardless of the level of expertise of the users. SensorTile.box is shipped with a long-life battery and all the user has to do is connect the battery to the circuit to start using the box.
The SensorTile.box can be operated in three modes: Basic mode, Expert mode, and Pro mode. Basic mode is the easiest way of using the box since it is pre-loaded with demo apps and all the user has to do is choose the required apps and display or plot the measured data on a smartphone using an app called STE BLE Sensor. In Expert mode users can develop simple apps using a graphical wizard provided with the STE BLE Sensor. Pro mode is the most complex mode allowing users to develop programs and upload them to the SensorTile.box.
This book is an introduction to the SensorTile.box and includes the following:
Brief specifications of the SensorTile.box; description of how to install the STE BLE Sensor app on an iOS or Android compatible smartphone required to communicate with the box.
Operation of the SensorTile.box in Basic mode is described in detail by going through all of the pre-loaded demo apps, explaining how to run these apps through a smartphone.
An introduction to the Expert mode with many example apps developed and explained in detail enabling users to develop their own apps in this mode. Again, the STE BLE Sensor app is used on the smartphone to communicate with the SensorTile.box and to run the developed apps.
The book then describes in detail how to upload the sensor data to the cloud. This is an important topic since it allows the sensor measurements to be accessed from anywhere with an Internet connection, at any time.
Finally, Pro mode is described in detail where more experienced people can use the SensorTile.box to develop, debug, and test their own apps using the STM32 open development environment (STM32 ODE). The Chapter explains how to upload the developed firmware to the SensorTile.box using several methods. Additionally, the installation and use of the Unicleo-GUI package is described with reference to the SensorTile.box. This PC software package enables all of the SensorTile.box sensor measurements to be displayed or plotted in real time on the PC.
KI in der Praxis
Tauchen Sie ein in die faszinierende Welt der Robotik und Automatisierung!
Dieses Elektor Special zeigt, wie Sie mit Kreativität, etwas Know-how und günstiger Technik eigene Roboter bauen können. Vom ersten DIY-Projekt mit Arduino oder Raspberry Pi bis hin zu intelligenten Systemen mit KI – dieses Heft macht moderne Robotik verständlich und greifbar.
Entdecken Sie praxisnahe Anleitungen, inspirierende Projekte und spannende Einblicke in die Maker-Szene. Lernen Sie, wie aus Experimentierfreude, Gemeinschaft und Offenheit echte Innovation entsteht – und warum Robotik weit mehr ist als nur ein technisches Hobby.
Inhalt
Phantasie wird Realität
Arduino-controlled Drawing Robot
GalaxyRVR Mars Rover Kit for Arduino
YDLIDAR X4Pro Lidar
xHuskyLens AI Camera
DOF Robot Arm mit Raspberry Pi Pico
Fertigungsroboter mit Fischertechnik
Pneumatischer Industrieroboter
Warum bauen wir immer wieder Roboterhunde?
Elektor Mini-Wheelie
Roboterfahrzeuge und autonomes Fahren
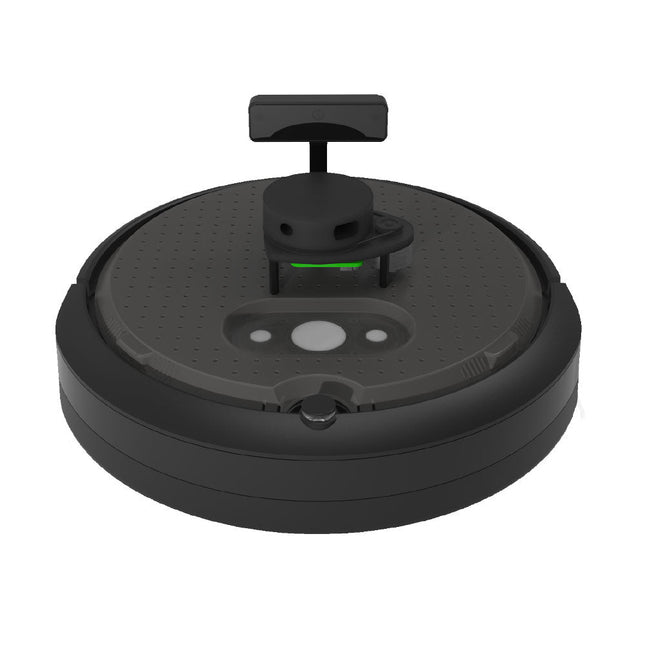
TurtleBot 4 ist die nächste Generation der weltweit beliebtesten Open-Source-Robotikplattform für Bildung und Forschung und bietet bessere Rechenleistung, bessere Sensoren und ein erstklassiges Benutzererlebnis zu einem erschwinglichen Preis.
TurtleBot 4 Lite ist mit einer mobilen iRobot Create 3-Basis, einem leistungsstarken Raspberry Pi 4 mit ROS 2, einer räumlichen KI-Stereokamera OAK-D, 2D LiDAR und mehr ausgestattet. Alle Komponenten wurden nahtlos integriert, um eine sofort einsatzbereite Entwicklungs- und Lernplattform zu bieten.
Technische Daten
Basisplattform
iRobot Create 3
Räder (Durchmesser)
72 mm
Bodenfreiheit
4,5 mm
Bordcomputer
Raspberry Pi 4 (4 GB)
Maximale Lineargeschwindigkeit
0,31 m/s im abgesicherten Modus0,46 m/s ohne abgesicherten Modus
Maximale Winkelgeschwindigkeit
1,90 rad/s
Maximale Nutzlast
9kg
Betriebszeit
2h 30m – 4h je nach Belastung
Ladezeit
2h 30m
Lidar
RPLIDAR A1M8
Kamera
OAK-D-Lite
Benutzerleistung
VBAT @1,9 A5 V @ Schwachstrom3,3 V @ Schwachstrom
USB-Erweiterung
2x USB 2.0 (Typ A)2x USB 3.0 (Typ A)
Programmierbare LEDs
Erstelle 3 Lichtringe
Tasten und Schalter
2x Create 3 User Buttons1x Create 3 Power Button
Batterie
26 Wh Lithium-Ionen (14,4 V nominal)
Ladestation
Inbegriffen
Größe (L x B x H)
342 x 339 x 192 mm
Gewicht
3,3 kg
Downloads
User Manual
Diese Ausgabe steht allen GOLD- und GREEN-Mitgliedern auf der ElektorMagazine-Website zum Download bereit!
Sind Sie noch kein Mitglied? Hier klicken!
Cloc 2.0 Der Wecker, den Sie sich schon immer gewünscht haben
Raspberry Pi Pico: PIO in der Praxis Experimente mit dem Programmable I/O des RP2040
ChipTweaker des armen Mannes Billige Wege, sie zum Sprechen zu bringen
Echter Zufallszahlen-Generator mit USB Zwei PICs zum Preis von einem AVR
Pimp mein Mikrofon ... Pegelanhebung selbst gebaut
FFT mit Maixduino Frequenzspektren erfassen
Aus dem Leben gegriffen Entwurfslogik (oder Un-Logik)
Schrittmotor-Treiber UCN5804 Bemerkenswerte Bauteile
Schaltungssimulation mit Micro-Cap Erste Schritte in einer komplizierten Welt
Der PAUL Award 2022 Junge Techniktalente und ihre kreativen Lösungen
Mein erstes Software-definiertes Radio Gebaut in weniger als 15 Minuten
Mikrocontroller-Dokumentation verstehen Teil 1: Aufbau einer Dokumentation
KI und integrierte Systeme – Was kommt als Nächstes? Werkzeuge, Plattformen und das Ende der Textarbeiter
Digitalisierung der vertikalen Landwirtschaft
Infografik: Embedded und KI, heute und morgen
Einführung in TinyML
Fallstudie KwickPOS
High-Performance in jeder Klasse Computer-on-Module-Standards
Aller Anfang... muss nicht schwer sein: Werden wir aktiv!
I²C-Kommunikation mit Node.js und einem Raspberry Pi Sehen Sie Ihre Sensordaten in einem Browser
Videoausgabe mit Mikrocontrollern Teil 2: VGA- und DVI-Ausgabe
Das Echtzeit-Betriebssystem Metronom Ein RTOS für AVR-Prozessoren
DVI auf dem RP2040 Ein Interview mit Luke Wren, Chip-Entwickler bei Raspberry Pi
Anzeige HAT Mini Zeigt die Leistung auf dem Raspberry Pi
WEEF 2022 Awards: Feiern Sie das Gute!
Hexadoku
Le téléchargement intégral de ce numéro est disponible pour nos membres GOLD et GREEN sur le site Elektor Magazine !
Pas encore membre ? Cliquez ici.
l'ESP-BLASTUn mini drone-fusée ESP32 qui vole à plus de 100 km/h
atelier sans fil (1)Modules radio déverrouillés : émetteur-récepteur sub-GHz CC1101 433 MHz
émetteur AMAvec le générateur d'ondes carrées/sinusoïdales sur Raspberry Pi Pico
STM32Cube Innovation ChallengeParticipez avec votre meilleur projet STM32C5
CoffeeCallerComment une pause café a inspiré un PCB sur mesure
audiotroniquesDistorsion harmonique totale
Elektor à 65 ansProjets de septembre et octobre au fil des ans
Bluetooth Channel Sounding pour le suivi des équipementsMesure de distance avec une précision centimétrique pour l’IoT de nouvelle génération
2026 : une Odyssée de l'IAL'informatique quantique n'est pas le prochain GPU
protéger le cloud exige de sécuriser la périphérie
premières expériences avec le HackRF ProTests pratiques avec le nouveau matériel SDR
mise à niveau du modem de GPRS/2G vers LTE/4GExemple d'un panneau de contrôle d'alarme sans fil
antenne en bouclePartie 1 : Une antenne ondes courtes à directivité réglable, à réaliser soi-même
convertisseur de radio Internet en AMUn ESP32-S3 comme émetteur
projet 2.0
mioty : aperçu généralL'approche de Fraunhofer pour les LPWAN
sagesse d'atelierConseils pratiques d'experts
Walter, le module IoT compactPartie 2 : Accéder aux services météorologiques et aux services de données
Entdecken Sie grenzenlose Kreativität mit dem Universal Maker Sensor Kit, das für Raspberry Pi, Pico W, Arduino und ESP32 entwickelt wurde. Dieses vielseitige Kit ist mit gängigen Entwicklungsplattformen kompatibel, darunter Arduino Uno R4 Minima/WiFi, Uno R3, Mega 2560, Raspberry Pi 5, 4, 3B+, 3B, Zero, Pico W und ESP32.
Mit über 35 Sensoren, Aktoren und Displays eignet es sich perfekt für Projekte von Umweltüberwachung und Smart-Home-Automatisierung bis hin zu Robotik und interaktivem Gaming. Schritt-für-Schritt-Tutorials in C/C++, Python und MicroPython führen Anfänger und erfahrene Maker gleichermaßen durch 169 spannende Projekte.
Features
Umfassende Kompatibilität: Vollständige Unterstützung für Arduino (Uno R3, Uno R4 Minima/WiFi, Mega 2560), Raspberry Pi (5, 4, 3B+, 3B, Zero, Pico W) und ESP32. Dies ermöglicht umfassende Flexibilität auf zahlreichen Entwicklungsplattformen. Enthält Anleitungen für 169 Projekte.
Umfassende Komponenten: Mehr als 35 Sensoren, Aktoren und Anzeigemodule für vielfältige Projekte wie Umweltüberwachung, Smart Home-Automatisierung, Robotik und interaktive Spielesteuerungen.
Ausführliche Tutorials: Klare Schritt-für-Schritt-Anleitungen für Arduino, Raspberry Pi, Pico W, ESP32 und alle enthaltenen Komponenten. Es stehen Tutorials in C/C++, Python und MicroPython zur Verfügung, die sowohl für Anfänger als auch für erfahrene Maker geeignet sind.
Für alle Kenntnisstufen geeignet: Bietet strukturierte Projekte, die Benutzer nahtlos vom Anfänger zum Fortgeschrittenen in Elektronik und Programmierung führen und so Kreativität und technisches Know-how fördern.
Lieferumfang
Breadboard
Tastenmodul
Kapazitives Bodenfeuchtemodul
Flammensensormodul
Gas-/Rauchsensormodul (MQ2)
Gyroskop & Beschleunigungssensormodul (MPU6050)
Hall-Sensormodul
Infrarot-Geschwindigkeitssensormodul
IR-Hindernisvermeidungssensormodul
Joystickmodul
PCF8591 ADC/DAC-Wandlermodul
Fotowiderstandsmodul
PIR-Bewegungssensormodul (HC-SR501)
Potentiometermodul
Pulsoximeter- und Herzfrequenzsensormodul (MAX30102)
Regentropfenerkennungsmodul
Echtzeituhrmodul (DS1302)
Drehgebermodul
Temperatursensormodul (DS18B20)
Temperatur- und Feuchtigkeitssensormodul (DHT11)
Temperatur, Luftfeuchtigkeit und Drucksensor (BMP280)
Time-of-Flight-Mikro-LIDAR-Distanzsensor (VL53L0X)
Berührungssensormodul
Ultraschallsensormodul (HC-SR04)
Vibrationssensormodul (SW-420)
Wasserstandssensormodul
I²C LCD 1602
OLED-Displaymodul (SSD1306)
RGB-LED-Modul
Ampelmodul
5-V-Relaismodul
Kreiselpumpe
L9110-Motortreibermodul
Passives Summermodul
Servomotor (SG90)
TT-Motor
ESP8266 Modul
JDY-31 Bluetooth-Modul
Stromversorgungsmodul
Dokumentation
Online-Tutorial
With Examples for Raspberry Pi Pico and ESP32
Creating and programming small electronic systems is now easier than ever before. With inexpensive development boards and modern software tools, anyone curious about embedded design can quickly move from an idea to a working piece of hardware. At the heart of this change is MicroPython—a clear, interactive, and beginner-friendly way to program microcontrollers while still remaining closely connected to the underlying electronics.
This book introduces embedded programming through MicroPython on popular platforms such as the Raspberry Pi Pico and the ESP32. You will discover how to use microcontrollers for reading inputs, processing data, and controlling outputs in a predictable, real-time loop. With just a few lines of code, you can blink LEDs, read sensors, drive motors, and communicate with the outside world. The interactive REPL programming interface encourages experimentation and fast learning, making concepts tangible from the very first chapter.
While different boards offer different capabilities, they all share the same core principles. Timers, GPIO, analog I/O, PWM, interrupts, and communication interfaces form the foundation of every embedded system.
By focusing on these universal building blocks, this book helps you build skills that transfer across platforms and scale naturally toward more advanced development. Whether you are a beginner or an experienced programmer entering embedded systems, you will find that working with MicroPython is both practical and genuinely enjoyable.