From Theory to Practical Applications in Wireless Energy Transfer and Harvesting
Wireless power transmission has gained significant global interest, particularly with the rise of electric vehicles and the Internet of Things (IoT). It’s a technology that allows the transfer of electricity without physical connections, offering solutions for everything from powering small devices over short distances to long-range energy transmission for more complex systems.
Wireless Power Design provides a balanced mix of theoretical knowledge and practical insights, helping you explore the potential of wireless energy transfer and harvesting technologies. The book presents a series of hands-on projects that cover various aspects of wireless power systems, each accompanied by detailed explanations and parameter listings.
The following five projects guide you through key areas of wireless power:
Project 1: Wireless Powering of Advanced IoT Devices
Project 2: Wireless Powered Devices on the Frontline – The Future and Challenges
Project 3: Wireless Powering of Devices Using Inductive Technology
Project 4: Wireless Power Transmission for IoT Devices
Project 5: Charging Robot Crawler Inside the Pipeline
These projects explore different aspects of wireless power, from inductive charging to wireless energy transmission, offering practical solutions for real-world applications. The book includes projects that use simulation tools like CST Microwave Studio and Keysight ADS for design and analysis, with a focus on practical design considerations and real-world implementation techniques.
This bundle is all about designing projects based on the 555 timer IC. The book features over 45 fully tested and documented projects. Together with the kit, which contains more than 130 through-hole components, you can build all the projects described on a breadboard. The setup also makes it easy to modify and experiment with the projects.
Over 45 Builds for the Legendary 555 Chip (and the 556, 558)
Some of the projects in the book are:
Alternately Flashing Two LEDs
Changing LED Flashing Rate
Touch Sensor On/Off Switch
Switch On/Off Delay
Light-Dependent Sound
Dark/Light Switch
Tone Burst Generator
Long Duration Timer
Chasing LEDs
LED Roulette Game
Traffic Lights
Continuity Tester
Electronic Lock
Switch Contact Debouncing
Toy Electronic Organ
Multiple Sensor Alarm System
Metronome
Voltage Multipliers
Electronic Dice
7-Segment Display Counter
Motor Control
7-Segment Display Dice
Electronic Siren
Various Other Projects
Kit Contents
Resistors
1x 15 kΩ
1x 68 kΩ
2x 47 kΩ
1x 82 kΩ
2x 820 Ω
1x 8.2 kΩ
3x 10 kΩ
1x 1.8 kΩ
1x 6.8 kΩ
14x 2.2 kΩ
10x 680 Ω
1x 27 kΩ
1x 5.6 kΩ
1x 560 kΩ
1x 4.7 kΩ
1x 3.3 kΩ
3x 33 kΩ
1x 36 kΩ
2x 100 kΩ
5x 1 kΩ
1x 3.9 kΩ
2x 56 kΩ
2x 12 kΩ
1x 10 kΩ potentiometer
1x 1 MΩ potentiometer
2x 50 kΩ potentiometer
3x 20 kΩ potentiometer
1x 10 kΩ potentiometer
1x 10 kΩ potentiometer
1x 50 kΩ potentiometer
1x 100 kΩ potentiometer
1x 50 kΩ potentiometer
Capacitors
1x 0.33 μF
1x 1 μF
1x 10 nF
1x 22 nF
1x 47 nF
1x 100 nF
1x 10 μF electrolytic
1x 33 μF electrolytic
2x 100 μF electrolytic
LEDs
10x 5 mm red LED
10x 3 mm red LED
3x 3 mm yellow LED
3x 3 mm green LED
1x Common-cathode 7-segment LED
Semiconductors
3x 555 timer
1x CD4017 counter
1x CD4026 counter
1x CD4011 NAND gate
4x 1N4148 diode
1x IRFZ46N MOSFET
1x Thermistor
1x Light dependent resistor (LDR)
Miscellaneous
1x Passive buzzer
1x Active buzzer
1x SG90 servo
1x 8 Ω mini loudspeaker
1x 9 V DC brushed motor
1x 5 V relay
1x 9 V battery clip
7x Pushbutton switches
1x Breadboard
1x Breadboard jumper wires
Projects with Arduino, ESPHome, Home Assistant, and Raspberry Pi & Co.
This e-book contains various example projects, beginning with an introduction to electronics. It also explains how to install Home Assistant on a Raspberry Pi, how to use indoor climate sensors for temperature and humidity, how to implement the MQTT protocol and other interfaces, and how to use ESPHome to integrate sensors and actuators into Home Assistant. Numerous video tutorials complement the book.
Fundamentals of electrical engineering
The book begins with an introduction to electrical engineering. You will learn the basics of voltage, current, resistors, diodes and transistors.
Arduino and microcontrollers
A complete section is dedicated to the Arduino Uno. You will get to know the structure, write your first programs and work on practical examples.
Home Assistant and automation
You will learn how to set up Home Assistant on a Raspberry Pi and how to use automations, scenes and devices. In addition, Zigbee, MQTT and ESP-NOW – important technologies for home automation – will be discussed.
ESP8266, ESP32 and ESP32-CAM
The popular ESP microcontrollers are covered in detail. A theoretical introduction is followed by practical projects that show you how to get the most out of these devices.
Sensors and actuators
The book explains the functionality and application of numerous sensors such as temperature and humidity sensors, motion detectors and RFID readers. For actuators, stepper motors, e-ink displays, servo motors and much more are covered. There are practical application examples for all devices.
ESPHome
This chapter shows you how to integrate sensors and actuators into Home Assistant without any programming effort. You will be guided step by step through the setup with ESPHome.
LEDs and lighting technology
In this chapter, you will learn about different types of LEDs and how they can be used. The basics of lighting technology are also explained.
Node-RED
A whole chapter is dedicated to Node-RED. You will learn the basics of this powerful tool and be guided step by step through its setup and use.
Integrated Circuits (ICs)
In electronics, there are numerous ICs that make our lives easier. You will get to know the most important ones and apply your knowledge in practical projects.
Professional programming
Advanced topics such as the correct use of buttons, the use of interrupts and the use of an NTP server for time synchronisation are covered in detail in this chapter.
Downloads
GitHub
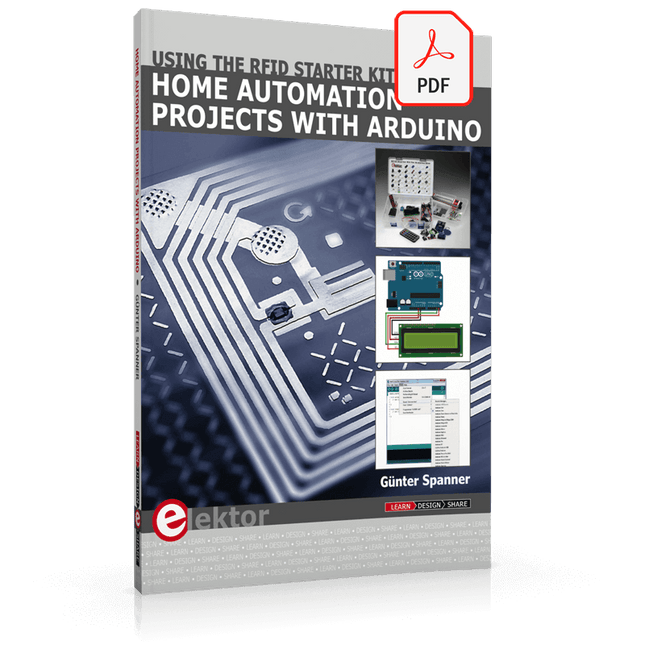
Using the RFID Starter Kit
An Arduino board has now become ‘the’ basic component in the maker community. No longer is an introduction to the world of microcontrollers the preserve of the expert. When it comes to expanding the capabilities of the basic Arduino board however, the developer is still largely on his own. If you really want to build some innovative projects it’s often necessary to get down to component level. This can present many beginners with major problems. That is exactly where this book begins.
This book explains how a wide variety of practical projects can be built using items supplied in a single kit together with the Arduino board. This kit, called the 'RFID Starter Kit for Arduino' (SKU 17240) is not just limited to RFID applications but contains more than 30 components, devices and modules covering all areas of modern electronics.
In addition to more simple components such as LEDs and resistors there are also complex and sophisticated modules that employ the latest technology such as:
A humidity sensor
A multicolor LED
A large LED matrix with 64 points of light
A 4-character 7-segment LED display
An infra red remote-controller unit
A complete LC-display module
A servo
A stepper motor and controller module
A complete RFID reader module and security tag
On top of that you will get to build precise digital thermometers, hygrometers, exposure meters and various alarm systems. There are also practical devices and applications such as a fully automatic rain sensor, a sound-controlled remote control system, a multifunctional weather station and so much more.
All of the projects described can be built using the components supplied in the Elektor kit.
Dieser komplette Mikrocontroller-Programmierkurs auf Basis des Raspberry Pi Pico umfasst ein Lehrbuch, ein Komponenten-Kit, praxisnahe Projekte sowie einen umfassenden Online-Kurs mit Simulationen. Er eignet sich ideal für das schrittweise Erlernen der Embedded-Programmierung mit Arduino anhand eines praktischen, hands-on Ansatzes.
Eine praxisnahe Einführung in Embedded Systems mit dem Raspberry Pi Pico
Dieser Kurs richtet sich an Personen ohne Vorkenntnisse im Bereich Embedded Systems, die einen strukturierten und beispielbasierten Einstieg suchen.
Ein Kit bestehend aus LEDs und Widerständen, Schaltern, Sensoren und Aktoren, Displays, einem Breadboard und Kabeln sowie weiteren Komponenten ist enthalten. Diese werden im Kurs verwendet, um Beispielanwendungen zu veranschaulichen.
Vorkenntnisse mit Arduino oder Embedded-Entwicklung sind nicht erforderlich. Jeder Abschnitt enthält praktische Beispiele und Mini-Projekte, die wichtige Konzepte festigen und zur weiteren Vertiefung anregen. Am Ende des Kurses werden Sie nicht nur in der Lage sein, die Beispiele nachzuvollziehen, sondern auch eigene Ideen und Anwendungen umzusetzen.
Was werden Sie lernen?
Mikrocontroller-Programmierung in C/C++ mit dem Raspberry Pi Pico unter Verwendung der Arduino IDE
Arbeiten mit digitalen Ein- und Ausgängen, Auslesen von Tastern und Encodern, Steuern von LEDs und Relais
Auslesen analoger Eingänge, Spannungen und analoger Sensoren
Erzeugung analoger Ausgangssignale und PWM
Verwendung serieller Kommunikation wie UART, I²C und SPI zur Steuerung von Displays und zum Auslesen digitaler Sensoren und SD-Karten
Zeitmanagement
Arbeiten mit Interrupts
Echtzeit-Sensordatenerfassung und Steuerung über Taster, LEDs und Displays
Steuerung von Aktoren wie Relais und Servomotoren
Für wen ist dieser Kurs geeignet?
Studierende und Selbstlerner im Bereich Embedded Systems
Makers und IoT-Enthusiasten, die ihre Hardware-Kenntnisse verbessern möchten
Lehrkräfte und Trainer, die sofort einsetzbares Unterrichtsmaterial suchen
Was ist im Lieferumfang enthalten?
Zugang zum vollständigen Kurs auf der Elektor Academy Pro-Lernplattform
Raspberry Pi Pico Mikrocontroller-Board (+ USB-Kabel)
Buch: Programming Microcontrollers in C/C++ Using Arduino
Downloadbare Projektdateien für jedes Modul
Komponenten-Set:
2× LED, rot, 5 mm
LED, grün, 5 mm
3× Widerstand, 470 Ω, 0,25 W
LDR
Potentiometer, 10 kΩ, linear
Taster
Drehencoder-Modul
Relaismodul
DHT22 Feuchtigkeits- und Temperatursensor
TM1637-kompatibles 4-stelliges 7-Segment-Display
MPU-6050 IMU mit Stiftleisten
SSD1306-kompatibles I²C OLED-Display
Micro-SD-Kartenadapter mit Stiftleiste
Buzzer
SG90 Mikro-Servo
ILI9341-kompatibles SPI 240×320 TFT-Display
20× Jumperkabel
Breadboard
Alle Programmierkurse (und Unterschiede im Inhalt)
Kurs
Arduino
Raspberry Pi Pico with Arduino C/C++
ESP32 with Arduino C/C++
Raspberry Pi Pico with MicroPython
ESP32 with MicroPython
Online-Kurs
Access to Arduino Course
Access to Pico with Arduino C/C++ Course
Access to ESP32 with Arduino C/C++ Course
Access to Pico with MicroPython Course
Access to ESP32 with MicroPython Course
Board
Uno R3
Raspberry Pi Pico
ESP32
Raspberry Pi Pico
ESP32
Buch
Programming Microcontrollers in C/C++ Using Arduino
Programming Microcontrollers in C/C++ Using Arduino
Programming Microcontrollers in C/C++ Using Arduino
Programming Microcontrollers in MicroPython
Programming Microcontrollers in MicroPython
Kit
40-teiliges Komponenten-Set
40-teiliges Komponenten-Set
40-teiliges Komponenten-Set
40-teiliges Komponenten-Set
40-teiliges Komponenten-Set
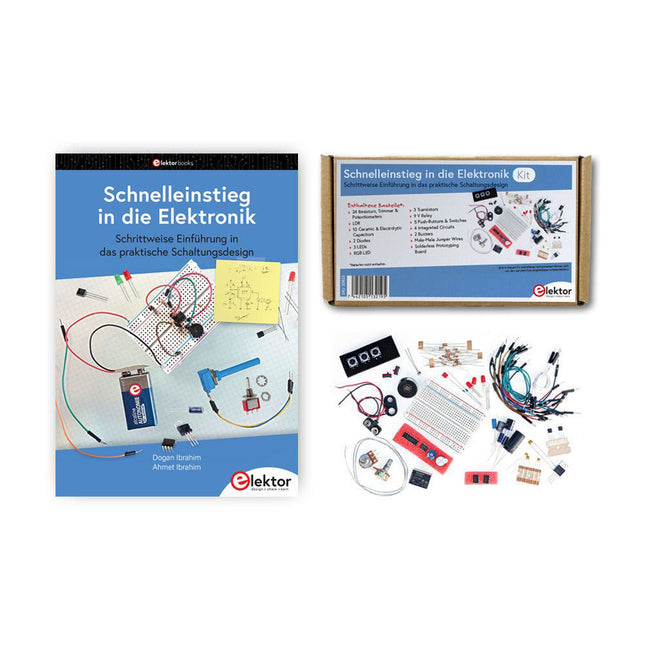
Der Einstieg in die Elektronik ist einfacher, als Sie denken! Mit diesem Bundle – bestehend aus Buch und Experimentierkit – entdecken Sie die Grundlagen der Elektro- und Elektroniktechnik Schritt für Schritt. Anhand spannender Experimente lernen Sie praxisnah und verständlich, ganz ohne komplizierte Fachbegriffe oder langwierige Berechnungen. So sind Sie schon bald in der Lage, Ihre eigenen Elektronikprojekte umzusetzen!
Das Kit enthält alle notwendigen Komponenten, um die meisten im Buch beschriebenen Schaltungen direkt auf dem Steckbrett aufzubauen und praktisch zu erproben.
Das Kit kann selbstverständlich auch ohne das Buch zum Aufbau anderer Schaltkreise und zur Durchführung eigener Experimente verwendet werden.
Inhalt des Kits
1x 39 Ω, 1 W Widerstand
1x 47 Ω Widerstand
1x 180 Ω Widerstand
1x 330 Ω Widerstand
3x 1 kΩ Widerstand
1x 2,2 kΩ Widerstand
1x 3,9 kΩ Widerstand
1x 6,8 kΩ Widerstand
1x 10 kΩ Widerstand
1x 15 kΩ Widerstand
1x 22 kΩ Widerstand
1x 33 kΩ Widerstand
1x 47 kΩ Widerstand
1x 56 kΩ Widerstand
1x 82 kΩ Widerstand
1x 120 kΩ Widerstand
1x 680 kΩ Widerstand
2x 100 kΩ Widerstand
1x 10 kΩ Trimmer
1x 10 kΩ Linearpotentiometer
1x 100 kΩ Linearpotentiometer
1x LDR
1x 1 nF Keramikkondensator
2x 10 nF Keramikkondensator
1x 100 nF Keramikkondensator
1x 1 µF, 25 V Aluminium-Elektrolytkondensator
2x 10 µF, 25 V Aluminium-Elektrolytkondensator
1x 100 µF, 25 V Aluminium-Elektrolytkondensator
1x 470 µF, 25 V Aluminium-Elektrolytkondensator
1x 1000 µF, 25 V Aluminium-Elektrolytkondensator
1x RGB-LED, Common-Cathode (CC)
1x 1N4148 Kleinsignaldiode
1x 1N4733A 5,1 V, 1 W Zenerdiode
3x LED, rot
2x BC337 NPN-Transistor
1x IRFZ44N N-Kanal-MOSFET
2x NE555-Timer
1x LM393-Komparator
1x 74HCT08 Quad-AND-Gatter
3x Tastschalter
2x SPDT-Schalter
1x Relais, SPDT, 9 VDC
1x Aktiver Summer
1x Passiver Summer
50 cm Massivdraht, 16 AWG, ohne Mantel
2x PP3 9 V Batterieclip
1x Steckbrett
20x Überbrückungskabel
Dieses Bundle enthält:
Buch: Schnelleinstieg in die Elektronik (Einzelpreis: 45 €)
Kit: Schnelleinstieg in die Elektronik (Wert: 45 €)
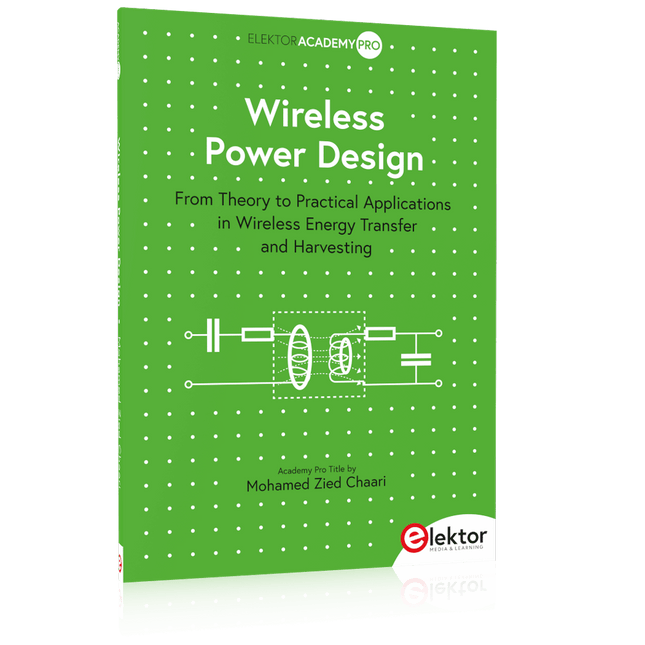
From Theory to Practical Applications in Wireless Energy Transfer and Harvesting
Wireless power transmission has gained significant global interest, particularly with the rise of electric vehicles and the Internet of Things (IoT). It’s a technology that allows the transfer of electricity without physical connections, offering solutions for everything from powering small devices over short distances to long-range energy transmission for more complex systems.
Wireless Power Design provides a balanced mix of theoretical knowledge and practical insights, helping you explore the potential of wireless energy transfer and harvesting technologies. The book presents a series of hands-on projects that cover various aspects of wireless power systems, each accompanied by detailed explanations and parameter listings.
The following five projects guide you through key areas of wireless power:
Project 1: Wireless Powering of Advanced IoT Devices
Project 2: Wireless Powered Devices on the Frontline – The Future and Challenges
Project 3: Wireless Powering of Devices Using Inductive Technology
Project 4: Wireless Power Transmission for IoT Devices
Project 5: Charging Robot Crawler Inside the Pipeline
These projects explore different aspects of wireless power, from inductive charging to wireless energy transmission, offering practical solutions for real-world applications. The book includes projects that use simulation tools like CST Microwave Studio and Keysight ADS for design and analysis, with a focus on practical design considerations and real-world implementation techniques.
Hochleistungsfähiges LoRa-Kommunikationsgerät
Das Elecrow ThinkNode M5 ist ein kompaktes, tragbares LoRa-Kommunikationsgerät, das für netzunabhängige Nachrichtenübermittlung, Standortfreigabe und den Außeneinsatz konzipiert wurde. Ausgestattet mit einem ESP32-S3-Prozessor und einem SX1262-LoRa-Chip, wird es mit vorinstallierter Meshtastic-Firmware geliefert und lässt sich bequem per Bluetooth über die offizielle Meshtastic-App konfigurieren.
Das integrierte Multi-GNSS-Modul unterstützt GPS, GLONASS, BeiDou und QZSS für eine zuverlässige Positionsbestimmung und Standortfreigabe. Nachrichten und Geräteinformationen werden auf dem energieeffizienten 1,54-Zoll-E-Paper-Display angezeigt, während der integrierte 1.200-mAh-Akku einen langen mobilen Betrieb ermöglicht.
Dank der integrierten LoRa-Antenne, des kompakten Gehäuses, der Echtzeituhr (RTC) und der Unterstützung für Meshtastic- sowie MeshCore-Firmware ist das ThinkNode M5 eine praktische Kommunikationslösung für Wandern, Camping, abgelegene Gebiete und Notfallsituationen, in denen keine herkömmlichen Mobilfunknetze verfügbar sind.
Features
LoRa-Kommunikation
Multi-GNSS-Positionsbestimmung
1.200-mAh-Akku
1,54" E-Paper-Display
Integrierte RTC
Kompatibel mit MeshCore
Kompatibel mit Meshtastic
Technische Daten
Hauptprozessor (ESP32-S3)
CPU/SoC
Xtensa 32-Bit-LX7-Dual-Core-Prozessor, getaktet mit bis zu 240 MHz
Systemspeicher
512 KB SRAM, 8 MB PSRAM
Speicher
4 MB Flash, 384 KB ROM
Firmware
Meshtastic-Firmware ist voll kompatibel; Signalübertragung im LoRa-Modus
EPD (Electronic Paper Display)
Displaygröße
1,54-Zoll-EPD (monochromer E-Ink-Bildschirm)
Displaymaterial
E-Ink (Electronic Ink)
Auflösung
200 x 200
Treiber-Chip
SSD1681 (über SPI- oder I²C-Schnittstelle)
Zeit für vollständige Aktualisierung
2 s
Drahtlose Kommunikation
Bluetooth
Bluetooth Low Energy und Bluetooth 5.0 (Konfiguration per Smartphone)
LoRa
SX1262 LoRa-Modul, EU 868 MHz (externe Antenne)
Hardware
Schnittstellen
USB-C, RP-SMA
Funktionen
GPS-Ortung (GPS, GLONASS, BeiDou, QZSS), EPD-Display, RTC, USB 2.0, PMU-Energiemanagement (integrierter 1200-mAh-Lithium-Akku), Summer usw.
Tasten
Drehschalter, Funktionstaste, Blättertaste, GPS-Schalter, Reset-Taste
LED-Anzeige
Stromversorgung, GPS/LoRa-Anzeige
Sonstiges
Spannungsversorgung
5 V/1 A; unterstützt Stromversorgung über USB oder Lithium-Akku
Stromverbrauch
Maximaler Betriebsstrom ca. 340 mA (CPU + LoRa-Modul); Stromverbrauch im Energiesparmodus ca. 34 µA
Betriebstemperatur
-10 bis 50°C
Lagertemperatur
-20 bis 60°C
Relative Luftfeuchtigkeit
10–95% bei 40°C (nicht kondensierend)
Gehäuse
ABS-Kunststoff
Abmessungen
82 x 51,6 x 26,3 mm
Gewicht
81 g
Lieferumfang
1x Elecrow ThinkNode M5
1x LoRa-Antenne
1x USB-C Kabel
1x Manual
Downloads
Manual
Projects Using Arduino IDE and the LVGL Graphics Library
The ESP32 is probably one of the most popular microcontrollers used by many people, including students, hobbyists, and professional engineers. Its low cost, coupled with rich features makes it a popular device to use in many projects. Recently, a board called the ESP32 Cheap Yellow Display (CYD for short) is available from its manufacturers. The board includes a standard ESP32 microcontroller together with a 320x240 pixel TFT display. Additionally, the board provides several connectors for interfaces such as GPIO, serial port (TX/RX), power and Ground. The inclusion of a TFT display is a real advantage as it enables users to design complex graphics-based projects without resorting to an external LCD or graphics displays.
The book describes the basic hardware of the ESP32 CYD board and provides details of its on-board connectors. Many basic, simple, and intermediate-level projects are given in the book based on the ESP32 CYD, using the highly popular Arduino IDE 2.0 integrated development environment. The use of both the basic graphics functions and the use of the popular LVGL graphics library are discussed in the book and projects are given that use both types of approaches.
All the projects given in the book have been tested and are working. The block diagram, circuit diagram, and the complete program listings and program descriptions of all the projects are given with explanations. Readers can use the LVGL graphics library to design highly popular eye-catching full-color graphics projects using widgets such as buttons, labels, calendars, keypads, keyboards, message boxes, spinboxes, sliders, charts, tables, menus, bars, switches, drop-down lists, animations, and many more widgets.
Dieser vollständige Programmierkurs für den ESP32-Mikrocontroller umfasst ein Lehrbuch, ein Komponenten-Set, praxisnahe Projekte sowie einen umfassenden Online-Kurs mit Simulationen. Er eignet sich ideal für das schrittweise Erlernen der Embedded-System-Programmierung mit Arduino – mit einem praxisorientierten, hands-on Ansatz.
Ein praxisnaher Einstieg in Embedded Systems mit dem ESP32
Dieser Kurs richtet sich an Personen ohne Vorkenntnisse im Bereich Embedded Systems, die einen strukturierten und beispielbasierten Einstieg suchen.
Ein Kit bestehend aus LEDs und Widerständen, Schaltern, Sensoren und Aktoren, Displays, einem Breadboard und Kabeln sowie weiteren Komponenten ist enthalten. Diese werden im Kurs verwendet, um Beispielanwendungen zu veranschaulichen.
Vorkenntnisse mit Arduino oder Embedded-Entwicklung sind nicht erforderlich. Jeder Abschnitt enthält praktische Beispiele und Mini-Projekte, die wichtige Konzepte festigen und zur weiteren Vertiefung anregen. Am Ende des Kurses werden Sie nicht nur in der Lage sein, die Beispiele nachzuvollziehen, sondern auch eigene Ideen und Anwendungen umzusetzen.
Was werden Sie lernen?
Programmierung des ESP32-Mikrocontrollers mit der Arduino IDE
Arbeiten mit digitalen Ein- und Ausgängen, Auslesen von Tastern und Encodern, Steuern von LEDs und Relais
Auslesen analoger Eingänge, Spannungen und analoger Sensoren
Erzeugung analoger Ausgangssignale und PWM
Verwendung serieller Kommunikation wie UART, I²C und SPI zur Steuerung von Displays und zum Auslesen digitaler Sensoren und SD-Karten
Zeitmanagement
Arbeiten mit Interrupts
Echtzeit-Sensordatenerfassung und Steuerung über Taster, LEDs und Displays
Steuerung von Aktoren wie Relais und Servomotoren
Für wen ist dieser Kurs geeignet?
Studierende und Selbstlerner im Bereich Embedded Systems
Makers und IoT-Enthusiasten, die ihre Hardware-Kenntnisse verbessern möchten
Lehrkräfte und Trainer, die sofort einsetzbares Unterrichtsmaterial suchen
Was ist im Lieferumfang enthalten?
Zugang zum vollständigen Kurs auf der Elektor Academy Pro-Lernplattform
ESP32 Mikrocontroller-Board (+ USB-Kabel)
Buch: Programming Microcontrollers in C/C++ Using Arduino
Downloadbare Projektdateien für jedes Modul
Komponenten-Set:
2× LED, rot, 5 mm
LED, grün, 5 mm
3× Widerstand, 470 Ω, 0,25 W
LDR
Potentiometer, 10 kΩ, linear
Taster
Drehencoder-Modul
Relaismodul
DHT22 Feuchtigkeits- und Temperatursensor
TM1637-kompatibles 4-stelliges 7-Segment-Display
MPU-6050 IMU mit Stiftleisten
SSD1306-kompatibles I²C OLED-Display
Micro-SD-Kartenadapter mit Stiftleiste
Buzzer
SG90 Mikro-Servo
ILI9341-kompatibles SPI 240×320 TFT-Display
20× Jumperkabel
Breadboard
Alle Programmierkurse (und Unterschiede im Inhalt)
Kurs
Arduino
Raspberry Pi Pico with Arduino C/C++
ESP32 with Arduino C/C++
Raspberry Pi Pico with MicroPython
ESP32 with MicroPython
Online-Kurs
Access to Arduino Course
Access to Pico with Arduino C/C++ Course
Access to ESP32 with Arduino C/C++ Course
Access to Pico with MicroPython Course
Access to ESP32 with MicroPython Course
Board
Uno R3
Raspberry Pi Pico
ESP32
Raspberry Pi Pico
ESP32
Buch
Programming Microcontrollers in C/C++ Using Arduino
Programming Microcontrollers in C/C++ Using Arduino
Programming Microcontrollers in C/C++ Using Arduino
Programming Microcontrollers in MicroPython
Programming Microcontrollers in MicroPython
Kit
40-teiliges Komponenten-Set
40-teiliges Komponenten-Set
40-teiliges Komponenten-Set
40-teiliges Komponenten-Set
40-teiliges Komponenten-Set
Mit diesem Praxis-Bundle können Sie echte Edge-AI-Anwendungen mit dem Raspberry Pi entwickeln
Raspberry Pi AI HAT+ (13 TOPS)
Das Raspberry Pi AI HAT+ ist eine Erweiterungsplatine für den Raspberry Pi 5, die einen integrierten Hailo AI-Beschleuniger enthält. Dieses Add-on bietet einen kostengünstigen, effizienten und leicht zugänglichen Ansatz für die Integration von leistungsstarken KI-Funktionen, mit Anwendungen in den Bereichen Prozesssteuerung, Sicherheit, Heimautomatisierung und Robotik.
Das AI HAT+ wird über die PCIe Gen3-Schnittstelle des Raspberry Pi 5 angeschlossen. Wenn auf dem Raspberry Pi 5 eine aktuelle Version des Raspberry Pi OS läuft, erkennt es automatisch den integrierten Hailo-Beschleuniger und macht die neuronale Verarbeitungseinheit (NPU) für KI-Aufgaben verfügbar. Darüber hinaus unterstützen die im Raspberry Pi OS enthaltenen rpicam-apps Kameraanwendungen das KI-Modul nahtlos und nutzen die NPU automatisch für kompatible Nachbearbeitungsfunktionen.
Raspberry Pi Camera Module 3
Raspberry Pi Camera Module 3 ist eine Kompaktkamera von Raspberry Pi. Es bietet einen IMX708 12-Megapixel-Sensor mit HDR und verfügt über einen Autofokus mit Phasenerkennung. Das Camera Module 3 ist in Standard- und Weitwinkelvarianten erhältlich, die beide mit oder ohne Infrarot-Sperrfilter erhältlich sind.
Das Camera Module 3 kann sowohl Full-HD-Videos als auch Fotos aufnehmen und bietet einen HDR-Modus mit bis zu 3 MP. Sein Betrieb wird vollständig von der libcamera-Bibliothek unterstützt, einschließlich der schnellen Autofokus-Funktion des Camera Module 3: Dies macht es für Anfänger einfach zu bedienen und bietet gleichzeitig viel für fortgeschrittene Benutzer. Das Camera Module 3 ist mit allen Raspberry-Pi-Modellen kompatibel.
Buch: Edge AI Made Practical – AI Projects for the Raspberry Pi with the AI HAT+
Edge-KI revolutioniert Alltagsgeräte, indem sie Intelligenz genau dort integriert, wo sie am wichtigsten ist: direkt in der Hardware. Dank On-Device-Inferenz kann eine Kamera Besucher sofort erkennen, ein Smartphone Sprache übersetzen, ohne Audio in die Cloud zu streamen, und ein Wearable Anomalien in Echtzeit erkennen – schnell, datenschutzfreundlich und zuverlässig, selbst wenn die Netzwerkverbindung ausfällt.
Dieses Buch ist Ihr praktischer Leitfaden zum Bau solcher Systeme mit dem Raspberry Pi AI HAT+ und dem Hailo-8L-Beschleuniger. Sie beginnen mit den Grundlagen: Kernkonzepte von KI und maschinellem Lernen, Funktionsweise neuronaler Netze und die wesentlichen Unterschiede zwischen Edge AI und Cloud AI – sowie eine ehrliche Betrachtung ethischer Aspekte und zukünftiger Auswirkungen.
Dieses Bundle enthält:
Buch: Edge AI Made Practical
Raspberry Pi AI HAT+ (13 TOPS)
Raspberry Pi Camera Module 3
Aktiver Kühler für Raspberry Pi 5
FPC Display-Kabel für Raspberry Pi 5 (300 mm)
Elektor Komponenten-Kit
40-poliger GPIO-Header
Ampelmodul
Rote LED, 5 V, mit integriertem Widerstand
Gelbe LED, 5 V, mit integriertem Widerstand
Grüne LED, 5 V, mit integriertem Widerstand
Blaue LED, 5 V, mit integriertem Widerstand
Steckbrett (400 Tie-Points)
10 Dupont-Drähte (male-female)
DHT22-Sensormodul
Servomotor
Erforderlich
Raspberry Pi 5
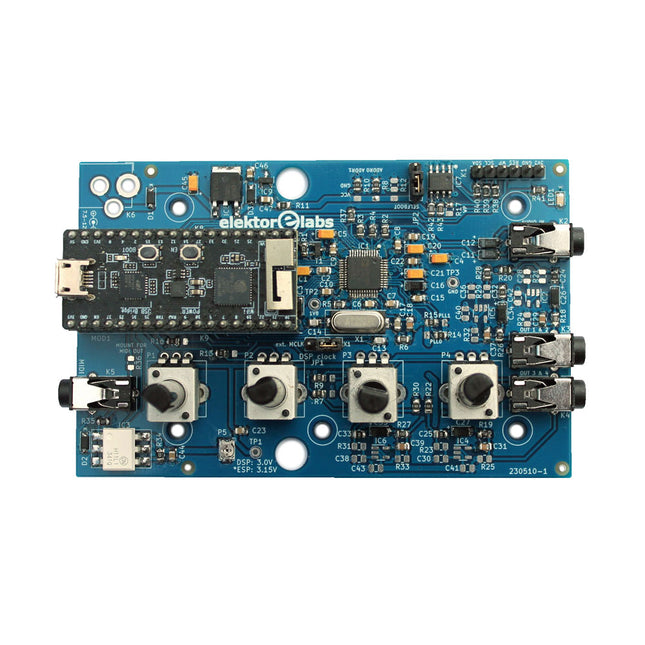
Der Elektor Audio DSP FX Processor kombiniert einen ESP32-Mikrocontroller und einen ADAU1701 Audio DSP von Analog Devices. Neben einem vom Benutzer programmierbaren DSP-Kern verfügt der ADAU1701 über hochwertige integrierte Analog-Digital- und Digital-Analog-Wandler und verfügt über einen I²S-Port. Dadurch eignet es sich als hochwertiges Audio-Interface für den ESP32.
Programme für den ESP32 können mit Arduino, Platform IO, CMake oder durch die Verwendung des Espressif IDF auf andere Weise erstellt werden. Programme für die Audio-DSPs ADAU7101 werden mit dem kostenlosen visuellen Programmiertool SigmaStudio durch Ziehen und Ablegen vordefinierter Algorithmusblöcke auf einer Leinwand erstellt.
Anwendungen
Bluetooth/Wi-Fi-Audiosink (z. B. Lautsprecher) & Quelle
Gitarreneffektpedal (Stomp-Box)
Musiksynthesizer
Sound-/Funktionsgenerator
Programmierbarer Crossover-Filter für Lautsprecher
Erweiterter Audioeffektprozessor (Hall, Chorus, Pitch-Shifting usw.)
Mit dem Internet verbundenes Audiogerät
DSP-Experimentierplattform
Drahtloses MIDI
MIDI-zu-CV-Konverter
und viele mehr...
Technische Daten
ADAU1701 28-/56-Bit, 50-MIPS digitaler Audioprozessor, der Abtastraten von bis zu 192 kHz unterstützt
ESP32 32-Bit-Dual-Core-Mikrocontroller mit Wi-Fi 802.11b/g/n und Bluetooth 4.2 BR/EDR und BLE
2x 24-Bit-Audioeingänge (2 V RMS, 20 kΩ)
4x 24-Bit-Audioausgänge (0,9 V RMS, 600 Ω)
4x Steuerpotentiometer
MIDI Ein- und Ausgang
I²C-Erweiterungsport
Multi-Mode-Betrieb
Stromversorgung: 5 V DC USB oder 7,5-12 V DC (Hohlbuchse, mittlerer Pin ist GND)
Stromverbrauch (Durchschnitt): 200 mA
Lieferumfang
1x ESP32 Audio DSP FX Prozessor Board (montiert)
1x ESP32-PICO-KIT
2x Jumper
2x 18-Pin Header (female)
4x 10 KB Potentiometer
Downloads
Documentation
GitHub