Diese exklusiv bei Elektor erhältliche überarbeitete Version 2.0 enthält folgende Verbesserungen:
Verbesserte Schutzerdung (PE) für das Ofengehäuse
Zusätzliche Wärmedämmschicht um den Ofen herum zur Geruchsreduzierung
Anschluss an einen Computer zur Kurvenbearbeitung am PC
Funktionen wie konstante Temperaturregelung und Zeitfunktionen
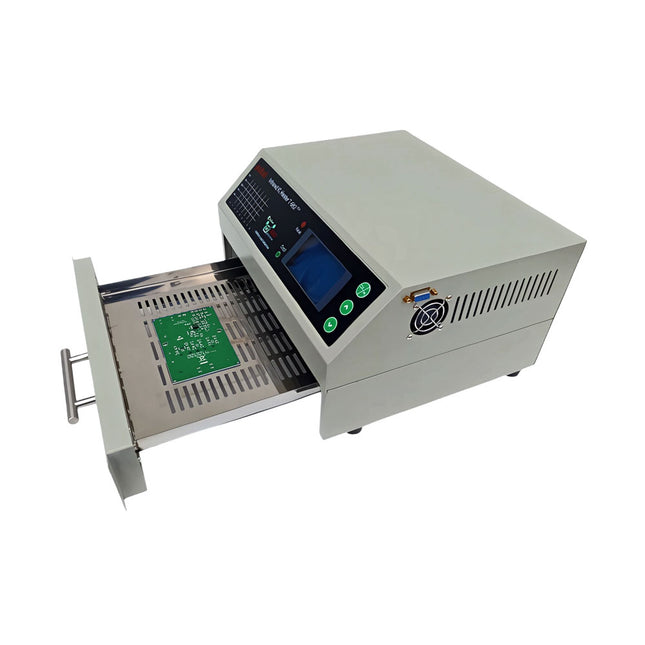
Der Infrarot-IC-Strahler T-962 v2.0 ist ein mikroprozessorgesteuerter Reflow-Ofen. Er kann zum effektiven Löten verschiedener SMD- und BGA-Komponenten verwendet werden. Der gesamte Lötprozess kann automatisch durchgeführt werden und ist sehr einfach zu bedienen. Diese Maschine verwendet eine leistungsstarke Infrarotemission und Zirkulation des Heißluftstroms, so dass die Temperatur sehr genau und gleichmäßig verteilt gehalten wird.
Eine verglaste Schublade dient zur Aufnahme des Werkstücks und ermöglicht sichere Löttechniken und die Handhabung von SMDBGA und anderen kleinen elektronischen Bauteilen, die auf einer Leiterplatte montiert sind. Der T-962 v2.0 kann zum automatischen Nachlöten verwendet werden, um schlechte Lötstellen zu korrigieren, schlechte Komponenten zu entfernen/zu ersetzen und kleine technische Modelle oder Prototypen zu vervollständigen.
Features
Große Infrarot-Lötfläche
Effektive Lötfläche: 180 x 235 mm; das erhöht den Einsatzbereich dieser Maschine drastisch und macht sie zu einer wirtschaftlichen Investition.
Wahlmöglichkeit zwischen verschiedenen Lötzyklen
Die Parameter von acht Lötzyklen sind vordefiniert und der gesamte Lötprozess kann automatisch von Preheat, Soak und Reflow bis hin zur Abkühlung durchgeführt werden.
Spezielles Aufheizen und Temperaturausgleich bei allen Ausführungen
Nutzt bis zu 800 Watt energieeffiziente Infrarotheizung und Luftzirkulation zum Reflow-Löten.
Ergonomisches Design, praktisch und leicht zu bedienen
Die gute Verarbeitungsqualität, das geringe Gewicht und die kleine Stellfläche ermöglichen es, den T-962 v2.0 auf der Werkbank zu platzieren, zu transportieren oder zu lagern.
Große Anzahl von verfügbaren Funktionen
Der T-962 v2.0 kann die meisten Kleinteile von Leiterplatten löten, zum Beispiel CHIP, SOP, PLCC, QFP, BGA etc. Sie ist die ideale Rework-Lösung für Einzelläufe bis hin zur bedarfsgerechten Kleinserienproduktion.
Technische Daten
Lötfläche (max.)
180 x 235 mm
Leistung (max.)
800 W
Temperaturbereich
0-280°C
Heizmethode
Infrarot
Bearbeitungszeit
1-8 Minuten
Stromversorgung
220 V AC/50 Hz
Display
LCD mit Hintergrundbeleuchtung
Regelmodus
8 intelligente Temperaturkurven
Abmessungen
310 x 290 x 170 mm
Gewicht
6,2 kg
Lieferumfang
1x T-962 v2.0 Reflow-Lötofen (Elektor Version)
2x Sicherungen
1x Netzkabel (EU)
Learn how to use the ESP32 Microcontroller and MicroPython programming in your future projects!
The project book, written by well-known Elektor author Dogan Ibrahim, holds many software- and hardware-based projects especially developed for the MakePython ESP32 Development Kit. The kit comes with several LEDs, sensors, and actuators. The kit will help you acquire the basic knowledge to create IoT projects.
The book’s fully evaluated projects feature all the supplied components. Each project includes a block diagram, a circuit diagram, a full program listing, and a complete program description.
Included in the kit
1x MakePython ESP32 development board with LCD
1x Ultrasonic ranging module
1x Temperature and humidity sensor
1x Buzzer module
1x DS18B20 module
1x Infrared module
1x Potentiometer
1x WS2812 module
1x Sound sensor
1x Vibration sensor
1x Photosensitive resistance module
1x Pulse sensor
1x Servo motor
1x USB cable
2x Button
2x Breadboard
45x Jumper wire
10x Resistor 330R
10x LED (Red)
10x LED (Green)
1x Project book (206 pages)
46 Projects in the Book
LED Projects
Blinking LED
Flashing SOS
Blinking LED – using a timer
Alternately flashing LEDs
Button control
Changing the LED flashing rate using pushbutton interrupts
Chasing-LEDs
Binary-counting LEDs
Christmas lights (random-flashing 8 LEDs)
Electronic dice
Lucky day of the week
Pulsewidth Modulation (PWM) Projects
Generate a 1000-Hz PWM waveform with 50% duty cycle
LED brightness control
Measuring the frequency and duty cycle of a PWM waveform
Melody maker
Simple electronic organ
Servo motor control
Servo motor DS18B20 thermometer
Analog To Digital Converter (ADC) Projects
Voltmeter
Plotting the analog input voltage
ESP32 internal temperature sensor
Ohmmeter
Photosensitive resistance module
Digital To Analog Converter (DAC) Projects
Generating fixed voltages
Generating a sawtooth-wave signal
Generating a triangular-wave signal
Arbitrary periodic waveform
Generating a sinewave signal
Generating accurate sinewave signal using timer interrupts
Using The OLED Display
Seconds counter
Event counter
DS18B20 OLED based digital thermometer
ON-OFF temperature controller
Measuring the temperature and humidity
Ultrasonic distance measurement
Height of a person (stadiometer)
Heart rate (pulse) measurement
Other Sensors Supplied with the Kit
Theft alarm
Sound-activated light
Infrared obstacle avoidance with buzzer
WS2812 RGB LED ring
Timestamping temperature and humidity readings
Network Programming
Wi-Fi scanner
Remote control from the Internet browser (using a smartphone or PC) – Web Server
Storing temperature and humidity data in the Cloud
Low-Power Operation
Using a timer to wake up the processor
Voor thuis en op school
Dit boekje is gericht op leerlingen en natuurkunde docenten in het voortgezet onderwijs. Met voorbeelden op verschillende gebieden van de fysica, geeft het aan hoe een populair microprocessor platform als Arduino toegepast kan worden in het natuurkunde practicum. We passen Arduino onder andere toe als nauwkeurig meetinstrument, zodat metingen uitgewerkt kunnen worden in een spread sheet.
Hoewel enige handigheid niet overbodig is, kunnen de beschreven experimenten kunnen ook uitstekend thuis worden uitgevoerd. In dat opzicht wil dit boek met name bij de jeugd de interesse wekken voor de toepassing van microprocessoren. In de hobbysfeer is dat niet alleen een zinvolle tijdsbesteding, maar bovenal interessant en leuk.
Veiligheid staat uiteraard voorop bij het doen van experimenten. Energie, licht en warmte zijn onuitputtelijke bronnen, maar ze kunnen ook gevaar opleveren. Voor dit boek geldt dan ook het motto: Eerst denken, dan doen.
Dieses Bundle enthält alles, was Sie brauchen, um direkt mit dem XIAO ESP32-C3 Development Board loszulegen. Lernen Sie die Grundlagen des ESP32-C3 kennen und entwickeln Sie praktische Projekte mit Wi-Fi, Bluetooth, Sensoren, Displays, PWM, Deep Sleep und vielem mehr.
Buch: Build Smart Projects with the XIAO ESP32-C3 Board
Das XIAO ESP32-C3 Board kombiniert den ultrakompakten Formfaktor der XIAO-Serie mit den umfangreichen Funktionen des ESP32-C3-Chips, einschließlich integriertem Wi-Fi und Bluetooth 5.0. Dieses Buch ist ein umfassender, praxisorientierter Leitfaden, mit dem Sie das Potenzial dieses leistungsstarken und dennoch preisgünstigen Development Boards voll ausschöpfen können.
Der Autor führt die Leser von den Grundlagen bis hin zu fortgeschrittenen Projekten. Angefangen beim Blinken und Dimmen von LEDs geht es weiter mit ADC und PWM für die präzise Anbindung von Sensoren und PWM-gesteuerte Lichteffekte, bevor praktische Anwendungen aus der realen Welt umgesetzt werden, darunter:
Eine Wi-Fi-Wetterstation mit OLED-Display und aktuellen Online-Wetterdaten
Ein Ultraschall-Einparkassistent mit akustischer Rückmeldung
Eine Kühlschrank-Messsonde mit Klimasensoren und Deep Sleep für jahrelangen Batteriebetrieb
Ein Retro-Pong-Spiel, das berührungslos per Sensor gesteuert wird
Eine mikrofonbasierte Party-App, die auf Klatschen reagiert
Und vieles mehr: Lichtsteuerung, Reaktionszeitmessung, Netzfrequenzanalyse, Bodenfeuchtemessung, LED-Ambientebeleuchtung und 7-Segment-Anzeigen
Seeed Studio XIAO ESP32C3
Das Seeed Studio XIAO ESP32C3 ist mit einem hochintegrierten ESP32-C3-Chip ausgestattet, der auf einem 32-Bit-RISC-V-Prozessor mit vierstufiger Pipeline basiert und mit bis zu 160 MHz arbeitet.
Das Board verfügt über ein hochintegriertes ESP32-C3-SoC. Der Chip ist mit einem vollständigen 2,4-GHz-Wi-Fi-Subsystem ausgestattet und unterstützt damit den Station-Modus, SoftAP-Modus, SoftAP-&-Station-Modus sowie den Promiscuous-Modus für unterschiedliche Wi-Fi-Anwendungen. Gleichzeitig arbeitet er äußerst energieeffizient und unterstützt Bluetooth 5 sowie Bluetooth Mesh. Mit 400 KB SRAM und 4 MB Flash bietet der Chip ausreichend Speicherplatz für Programme und eröffnet zahlreiche Möglichkeiten für IoT-Steuerungsanwendungen.
Anwendungen
Internet der Dinge (IoT)
Wearables
Gesundheitsüberwachung
Bildung
Energiesparende Netzwerke
Schnelle Prototypenentwicklung
Technische Daten
Processor
ESP32-C3 SoC
RISC-V single-core 32-bit chip processor with a four-stage pipeline that operates at up to 160 MHz
Wireless
Complete 2.4GHz Wi-Fi subsystem
Bluetooth Low Energy 5.0/ Bluetooth Mesh
On-chip Memory
400 KB SRAM & 4 MB Flash
Interface
1x UART, 1x I²C, 1x SPI, 11x GPIO (PWM), 4x ADC
1x Reset button, 1x Boot button
Power (Typ.)
Max 3.3 V Output Current: 500 mA Test Condition: BAT Pin Input @ 3.8 V Source Capability: 3 A
Charging current: 380 mA(Fast) / 40 mA(Trickle)
Input voltage (VIN): 5 VInput voltage (BAT): 3.7 V
Deep Sleep Power Consumption
Deep Sleep Mode: 44 μA
Wi-Fi Enabled Power Consumption
Active Mode: 75 mA
Modem-sleep Mode: 25 mA
Light-sleep Mode: 4 mA
BLE Enabled Power Consumption
Modem-sleep Mode: 27 mA
Light-sleep Mode: 10 mA
Dimensions
21 x 17.8 mm
Lieferumfang
1x Seeed Studio XIAO ESP32C3
1x Antenne
2x 7-Pin-Header
Downloads
Wiki
Datasheet
Dieses Bundle enthält:
Buch: Build Smart Projects with the XIAO ESP32-C3 Board (Einzelpreis: 35 €)
Board: Seeed Studio XIAO ESP32C3 (Einzelpreis: 10 €)
VOYAGE DANS LES RÉSEAUX NEURONAUX (1ÈRE PARTIE)Les neurones artificielsTEST DE PRÉCONFORMITÉ CEM POUR UN PROJET ALIMENTÉ EN COURANT CONTINUPartie 1 : RSIL double continuCHARGE ÉLECTRONIQUE EN CC ET CAJusqu'à 400 V et 10 A (crête)DÉMARRER EN ÉLECTRONIQUE (9)N'ayez pas peur du choc... un peu de « self control » suffit !TRAITEMENT D'IMAGES AVEC LE MODULE JETSON NANO DE NVIDIA (1ÈRE PARTIE)Matériel et logicielZOOM SUR LES TRANSFORMATEURS SECTEURComportement transitoire à l'allumage et l'extinction« YES WE CAN » AVEC PICAN 3Module de bus CAN pour le Raspberry Pi 4CENTRALE SOLAIRE SUR BALCONUn investissement vite amortiPRISE DE VUE ET DIFFUSION VIDÉO EN CONTINU AVEC UN RASPBERRY PI 4La caméra Raspberry Pi HQ en actionUTILISATION D'ÉCRANS DANS LES PROJETS RASPBERRY PIExtrait : écrans à diodes électroluminescentes organiques (OLED)PROPELLER 2 DE PARALLAX (4)Envoi de chaînes de caractères60 ANS D'ELEKTORRegard sur septembreDANS L'ANTRE DE…Menno van der Veen et de ses tubes amplificateursCIRCUITS HYBRIDESROSE DES VENTS AVEC LE CAPTEUR GY-271Ou pourquoi il faut faire des huit pour calibrer un capteurMESUREZ VOTRE EMPREINTEÉlectronique et émissions de gaz à effet de serreTHERMOSTAT CONNECTÉ À ESP32Conservez votre vin à la bonne température !LÉVITATION MAGNÉTIQUE, VERSION NUMÉRIQUEComparateur analogique remplacé par un ESP32 PicoULTIMATE ARDUINO UNO HARDWARE MANUAL - FR TRANSLATIONExtrait : chargeur d'amorçage du microcontrôleur principalMICROPYTHON POUR L'ESP32 ET SES COPAINSPartie 2 : piloter facilement les écrans matricielsCARTE MADMACHINE SWIFTIOUn langage récent pour du matériel tout nouveauSUR LE VIFPassions incertainesHEXADOKUCasse-tête pour elektorniciens
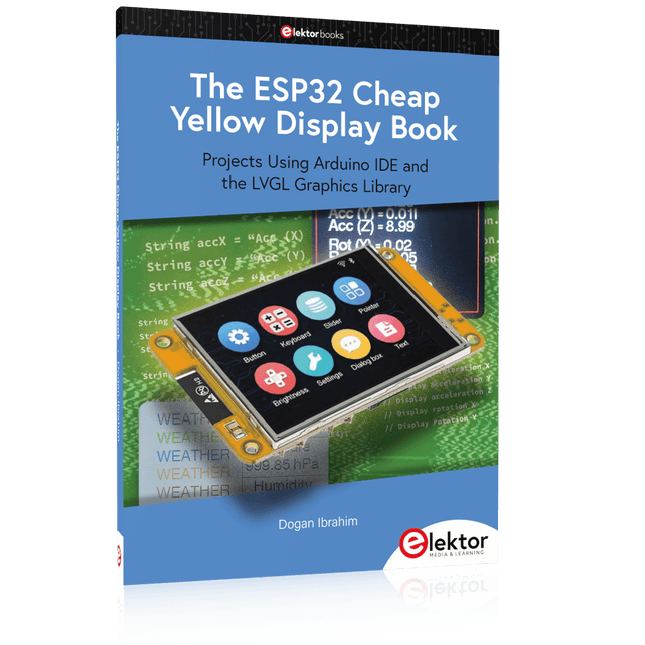
Projects Using Arduino IDE and the LVGL Graphics Library
The ESP32 is probably one of the most popular microcontrollers used by many people, including students, hobbyists, and professional engineers. Its low cost, coupled with rich features makes it a popular device to use in many projects. Recently, a board called the ESP32 Cheap Yellow Display (CYD for short) is available from its manufacturers. The board includes a standard ESP32 microcontroller together with a 320x240 pixel TFT display. Additionally, the board provides several connectors for interfaces such as GPIO, serial port (TX/RX), power and Ground. The inclusion of a TFT display is a real advantage as it enables users to design complex graphics-based projects without resorting to an external LCD or graphics displays.
The book describes the basic hardware of the ESP32 CYD board and provides details of its on-board connectors. Many basic, simple, and intermediate-level projects are given in the book based on the ESP32 CYD, using the highly popular Arduino IDE 2.0 integrated development environment. The use of both the basic graphics functions and the use of the popular LVGL graphics library are discussed in the book and projects are given that use both types of approaches.
All the projects given in the book have been tested and are working. The block diagram, circuit diagram, and the complete program listings and program descriptions of all the projects are given with explanations. Readers can use the LVGL graphics library to design highly popular eye-catching full-color graphics projects using widgets such as buttons, labels, calendars, keypads, keyboards, message boxes, spinboxes, sliders, charts, tables, menus, bars, switches, drop-down lists, animations, and many more widgets.
A Project-Based Introduction to Microcontrollers and Drone Control
A Practical Introduction to Embedded Systems with the ESP32
This book is intended for readers who are new to embedded systems and looking for a structured, example-driven way to begin. If you’ve explored general-purpose electronics or Arduino-based resources but found them too broad or lacking in practical application, this guide offers a more focused alternative.
With a small, affordable set of components – such as LEDs, sensors, an OLED screen and a motion sensor – you’ll build and work with the same hardware setup throughout the book. This allows you to focus on learning and experimenting without constant reconfiguration.
Topics include:
Understanding and programming the ESP32 microcontroller
Using the Arduino IDE to write and deploy code
Exploring cyber-physical systems, culminating in basic drone control
No prior experience with Arduino or embedded development is required. Each section includes hands-on examples and mini-projects designed to reinforce core concepts and encourage deeper exploration. By the end, you’ll be equipped not only to reproduce the book’s examples, but also to extend them toward your own ideas and applications.
Whether your interest is in learning embedded programming, building interactive systems, or exploring educational drone control, this book provides a clear and practical path to getting started.
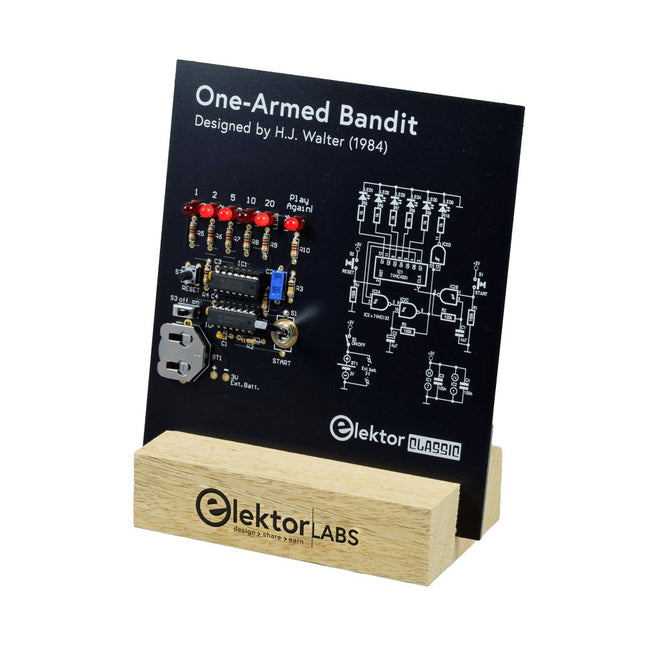
Ziehen Sie den Hebel nach unten, um die höchste Punktzahl zu erzielen!Dieser Elektor-Schaltungsklassiker aus dem Jahr 1984 zeigt eine spielerische Anwendung von Logik-ICs der CMOS-400x-Serie in Kombination mit LEDs, einer damals sehr beliebten Kombination. Das Projekt imitiert einen Spielautomaten mit rotierenden Ziffern.Das SpielUm das Spiel zu spielen, vereinbaren Sie zunächst die Anzahl der Runden. Spieler 1 betätigt den Schalthebel so lange wie gewünscht und lässt ihn los. Die LEDs zeigen dann die Punktzahl an, die sich aus der Summe der 50-20-10-5 aufleuchtenden Ziffern ergibt. Wenn die Play Again!-LED aufleuchtet, hat Spieler 1 eine weitere, „freie“ Runde. Wenn nicht, ist Spieler 2 am Zug. Die Spieler behalten ihre Punkte im Auge und der Spieler mit der höchsten Punktzahl gewinnt.FeaturesLEDs zeigen den Punktestand anMulti-Player und Play Again!Symbole des Elektor Heritage CircuitGetestet und geprüft von Elektor LabsEdukatives und geekiges ProjektNur Teile mit DurchgangslochLieferumfangPlatineAlle KomponentenHolzständerStücklisteWiderstände (5%, 250 mW)R1,R2,R3,R4 = 100kΩR5,R6,R7,R8,R9,R10 = 1kΩKondensatorenC1 = 4.7nF, 10%, 50V, 5mmC2 = 4.7μF, 10%, 63V, axialC3,C4 = 100nF, 10 %, 50V, Keramik X7R, 5mmHalbleiterLED1-LED6 = rot, 5mm (T1 3/4)IC1 = 74HC4024IC2 = 74HC132SonstigesS1 = Schalter, Kipphebel, 21-mm-Hebel, SPDT, tastendS2 = Schalter, taktil, 24V, 50mA, 6x6mmS3 = Schalter, Schieber, SPDTIC1,IC2 = IC-Sockel, DIP14BT1 = CR2032-Batteriehalteklammer für PlatinenmontageTischständerPCB 230098-1Nicht im Lieferumfang enthalten: BT1 = CR2032-Knopfzellenbatterie
This bundle is all about designing projects based on the 555 timer IC. The book features over 45 fully tested and documented projects. Together with the kit, which contains more than 130 through-hole components, you can build all the projects described on a breadboard. The setup also makes it easy to modify and experiment with the projects.
Over 45 Builds for the Legendary 555 Chip (and the 556, 558)
Some of the projects in the book are:
Alternately Flashing Two LEDs
Changing LED Flashing Rate
Touch Sensor On/Off Switch
Switch On/Off Delay
Light-Dependent Sound
Dark/Light Switch
Tone Burst Generator
Long Duration Timer
Chasing LEDs
LED Roulette Game
Traffic Lights
Continuity Tester
Electronic Lock
Switch Contact Debouncing
Toy Electronic Organ
Multiple Sensor Alarm System
Metronome
Voltage Multipliers
Electronic Dice
7-Segment Display Counter
Motor Control
7-Segment Display Dice
Electronic Siren
Various Other Projects
Kit Contents
Resistors
1x 15 kΩ
1x 68 kΩ
2x 47 kΩ
1x 82 kΩ
2x 820 Ω
1x 8.2 kΩ
3x 10 kΩ
1x 1.8 kΩ
1x 6.8 kΩ
14x 2.2 kΩ
10x 680 Ω
1x 27 kΩ
1x 5.6 kΩ
1x 560 kΩ
1x 4.7 kΩ
1x 3.3 kΩ
3x 33 kΩ
1x 36 kΩ
2x 100 kΩ
5x 1 kΩ
1x 3.9 kΩ
2x 56 kΩ
2x 12 kΩ
1x 10 kΩ potentiometer
1x 1 MΩ potentiometer
2x 50 kΩ potentiometer
3x 20 kΩ potentiometer
1x 10 kΩ potentiometer
1x 10 kΩ potentiometer
1x 50 kΩ potentiometer
1x 100 kΩ potentiometer
1x 50 kΩ potentiometer
Capacitors
1x 0.33 μF
1x 1 μF
1x 10 nF
1x 22 nF
1x 47 nF
1x 100 nF
1x 10 μF electrolytic
1x 33 μF electrolytic
2x 100 μF electrolytic
LEDs
10x 5 mm red LED
10x 3 mm red LED
3x 3 mm yellow LED
3x 3 mm green LED
1x Common-cathode 7-segment LED
Semiconductors
3x 555 timer
1x CD4017 counter
1x CD4026 counter
1x CD4011 NAND gate
4x 1N4148 diode
1x IRFZ46N MOSFET
1x Thermistor
1x Light dependent resistor (LDR)
Miscellaneous
1x Passive buzzer
1x Active buzzer
1x SG90 servo
1x 8 Ω mini loudspeaker
1x 9 V DC brushed motor
1x 5 V relay
1x 9 V battery clip
7x Pushbutton switches
1x Breadboard
1x Breadboard jumper wires
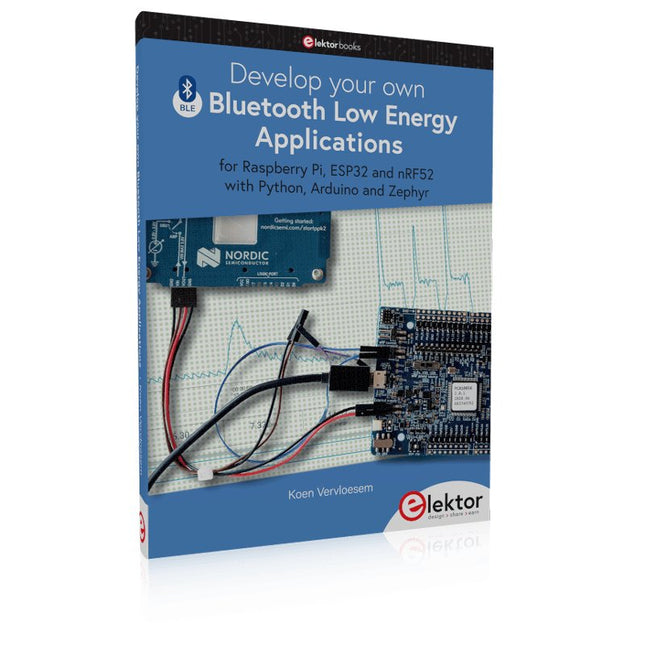
For Raspberry Pi, ESP32 and nRF52 with Python, Arduino and Zephyr
Bluetooth Low Energy (BLE) radio chips are ubiquitous from Raspberry Pi to light bulbs. BLE is an elaborate technology with a comprehensive specification, but the basics are quite accessible.
A progressive and systematic approach will lead you far in mastering this wireless communication technique, which is essential for working in low power scenarios.
In this book, you’ll learn how to:
Discover BLE devices in the neighborhood by listening to their advertisements.
Create your own BLE devices advertising data.
Connect to BLE devices such as heart rate monitors and proximity reporters.
Create secure connections to BLE devices with encryption and authentication.
Understand BLE service and profile specifications and implement them.
Reverse engineer a BLE device with a proprietary implementation and control it with your own software.
Make your BLE devices use as little power as possible.
This book shows you the ropes of BLE programming with Python and the Bleak library on a Raspberry Pi or PC, with C++ and NimBLE-Arduino on Espressif’s ESP32 development boards, and with C on one of the development boards supported by the Zephyr real-time operating system, such as Nordic Semiconductor's nRF52 boards.
Starting with a very little amount of theory, you’ll develop code right from the beginning. After you’ve completed this book, you’ll know enough to create your own BLE applications.