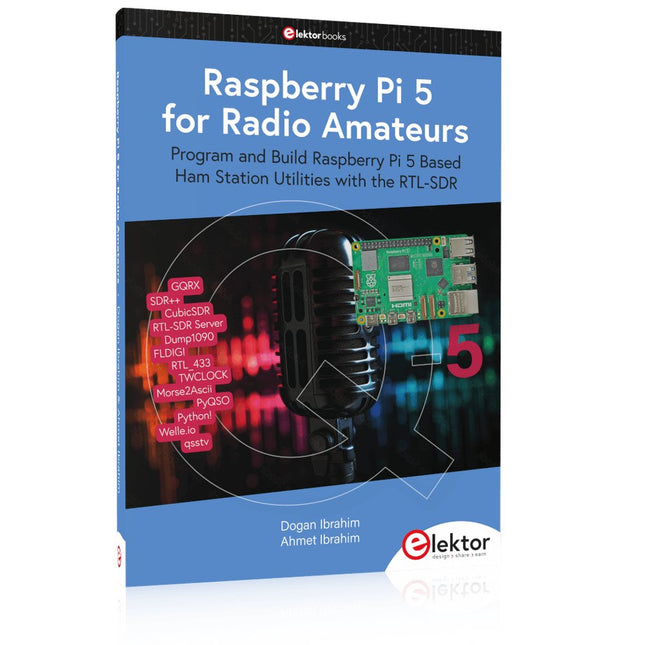
Program and Build Raspberry Pi 5 Based Ham Station Utilities with the RTL-SDR
The RTL-SDR devices (V3 and V4) have gained popularity among radio amateurs because of their very low cost and rich features. A basic system may consist of a USB based RTL-SDR device (dongle) with a suitable antenna, a Raspberry Pi 5 computer, a USB based external audio input-output adapter, and software installed on the Raspberry Pi 5 computer. With such a modest setup, it is possible to receive signals from around 24 MHz to over 1.7 GHz.
This book is aimed at amateur radio enthusiasts and electronic engineering students, as well as at anyone interested in learning to use the Raspberry Pi 5 to build electronic projects. The book is suitable for both beginners through experienced readers. Some knowledge of the Python programming language is required to understand and eventually modify the projects given in the book. A block diagram, a circuit diagram, and a complete Python program listing is given for each project, alongside a comprehensive description.
The following popular RTL-SDR programs are discussed in detail, aided by step-by-step installation guides for practical use on a Raspberry Pi 5:
SimpleFM
GQRX
SDR++
CubicSDR
RTL-SDR Server
Dump1090
FLDIGI
Quick
RTL_433
aldo
xcwcp
GPredict
TWCLOCK
CQRLOG
klog
Morse2Ascii
PyQSO
Welle.io
Ham Clock
CHIRP
xastir
qsstv
flrig
XyGrib
FreeDV
Qtel (EchoLink)
XDX (DX-Cluster)
WSJT-X
The application of the Python programming language on the latest Raspberry Pi 5 platform precludes the use of the programs in the book from working on older versions of Raspberry Pi computers.
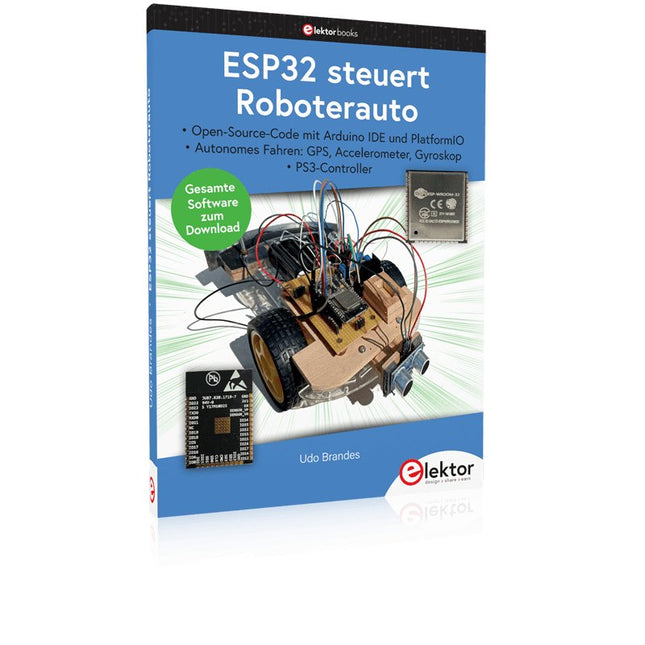
Open-Source-Code mit Arduino IDE und PlatformIO
Autonomes Fahren: GPS, Accelerometer, Gyroskop
PS3-Controller
Mikrocontroller wie der Arduino und Einplatinenrechner wie der Raspberry Pi haben sich zu beliebten Komponenten entwickelt. Dritter im Bunde ist der ESP32 der Firma Espressif. Mikrocontroller dieser Baureihe zeichnen sich durch eine Vielzahl implementierter Funktionen aus, die bei einem Arduino konventioneller Prägung mit einem Atmel-AVR-Mikrocontroller erst mit weiterer Hardware möglich sind. Prominentes Beispiel sind hier die WiFi- und Bluetooth-Funktionalitäten. Gegenüber einem Raspberry Pi zeichnen sie sich durch einen deutlich geringeren Preis aus.
Allgemeine Informationen für die Realisierung eines Roboterauto-Projekts mit dem ESP32 sind leicht zu finden. Dabei handelt es sich aber oft nur um Ausführungen zu einem Teilaspekt, ohne inhaltliche oder funktionale Abstimmung. So ist nicht nur die Beschaffung der benötigten Informationen mühselig und zeitaufwändig, sie kann auch außerordentlich fehlerträchtig sein.
Ansatzpunkt dieses Buches ist, diese Lücke zu schließen. Es geht auf verschiedene Möglichkeiten eines Chassis ein, vermittelt nötige Kenntnisse und führt schrittweise von einer einfachen Motorsteuerung zu einem komplexen sensor- und sprachgesteuerten Roboterauto. Hacks rund um GPS und eine PlayStation 3 runden die Sache ab.
Inhalt
Bei der Reihenfolge der Kapitel wurde versucht – beginnend bei der Darstellung von grundlegenden Informationen – über die Lösung einfacher Aufgaben zu etwas anspruchsvolleren Techniken zu führen.
Der Mikrocontroller ESP32
Die Software erstellen
Die Stromversorgung
Rund um die Hardware
Das Chassis
Der Gleichstrommotor
Kabellose Steuerung über WiFi
Mit Sensoren Hindernisse erkennen
Eine eigene Roboterauto-App
Servo und Lichtsensor
GPS
Accelerometer / Gyroskop
PS3-Controller
Roboterauto-App
Hinweis zur Software
Die Dateien haben das Suffix (.cpp). Grund ist die Entwicklung mit PlatformIO. Mit Copy & Paste sollten sie auch in der Arduino-IDE verwendet werden können.
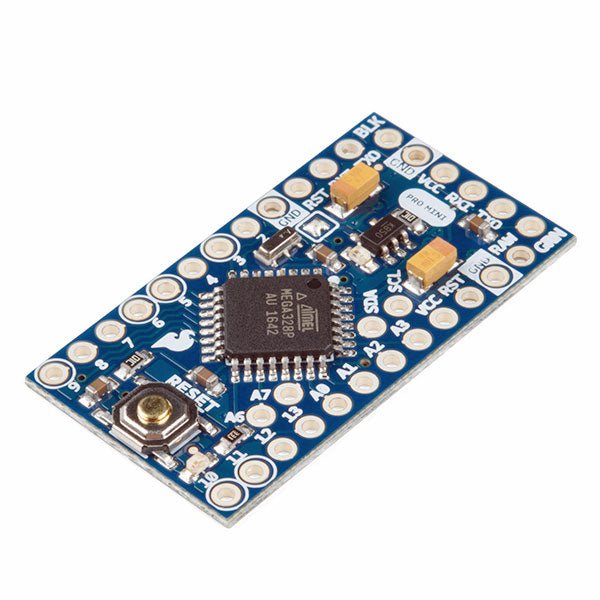
Der Arduino Pro Mini ist ein Mikrocontroller-Board auf Basis des ATmega328P.
Es hat 14 digitale Eingangs-/Ausgangs-Pins (von denen 6 als PWM-Ausgänge verwendet werden können), 6 analoge Eingänge, einen On-Board-Resonator, eine Reset-Taste und Löcher für die Montage von Stiftleisten. Eine sechspolige Stiftleiste kann mit einem FTDI-Kabel oder einem SparkFun-Breakout-Board verbunden werden, um die Platine über USB mit Strom zu versorgen und mit ihr zu kommunizieren.
Der Arduino Pro Mini ist für die semi-permanente Installation in Objekten oder Ausstellungen gedacht. Die Platine wird ohne vormontierte Stiftleisten geliefert, was die Verwendung verschiedener Arten von Steckern oder das direkte Anlöten von Drähten ermöglicht. Das Pin-Layout ist mit dem Arduino Mini kompatibel.
Technische Daten
Microcontroller
ATmega328P
Board Stromversorgung
5-12 V
Schaltung Betriebsspannung
5 V
Digitale E/A-Pins
14
PWM Pins
6
UART
1
SPI
1
I²C
1
Analogeingangs-Pins
6
Externe Interrupts
2
DC-Strom pro I/O-Pin
40 mA
Flash Memory
32 KB, davon 2 KB vom Bootloader verwendet
SRAM
2 KB
EEPROM
1 KB
Taktgeschwindigkeit
16 MHz
Abmessungen
18 x 33.3 mm
Downloads
Eagle files
Schematics
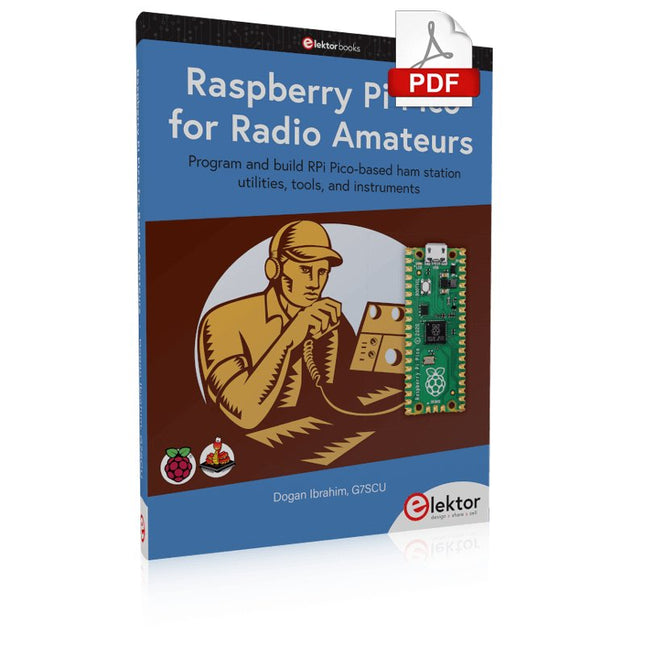
Program and build RPi Pico-based ham station utilities, tools, and instruments
Although much classical HF and mobile equipment is still in use by large numbers of amateurs, the use of computers and digital techniques has now become very popular among amateur radio operators. Nowadays, anyone can purchase a €5 Raspberry Pi Pico microcontroller board and develop many amateur radio projects using the “Pico” and some external components. This book is aimed at amateur radio enthusiasts, Electronic Engineering students, and anyone interested in learning to use the Raspberry Pi Pico to shape their electronic projects. The book is suitable for beginners in electronics as well as for those with wide experience.
Step-by-step installation of the MicroPython programming environment is described. Some knowledge of the Python programming language is helpful to be able to comprehend and modify the projects given in the book. The book introduces the Raspberry Pi Pico and gives examples of many general-purpose, software-only projects that familiarize the reader with the Python programming language. In addition to the software-only projects tailored to the amateur radio operator, Chapter 6 in particular presents over 36 hardware-based projects for “hams”, including:
Station mains power on/off control
Radio station clock
GPS based station geographical coordinates
Radio station temperature and humidity
Various waveform generation methods using software and hardware (DDS)
Frequency counter
Voltmeter / ammeter / ohmmeter / capacitance meter
RF meter and RF attenuators
Morse code exercisers
RadioStation Click board
Raspberry Pi Pico based FM radio
Using Bluetooth and Wi-Fi with Raspberry Pi Pico
Radio station security with RFID
Audio amplifier module with rotary encoder volume control
Morse decoder
Using the FS1000A TX-RX modules to communicate with Arduino
... qui sèchent les cours mais soudent sans se brûler les doigts
Par où commencer pour débuter en électronique ? Vais-je m'égarer en explorant l'internet ? Il regorge de schémas, mais sont-ils fiables ? Me faut-il un livre avec des montages simples ou plutôt un livre sur les composants ?
Après trente ans de pratique, l'auteur de ce livre, resté l'éternel débutant qui réalisait lui-même son premier montage des l'âge de dix ans, partage ici sa soif toujours vive d'apprendre. Fin pédagogue, il guide les débutants et répond aux questions que trop de livres laissent en suspens : « Quel type de fer à souder acheter ? »... « Un multimètre à 5 € peut-il suffire ? »... « Un oscilloscope est-il indispensable ? »... « Peut-on installer son montage dans une boîte à cigares ? »...
Rémy Mallard démystifie l'électronique en n'utilisant que ce qu'il vous faut de théorie pour aborder joyeusement la pratique sans risque de faire de grosses bêtises. Vous apprendrez à identifier les composants et leur rôle (résistances, condensateurs, bobines, diodes, transistors, relais, commutateurs...) mais aussi à les récupérer, les tester et les ranger. Bientôt vous saurez lire un schéma, choisir vos outils et mettre en boîte vos montages. Rémy connaît toutes les astuces et vous révèle les pratiques à éviter.
La matière de cet ouvrage, ce sont des montages simples et ludiques, réalisables sur des plaques d'expérimentation sans soudure: sirène, orgue, chenillard lumineux, interrupteur photosensible, thermomètre, alarme, générateur de picotements, indicateur de niveau de liquide, clignotant à vitesse variable selon la lumière ambiante, indicateur à fenêtre programmable, minuterie avec préavis d'extinction, chenillard de style K2000 (lumineux et sonore), gradateur de lumière à commande infrarouge...
Vous commencerez par le code des couleurs et finirez par programmer des PIC !
Praktischer Einstieg mit Arduino, GnuRadio und FPGA
Das Thema „Software Defined Radio“ ist facettenreich: Neben der Schaltungstechnik ist auch eine Einarbeitung in die Programmierung von Hardware und PC wichtig. Ein schrittweises Vorgehen erleichtert Ihnen den Einstieg. Mit dem im Buch vorgestellten modularen „RF Bricks“-Konzept werden Sie zum Architekten Ihrer Signalkette. Auf einem Chassis angeordnet gewährleisten die Module einen soliden und gut abgeschirmten Aufbau, den Sie einfach verändern und mit eigenen Ideen anreichern können.
Der skalierbare Aufbau bildet Ihr Blockschaltbild auch mechanisch ab – die so gewonnene Übersicht kann in der Aus- und Weiterbildung nützlich sein. Ein Arduino in Ihrem Chassis kommuniziert nach einigen Anpassungen mit üblichen SDR-Programmen, z. B. SDRCPP, GQRX und CubicSDR auf einer Linux-Plattform. Damit können Sie Ihren Empfänger direkt per Mausklick abstimmen.
Wenn Sie Blockschaltbilder mögen, ist GnuRadio ein natürlicher Partner der „RF Bricks“. Mit einem selbst programmierten Python-Block gelingt Ihnen in GnuRadio die Fernsteuerung Ihres Empfängers. Im GnuRadio-Universum können Sie Ihre GUI stufenweise ausbauen, behalten dabei aber immer volle Kontrolle über die inneren Abläufe des Programms.
Mit einem FPGA können zeitaufwändige Operationen auch direkt in die Hardware verlagert werden. Sie bauen stufenweise einen Doppelsuperhet auf und entwickeln die Filterkoeffizienten für FIR-Filter mit Scilab. Das in VHDL realisierte Weaver-Schema rundet diesen Empfänger ab, der mit hoher Empfindlichkeit und Dynamik aufwarten kann.
Mit dem gewonnen Überblick und Ihrer neuen Hardware können Sie die einzelnen Aspekte des Themenkomplexes SDR beliebig weiter vertiefen.
Downloads
Software
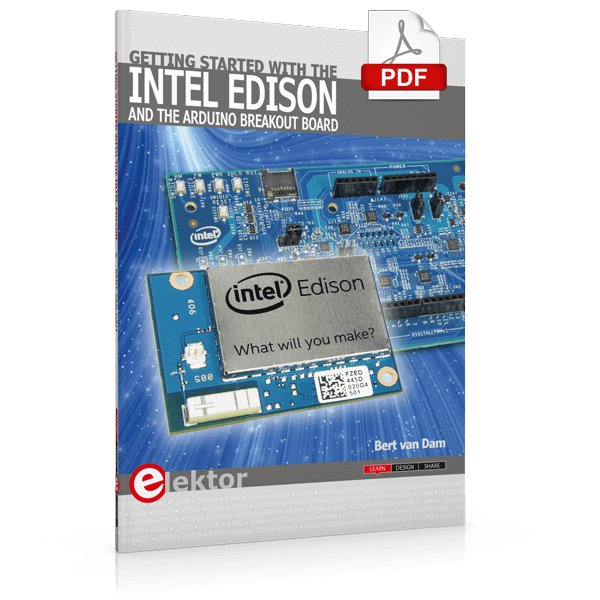
The Internet of Things is rapidly gaining interest, and that has fueled the development of the Edison. A tiny computer, the size of a postage stamp, with a lot of power and built-in wireless communication capabilities.
In this eBook we will help you get up-to-speed with the Edison, by installing the software both on the Edison as well as on your Windows PC. We will use the Edison Arduino break-out board because it is easy to work with. We will discuss Linux, Arduino C++ and Python, and show examples of how the Edison can interface with other hardware. We will use Wi-Fi and Bluetooth to set up wireless connections, and show you a trick to program sketches over Wi-Fi.
Once you have completed this book your Edison will be up and running with the latest software version, and you will have sufficient knowledge of both hardware and software to start making your own applications. You will even be able to program the Edison over USB and wireless both in Arduino C++ and Python.
This is not a projects eBook, but a toolbox that will allow you to explore the wonderful world of the Intel Edison!
Bauen Sie Ihren eigenen Vintage-Radiosender
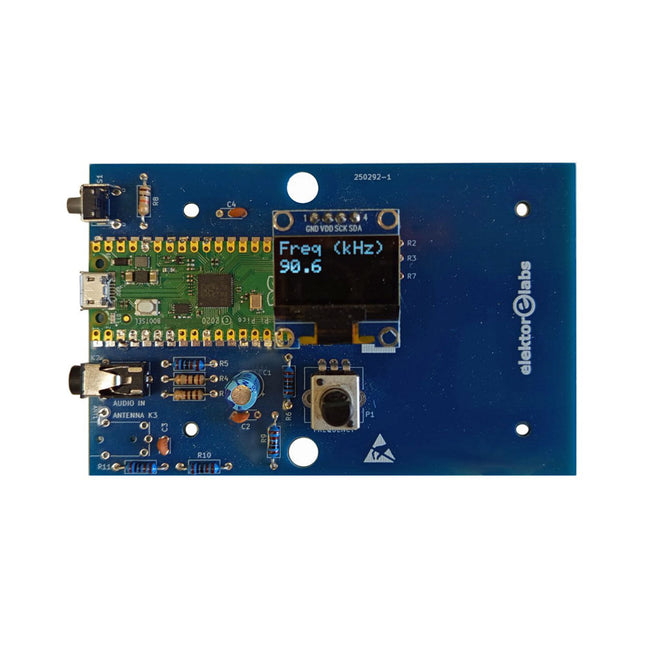
Das Elektor AM-Sender-Kit ermöglicht das Streamen von Audio auf Vintage-AM-Radioempfänger. Basierend auf einem Raspberry Pi Pico Mikrocontroller-Modul kann der AM-Sender auf 32 Frequenzen im AM-Band senden, von 500 kHz bis 1,6 MHz in 32 Schritten von ca. 35 kHz.
Die Frequenz wird mit einem Potentiometer gewählt und auf einem 0,96" OLED-Display angezeigt. Eine Taste ermöglicht das Umschalten des Sendemodus zwischen Ein und Aus. Die Reichweite des Senders hängt von der Antenne ab. Die integrierte Antenne bietet eine Reichweite von wenigen Zentimetern, sodass der AM-Sender nahe am Radio oder im Radio selbst platziert werden muss. Eine externe Loop-Antenne (nicht enthalten) kann angeschlossen werden, um die Reichweite zu erhöhen.
Das Elektor AM-Sender-Kit wird als Bausatz geliefert, den Sie selbst auf die Platine löten müssen.
Features
Die Platine ist kompatibel mit einem Hammond-1593N-Gehäuse (nicht enthalten).Ein 5-VDC-Netzteil mit Micro-USB-Anschluss (z. B. ein altes Handy-Ladegerät) wird benötigt, um das Kit zu betreiben (nicht enthalten). Stromaufnahme: 100 mA.
Die Arduino-Software (benötigt Earle Philhowers RP2040-Boards-Paket) für das Elektor-AM-Sender-Kit sowie weitere Informationen sind auf der Elektor-Labs-Seite dieses Projekts verfügbar.
Stückliste
Widerstände
R1, R4 = 100 Ω
R2, R3, R8 = 10 kΩ
R5, R6, R9, R10, R11 = 1 kΩ
R7 = optional (nicht enthalten)
P1 = Potentiometer 100 kΩ, linear
Kondensatoren
C1 = 22 µF 16V
C2, C4 = 10 nF
C3 = 150 pF
Sonstiges
K1 = 4×1 Stiftleiste
K2, K3 = 3,5-mm-Buchse
Raspberry Pi Pico
Drucktaste, Winkelmontage
0,96" monochromes I²C-OLED-Display
Leiterplatte 150292-1
Mit einem Arduino-Board ohne zusätzliche Sensoren kann man nicht viel anfangen. Dieses Buch richtet sich an jeden, der seinem Arduino-Uno-Board mit Hilfe von zahlreichen Sensoren Leben einhauchen möchte. Wie das geht, zeigt der Autor Schritt für Schritt mit zahlreichen Abbildungen, und das in einer leicht verständlichen Sprache.Damit ein Mikrocontroller wie der Arduino Uno Einfluss auf seine Umwelt nehmen kann, sind Sensoren und Aktoren erforderlich, die von einer Software gesteuert werden. Inzwischen gibt es eine große Auswahl an Sensor-Modulen, die an das Arduino-Board angeschlossen werden können.Als Einstieg in die faszinierende Welt der Sensorik wird in diesem Buch auf das auch bei Elektor erhältliche 37 Module umfassende Sensor-Kit zurückgegriffen. In diesem populären Set sind die Sensoren auf einer kleinen Platine montiert und mit Steckverbindern ausgestattet, was den Anschluss via Breadboard oder Drahtbrücken vereinfacht. Mit den auch für Einsteiger einfach anzuwendenden Sensor-Modulen lassen sich schnell beeindruckende Erfolge erzielen, ohne dass man tief in die Materie der Elektronik eintauchen muss.Die Funktionsweise und Beschaltung der einzelnen Sensoren wird ausführlich erklärt und ihre Verwendung durch die gut dokumentierten Beispielprogramme leicht nachvollziehbar gemacht.
Analogue Electronics and Microcontrollers Projects
Hobbyist electronics can be a fun way to learn new skills that can be helpful to your career. Those who understand the basics of electronics can design their own circuits and projects. However, before you run, you need to learn to walk.
It all starts with analogue electronics. You should be familiar with the simple components and circuits and understand their basic behaviors and the issues you may encounter. The best way to do this is through real experiments. Theory alone is not enough. This book offers a large number of practical entry-level circuits, with which everyone can gain the basic experience.
Through the widespread introduction of microcontrollers, a new chapter in electronics has begun. Microcontrollers are now performing more and more tasks that were originally solved using discrete components and conventional ICs. Starting out has become easier and easier thanks to platforms including Bascom, Arduino, micro:bit. The book introduces numerous manageable microcontroller applications. It?s now a case of less soldering and more programming.
The XIAO ESP32-C3 board combines the ultra-compact form factor of the XIAO series with the full capabilities of the ESP32-C3 chip, including integrated Wi-Fi and Bluetooth 5.0. This book is a comprehensive, hands-on guide to getting the most out of this powerful yet affordable development board.
The author takes readers from the fundamentals to advanced projects. Starting with LED blinking and dimming, the book progresses to ADC and PWM for precise sensor interfacing and PWM-controlled lighting effects before moving on to building practical, real-world applications, including:
A Wi-Fi weather station with an OLED display and real-time online weather data
An ultrasonic parking assistant with audible feedback
A refrigerator monitoring probe with climate sensing and Deep Sleep for years of battery operation
A retro Pong game controlled by a touch-free sensor
A microphone-based party app that responds to claps
And much more: lighting control, reaction-time measurement, mains frequency analysis, soil moisture sensing, ambient LED lighting, and 7-segment displays